Every business using Dynamics 365 Finance and Operations often needs customizations to meet their specialized needs that are not fully addressed by its out-of-the-box features. This is where the workflow engine in Dynamics 365 Finance and Operations comes into play. It allows you to define rules, set conditions, and trigger actions based on specific events or data changes.
Workflows enhance efficiency, reduce manual intervention, and perform complex business tasks with precision. In this blog, we will explore workflows in Dynamics 365 Finance and Operations and provide a step-by-step guide on how to create custom workflows.
What is a workflow in Dynamics 365 Finance and Operations?
A workflow in Dynamics 365 can be defined both as a system and a business process. As a system, the workflow runs on the Application Object Server (AOS), offering the capability to create individual workflows or automate business processes. As a business process, a workflow defines how a document moves through the system, detailing who must complete a task, perform an action, make a decision, or approve a document.
Workflows can involve various tasks such as approvals, notifications, data updates, and more, ensuring that business processes are carried out consistently and efficiently.
Creating custom workflows in Dynamics 365 Finance and Operations
A custom workflow allows you to incorporate complex processing steps into your configurable workflows. By using out-of-the-box components and customizing them with .NET, you can perform intricate business operations tailored to your specific needs.
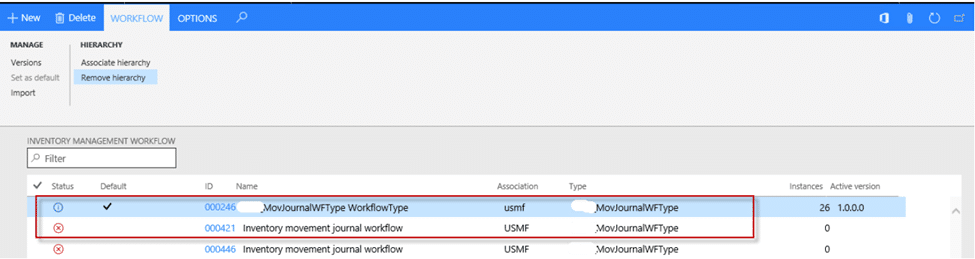
We often create custom workflows for our own or pre-existing tables where Microsoft hasn’t provided default workflows, like Inventory to Fixed Asset Journal or Item Movement Journal in Microsoft Dynamics 365 Finance and Operations.
How to create a custom workflow in Dynamics 365 Finance and Operations?
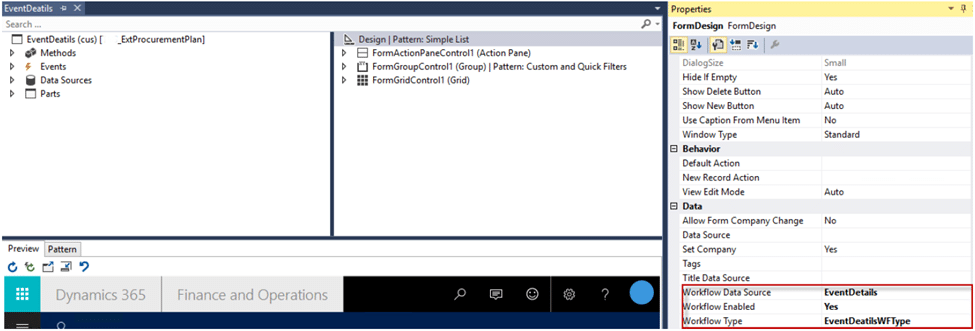
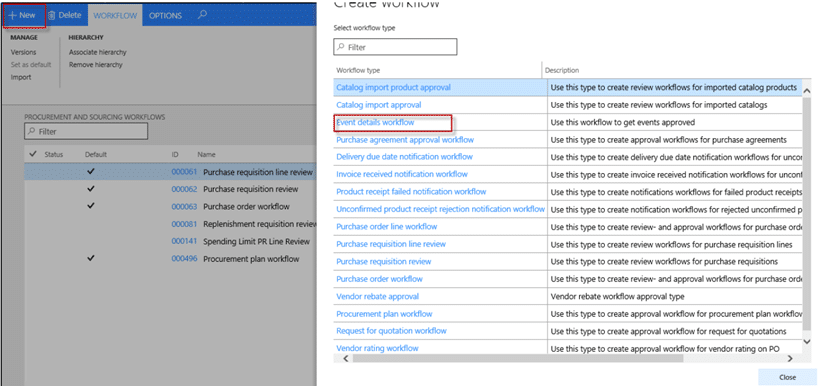
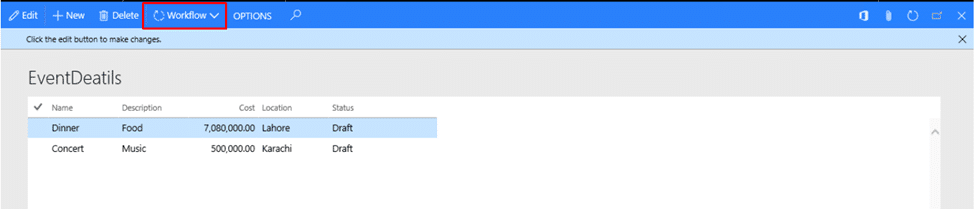
Let’s consider a custom workflow example in Dynamics 365. Imagine you are building a form to input details about social events for an organization’s employees. The organizing team needs approval from a senior manager for these events, thus requiring a workflow linked to this form. To create this workflow, we will use the Inventory to Fixed Asset Journal form. Now let’s consider the steps for creating a custom workflow in Dynamics 365 Finance and Operations for this scenario.
Note: Before proceeding with this Microsoft Dynamics 365 Finance and Operations workflow tutorial, ensure your MS Dynamics 365 Unified Operations Batch service is operational.

If the service is not running, follow these steps to start it:
To start the Microsoft Dynamics 365 Unified Operations Batch Service, follow these steps:
Start menu > type ‘Services’ > run Services (App) > find ‘Microsoft Dynamics 365 Unified Operations Batch Service’ > Properties > click on ‘Start.’
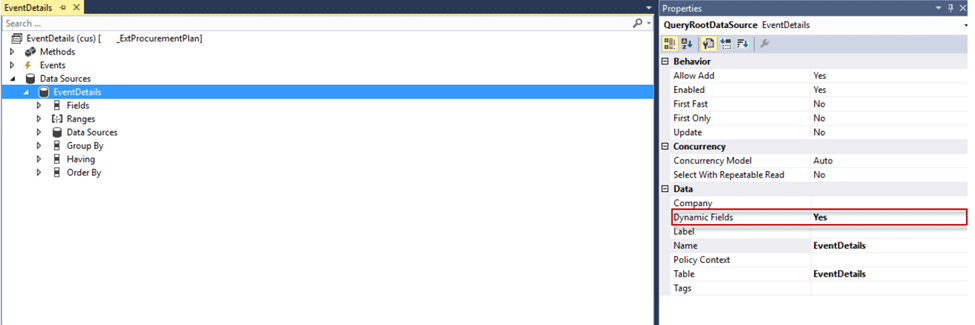
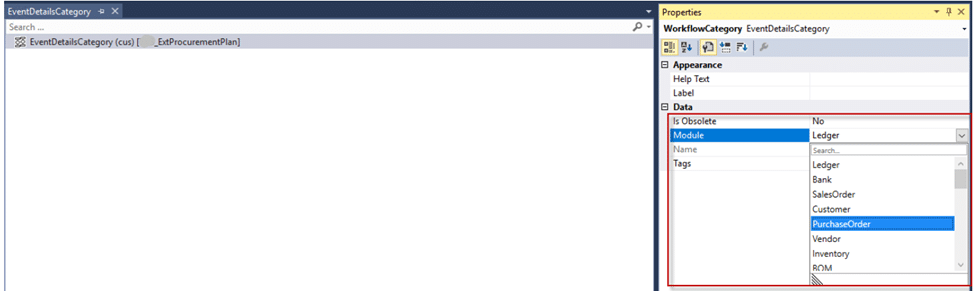
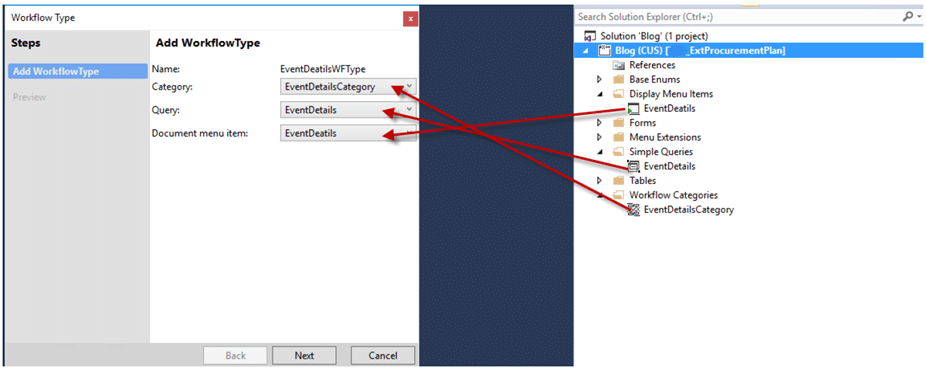
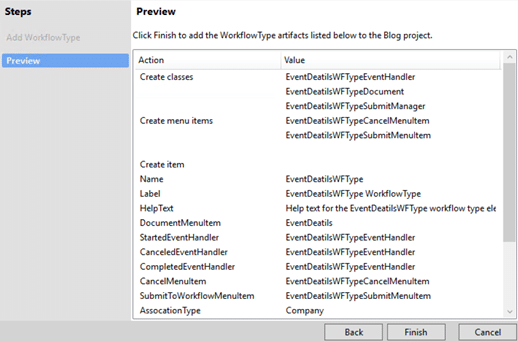
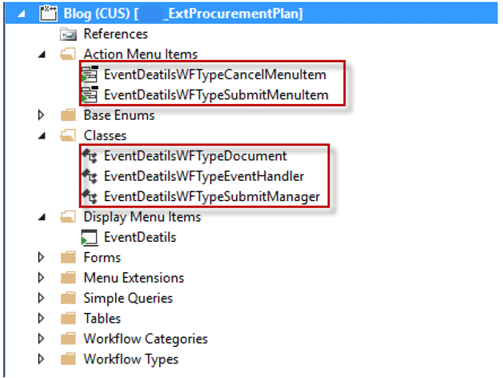
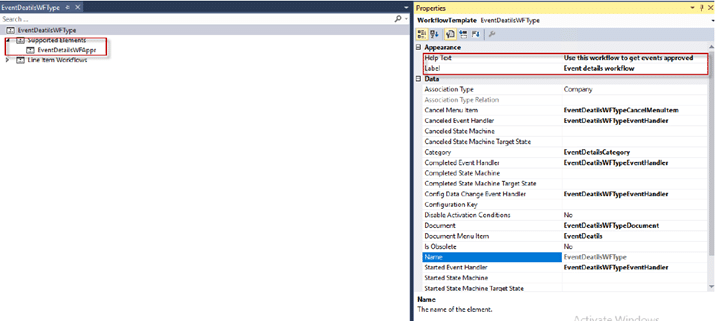
This article will guide you through each step of creating a custom workflow. We’ll create the following necessary elements in the Visual Studio project for this purpose:
1) Base Enum
2) Query
3) Workflow type
4) Workflow category
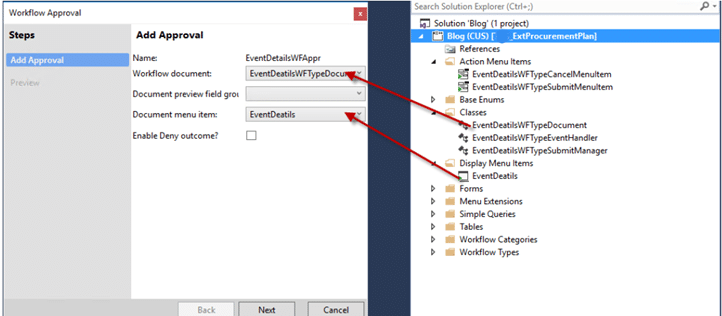
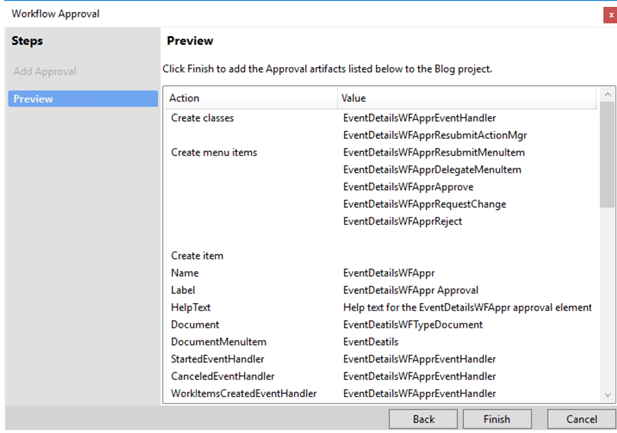
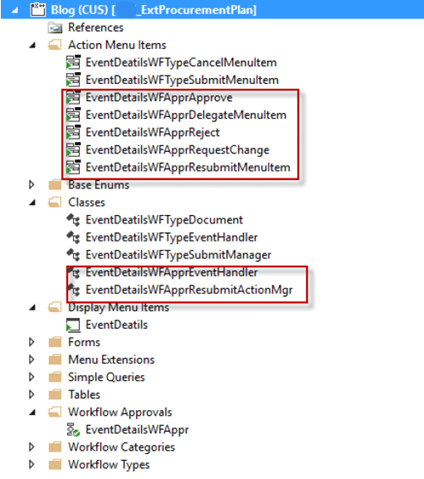
5) Workflow approval
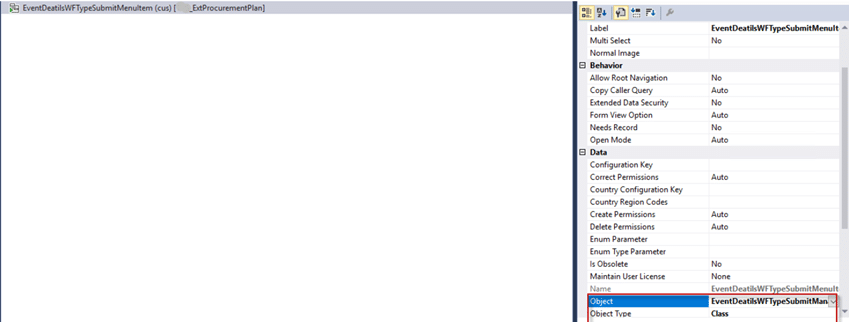
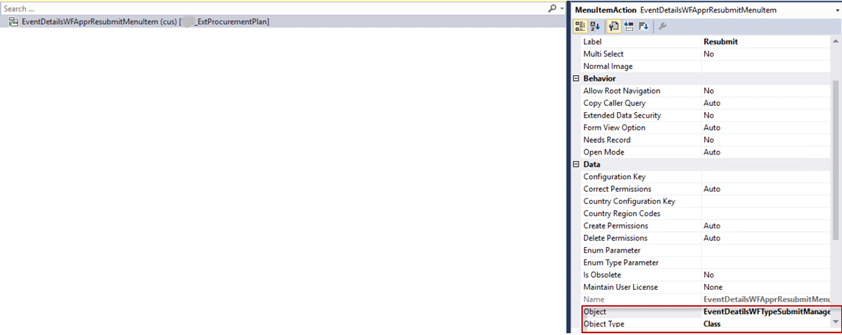
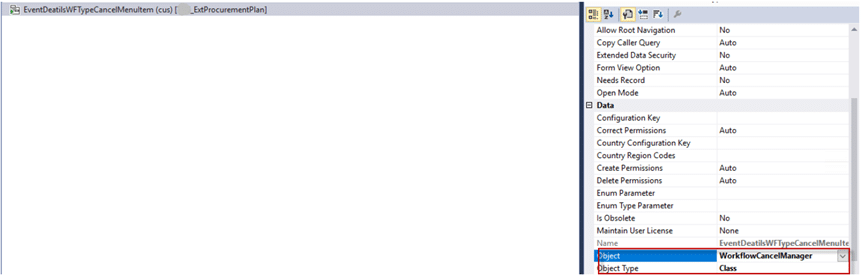
After creating a workflow type and workflow approval, the corresponding Workflow classes and action menu item button will be automatically generated. Now let’s look into the next steps in detail.
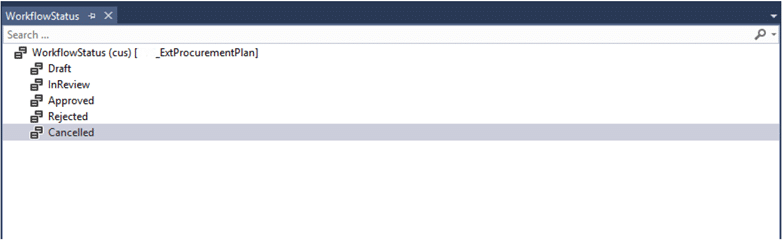
Step 1: Create a new base Enum and add elements as shown below. This base Enum will be used to maintain the status of the workflow.
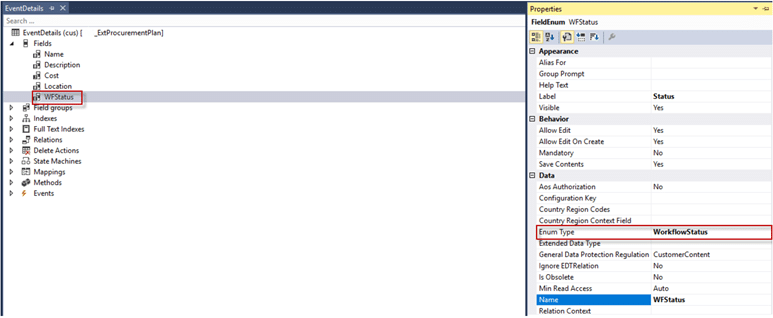
Step 2: Create a field in your table and give Enum name in the field properties. We will have to create this field on OOTB, too.
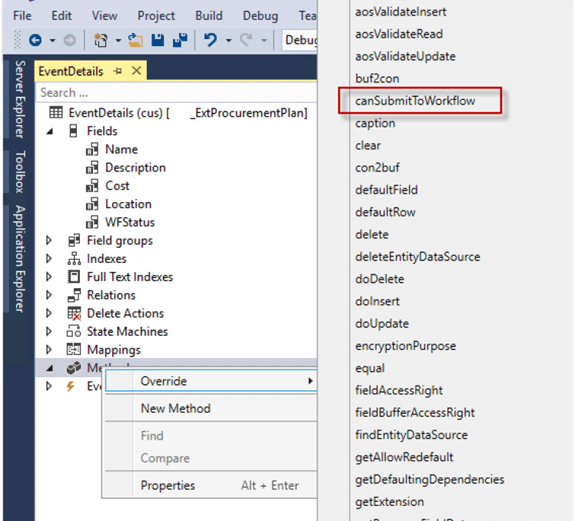
Step 3: Override CanSubmitToWorkflow() method on this table and write the following code.
In this method, we will define the conditions under which a user is allowed to submit a workflow. For example, we will enable the workflow submission when there is at least one record in the table and the workflow status is set to Draft.
public boolean canSubmitToWorkflow(str _workflowType = ”)
{
boolean ret = false;
if(this.RecId != 0 && this.WFStatus == WorkflowStatus::Draft)
{
ret = true;
}
return ret;
}
Step 4: In this table, create a new method named UpdateWorkflowState() and write the following code.
With this method, you will update the status of the workflow. This method will be called in workflow classes. The current status will be passed on to this method.
public static void UpdateWorkflowState(RefRecId _recId, WorkflowStatus _state)
{
EventDetails eventDetails;
;
select firstonly forupdate eventDetails
where eventDetails.RecId == _recId;
if (eventDetails !=null)
{
ttsBegin;
eventDetails.WFStatus = _state;
eventDetails.update();
ttsCommit;
}
}