
Upgrading from the Modern Point of Sale (MPOS) app to the Store Commerce app on Windows is a key milestone for retailers looking to enhance performance, security, and user experience in their store operations. As Microsoft phases out MPOS, the MPOS to Store Commerce transition ensures alignment with the latest capabilities for Dynamics 365 Commerce and long-term platform support.
In this blog, we’ll guide you through a structured, step-by-step process for migrating from MPOS to Store Commerce App on Windows.
Why migrate from MPOS to Store Commerce App?
Migrating from Modern Point of Sale (MPOS) to the Store Commerce App on Windows in Dynamics 365 Commerce is recommended for several strategic and technical reasons:
1. Unified architecture
- Store Commerce App combines the best of MPOS and Cloud POS into a single application, reducing complexity.
- Offers a more consistent experience across devices (Windows, Android).
2. Enhanced security and compliance
- Built on a more secure architecture aligned with Microsoft’s latest standards.
- Benefits from regular security updates and long-term support, which MPOS will eventually phase out.
3. Performance Improvements
- Improved offline capabilities and faster synchronization.
- Better responsiveness in transaction processing and inventory operations.
4. Easier maintenance and updates
- Managed through Microsoft Store or MSI, allowing simpler deployment and version control.
- Reduces customizations needed for common features.
5. Future-ready
- MPOS is being deprecated in favor of the Store Commerce App.
- Microsoft is investing in enhancements only for the Store Commerce App moving forward, so migration ensures access to the latest features and innovations.
6. Improved integration
- Seamless integration with other Microsoft 365 tools and services.
- Better support for modern payment terminals and hardware.
Steps to Migrate from MPOS to Store Commerce on Windows
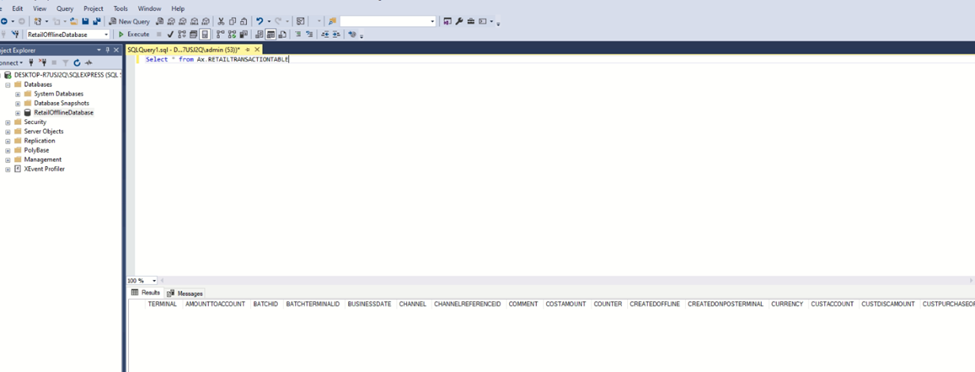
Step 1: Verify no transaction data in the POS offline database
Before migrating, confirm that no transaction data remains in the POS offline database to avoid data loss.
Run the following query in the RetailOfflineDatabase:

If the query returns no data, all transactions have been synced to the online state, and you can proceed with the migration.
Step 2: Uninstall the MPOS app
To remove the MPOS app from your system:
- Open Windows PowerShell as an administrator.
- Run the following command to identify the MPOS package name:

Example output: Microsoft.Dynamics.Retail.Pos_10.0.1591.108_x86__tfm0as0j1fqzt
- Run PowerShell as a user and execute:
Remove-AppxPackage -Package “Microsoft.Dynamics.Retail.Pos_10.0.1591.108_x86__tfm0as0j1fqzt”
Step 3: Delete the retail offline database
Once the MPOS app is uninstalled, delete the Retail Offline Database to ensure a clean slate for the Store Commerce app installation.

Read more: How to set up and configure the Microsoft Dynamics 365 Commerce Store Commerce app?
Step 4: Install .NET desktop runtime
The Store Commerce app requires .NET Desktop Runtime 6.0.28 to function properly.
- Download the runtime from the official Microsoft website: Download .NET 6.0.
- Follow the installation instructions to finish the setup.
https://dotnet.microsoft.com/en-us/download/dotnet/6.0 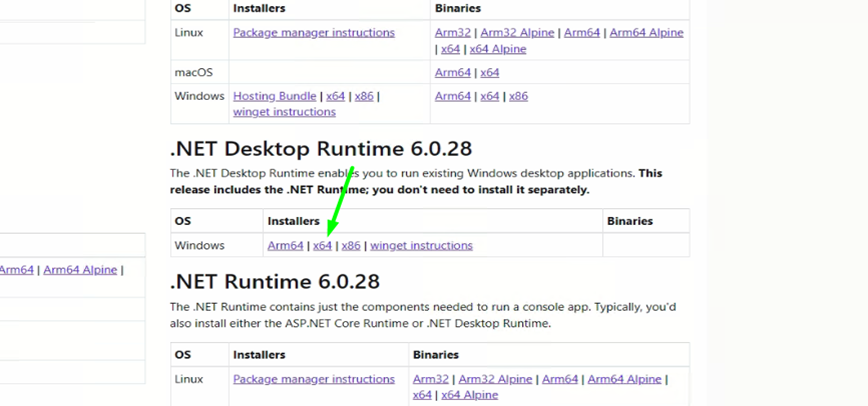
Step 5: Configure TLS protocols
- To ensure secure communication, enable TLS 1.2 and disable older protocols (TLS 1.0, TLS 1.1, SSL 2.0, and SSL 3.0).
- Open Registry Editor as an administrator.
- Navigate to: HKEY_LOCAL_MACHINE\SYSTEM\CurrentControlSet\Control\SecurityProviders\SCHANNEL\Protocols
- Configure the following protocols by adding keys and DWORD (32-bit) values:
Add Key Name: SSL 2.0
Add Key Name: Client
Right-click on Client and create DWORD (32-bit) value name: DisabledByDefault Value: 1
Right-click on Client and create DWORD (32-bit) value name: Enabled Value: 0
Add Key Name: Server
Right-click on Client and create DWORD (32-bit) value name: DisabledByDefault Value: 1
Right-click on Client and create DWORD (32-bit) value name: Enabled Value: 0
Add Key Name: SSL 3.0
Add Key Name: Client
Right-click on Client and create DWORD (32-bit) value name: DisabledByDefault Value: 1
Right-click on Client and create DWORD (32-bit) value name: Enabled Value: 0
Add Key Name: Server
Right-click on Client and create DWORD (32-bit) value name: DisabledByDefault Value: 1
Right-click on Client and create DWORD (32-bit) value name: Enabled Value: 0
Add Key Name: TLS 1.0
Add Key Name: Client
Right-click on Client and create DWORD (32-bit) value name: DisabledByDefault Value: 1
Right-click on Client and create DWORD (32-bit) value name: Enabled Value: 0
Add Key Name: Server
Right-click on Client and create DWORD (32-bit) value name: DisabledByDefault Value: 1
Right-click on Client and create DWORD (32-bit) value name: Enabled Value: 0
Add Key Name: TLS 1.1
Add Key Name: Client
Right-click on Client and create DWORD (32-bit) value name: DisabledByDefault Value: 1
Right-click on Client and create DWORD (32-bit) value name: Enabled Value: 0
Add Key Name: Server
Right-click on Client and create DWORD (32-bit) value name: DisabledByDefault Value: 1
Right-click on Client and create DWORD (32-bit) value name: Enabled Value: 0
Add Key Name: TLS 1.2
Add Key Name: Client
Right-click on Client and create DWORD (32-bit) value name: DisabledByDefault Value: 0
Right-click on Client and create DWORD (32-bit) value name: Enabled Value: 1
Add Key Name: Server
Right-click on Client and create DWORD (32-bit) value name: DisabledByDefault Value: 0
Right-click on Client and create DWORD (32-bit) value name: Enabled Value: 1
Step 6: Enable strong cryptography
To ensure robust security settings for .NET applications:
- Run Registry Editor as admin.
- Go to Path: HKEY_LOCAL_MACHINE\SOFTWARE\Microsoft.NETFramework\v2.0.50727
- Right Click on v2.0.50727 and create DWORD (32-bit) value name: SchUseStrongCrypto Value: 1
- Go to Path: HKEY_LOCAL_MACHINE\SOFTWARE\Wow6432Node\Microsoft.NETFramework\v2.0.50727
- Right Click on v2.0.50727 and create DWORD (32-bit) value name: SchUseStrongCrypto Value: 1
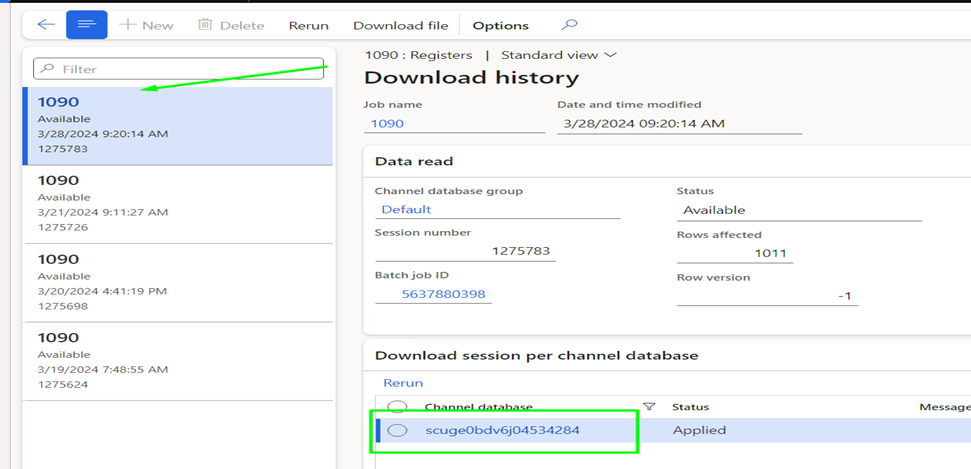
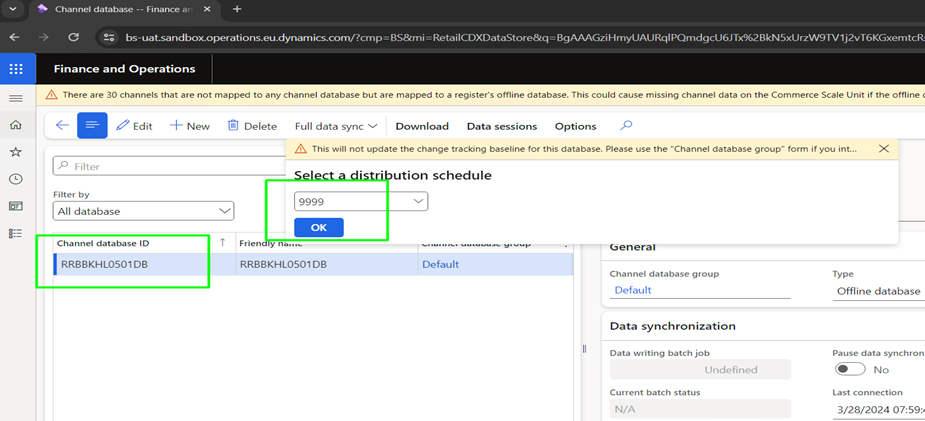
Step 7: Update device configuration
Update the configuration for devices connected to the terminals:
- Change the Application Type from MPOS to Store Commerce.
- Run the incremental Job 1090 from the distribution schedule to apply the changes.

Step 8: Install the default Store Commerce app
To install the default Store Commerce app:
- Download the installer from the Lifecycle Services (LCS) portal.
- Open PowerShell and run the following command, replacing SqlServerName with your machine’s SQL Server name:
- \StoreCommerce.Installer.exe install –installoffline –TrustSqlServerCertificate –SqlServerName
- Verify that the Store Commerce app is installed successfully.
- Activate the Store Commerce app for the terminal previously used with MPOS.
- Close the app after successful activation.
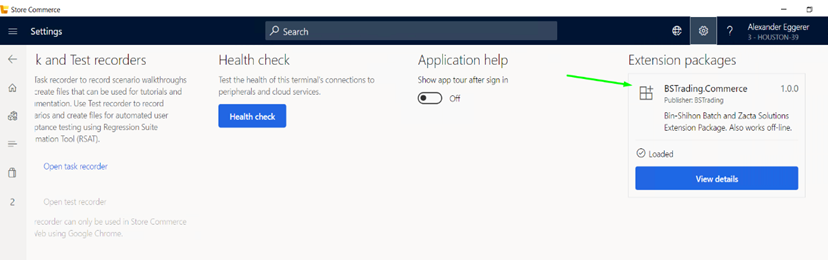
Step 9: Install customizations
If your business requires custom extensions:
- Run the following command in PowerShell to install customizations:
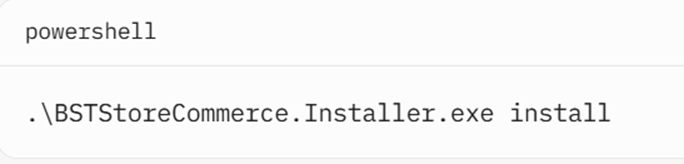
- Verify the custom extensions from the Settings page in the Store Commerce app.
Step 10: Sync the offline database
To enable offline mode for the Store Commerce app:
- Run a full sync job from the headquarters on the terminal’s offline database.
- Verify that the Store Commerce app successfully switches to offline mode.
Conclusion
Successfully transitioning from the MPOS app to the Store Commerce app is more than a routine upgrade- it’s a strategic move toward modernizing your retail infrastructure. By carefully following each step of the migration process, you can minimize disruptions, maintain system integrity, and ensure your in-store operations remain secure and aligned with the latest Microsoft technologies.
Confiz offers comprehensive Store Commerce migration services—from environment assessments and implementation planning to post-go-live support. Whether you’re just getting started or need help optimizing the transition, our experts ensure a smooth, secure, and future-ready migration. For personalized assistance, reach out to us at marketing@confiz.com.