Confiz Logo

How to build your own Copilot in Microsoft Copilot Studio

January 30, 2024

Subscribe to the newsletter

Generative AI has transformed productivity for businesses in nearly every industry. Organizations are looking for ways to leverage this technology, add business value, and experience its potential impact on their workforce.

McKinsey & Company’s research reveals that AI contributes up to $4.4 trillion annually to the global economy. Furthermore, experts believe that some technological capabilities may achieve human-level performance sooner than anticipated.

Microsoft, like OpenAI, is at the forefront of empowering business users with Generative AI, with Microsoft Copilot Studio, allowing users to create their own copilot experiences using a guided, no-code graphical experience, eliminating the need for data scientists or developers.

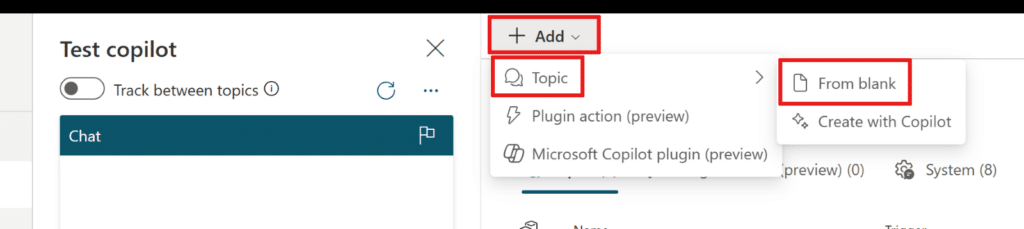
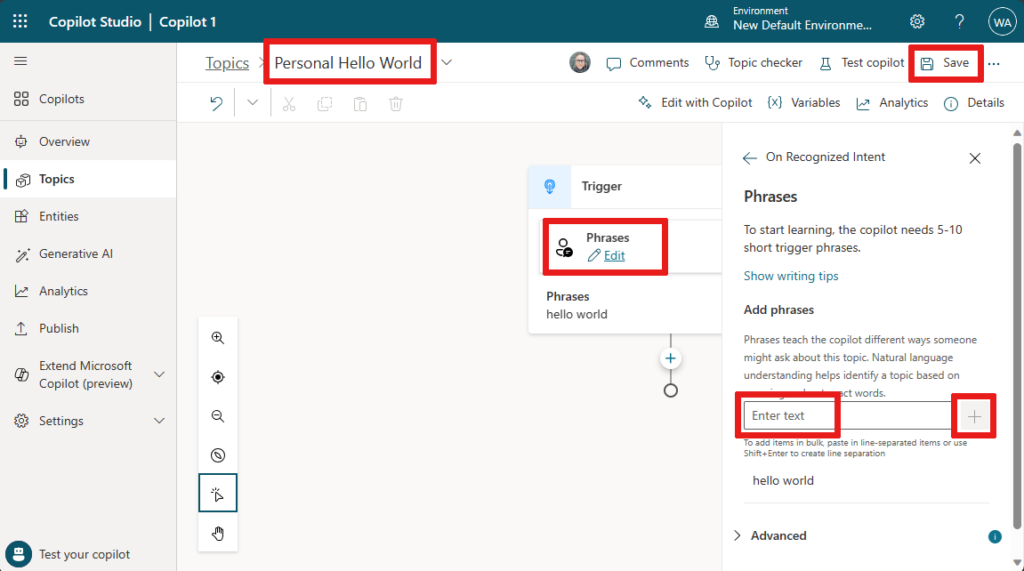
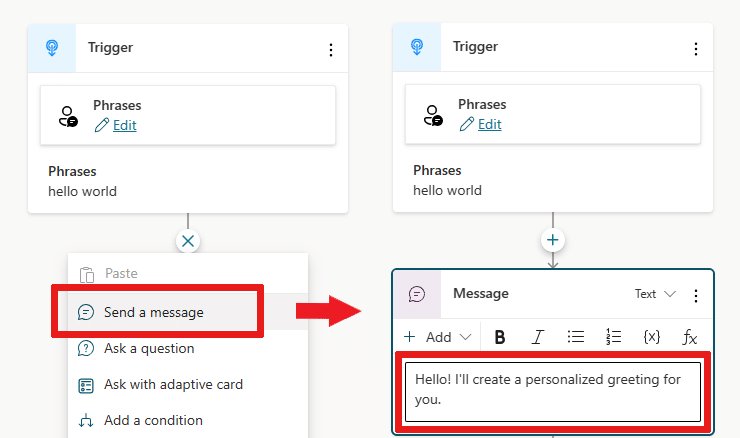
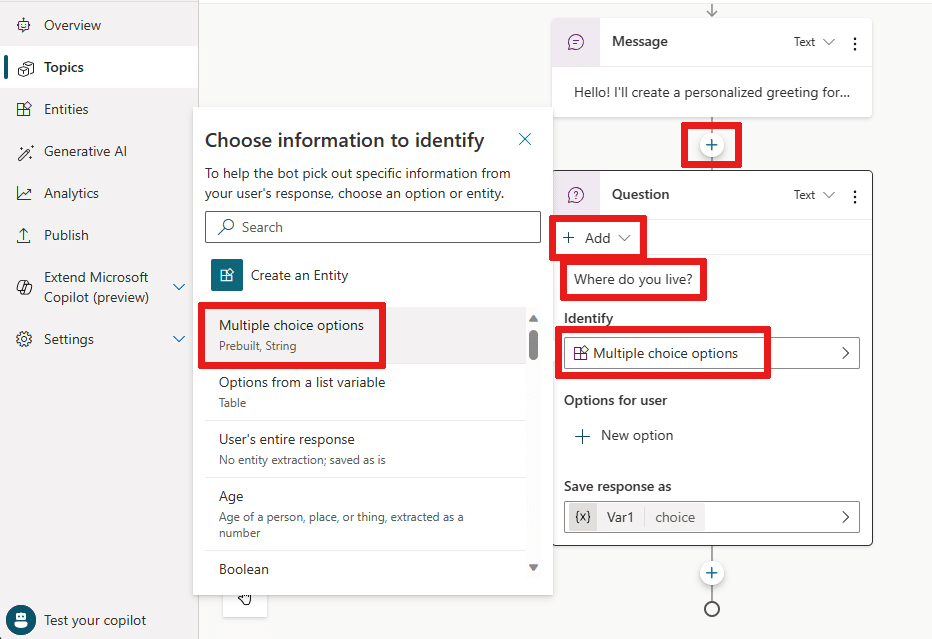
This quick start article helps you create a copilot for the first time. You learn how to add topics to your copilot, test content changes in real time, and deploy your copilot to a test page.

Steps to create your own Copilot

  1. Log into the official website of Microsoft Copilot Studio. You can access it through Firefox, Chrome, or Microsoft Edge. 
  2. Once you sign up, the Power Apps environment will be set for you by default. You can customize the environment as per your requirements.
  3. Go to the Home page and choose “Create a copilot.” 
  4. A wizard will pop up. It’s time to name your copilot. 
  1. Choose the language you would like your copilot to speak by clicking the dropdown menu. 
  1. Add a URL to Boost your conversations with generative answers field. This is optional. 
  1. You can further enhance and customize your copilot. To get started, select the Edit Advanced option at the bottom of the page. 
  1. You can give your copilot a personality by selecting an icon by either choosing an option from the list of icons or uploading a custom icon. You can also choose from a list of lesson topics to generate starter content. Next, choose the Solution and Schema name for your copilot.  
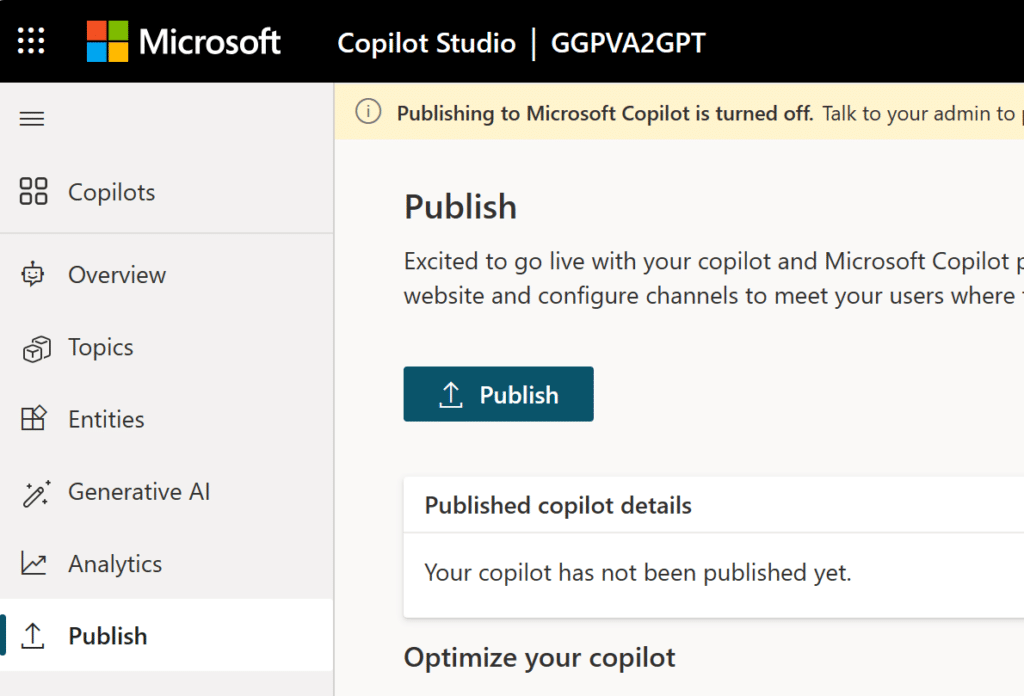
  1. Hit the Create button and wait up to 15 minutes to create your copilot. Once you have done so, you will be redirected to the overview page of the copilot. 

Creating a topic in Copilot  

It’s easy to get started with creating topics in the new copilot. A topic is like a dialog tree describing how your copilot will respond to user questions. 

  1. From the navigation menu, choose topics and hit “add.” Select “topic” and choose “From blank.” 
  1. Give your topic a name and configure a trigger (which are examples of user questions/utterances meant to teach the copilot how to respond when a question is detected). Here is an example: Name your copilot, “Personal Hello World” 
  1. From the trigger box under phrases, choose “Edit”. 
  1. The “On Recognized Intent” pane will appear. 
  1. Under “Add phrases”, enter the utterance “Hello world” 
  1. Choose the “+” icon to add it to your trigger.  
  1. Hit the Save icon to save the trigger. 

Setting your message in Copilot

  1. Choose the “+” icon below the trigger node and choose “Send a message.” 
  1. In the message node, add “Hello! I’ll create a personalized greeting for you.” 
  1. Save your trigger by hitting the save icon. 
  1. Choose the “+” icon under the message node and add an Ask a question node. 
  1. In the Ask a message box, type the question “Where do you live?” 
  1. Choose Multiple choice options under Identify to let the user answer as per their choice. 
  1. If you choose “multiple choice options, ” you must add more options. 
  1. Under Options for user in the Question node, choose + New option and add two options for the user. Type in “Seattle” as text. Then add another option and type in “’Bellevue.’’ 

At the same time, you can view the entire dialog tree within the authoring canvas to understand the flow of the conversation. The tree separates the path for the conversation as per the user’s response. 

  1. The final step is to choose the “+” icon below each condition note for adding a message node in each brand. In this scenario, add “Hello Seattle!” in the Seattle branch and “Hello Bellevue!” in the Bellevue branch. 
  1. Save your trigger by hitting the “Save” icon. 

You’ve just created a basic branching dialog tree successfully. Test it using the “Test your Copilot” pane to ensure the correct flow. Make any necessary adjustments until the dialog aligns with your intention. Remember, content changes will not be possible once the Copilot goes live.

Steps to publish your Copilot 

Once you have tested and tweaked the content in your copilot, you can publish it right away. Just follow these steps: 

  1. Go to the navigation menu and choose “Publish.” 
  1. As soon as you have activated your copilot, you will see a green banner at the top of the page. 
  1. To see your copilot in action on a demo website, hit the link under “Share your copilot.” 

Assess your Copilot’s performance 

There is more! Once interactions are complete, your copilot’s statistics are recorded in analytics, which means you can also test its performance. To access this data, choose “Analytics” from the navigation menu. Key performance indicators (KPIs) include: 

  • The volume of handled sessions 
  • Effectiveness in engaging users and resolving issues 
  • Escalation rates to human agents 
  • Abandonment rates during conversations 

For detailed session history and transcripts, you can go to “Analytics” and then choose “Sessions.” 

Final words

Microsoft has made it easier for us to use Generative AI by incorporating it into our everyday tasks without requiring technical expertise.

By seamlessly creating and deploying copilots within Copilot Studio, you can empower your employees with advanced capabilities. This will enhance their productivity and allow them to concentrate on core tasks that drive business value.

Ready to elevate your Dynamics 365 experience with Copilot’s prowess? Contact us at marketing@confiz.com to explore how our expertise can leverage Copilot’s capabilities.