Ensuring secure and compliant workflows is critical in today’s data-driven business environment. As organizations adopt automation tools like Microsoft Power Automate, the risk of unintentional data exposure also grows. That’s where Data Loss Prevention (DLP) policies come in.
This blog explores how Data Loss Prevention policies in Power Automate work, why they’re essential, and how your business can benefit from implementing them.
What is a Data Loss Prevention Policy in Power Automate?
As Microsoft Power Platform grows in popularity across organizations, citizen developers and business users are creating flows and apps at a rapid pace. While this empowers teams to automate tasks and gain efficiencies, it also opens the door to unintended data exposure.
This is where Data Loss Prevention (DLP) policies come in. Power Automate DLP policies are a set of rules created by administrators to control how data flows between connectors – essentially defining what data can go where and under what conditions.
Importance of Data Loss Prevention
Imagine a scenario where an employee builds a Power Automate flow that moves files from SharePoint to their personal Google Drive. Even with good intentions, this can lead to compliance violations, data breaches, and security risks.
A Data Loss Prevention policy helps prevent such scenarios by restricting flows that move data from trusted (business) services to untrusted (non-business or personal) services. It ensures organizational data stays within compliant systems, protecting sensitive information from leakage.
How Data Loss Prevention works?
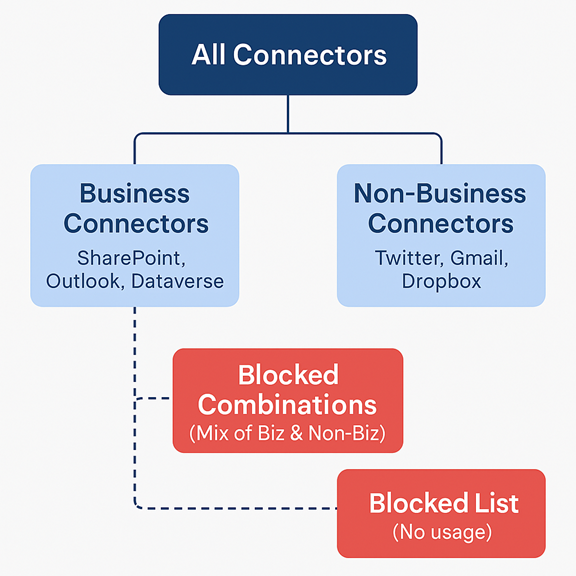
DLP policies work by classifying connectors into three buckets:
Business connectors (e.g., SharePoint, Outlook, Dataverse)
Blocked connectors (completely restricted from use)
Administrators define these groups and enforce policies at the environment level or across the entire tenant. Once a policy is implemented, flows that attempt to use both business and non-business connectors together will be blocked automatically.
Take control of your business operations
Discover how Confiz services can simplify your complex workflows and improve decision-making.
Creating and managing DLP policies in Power Automate
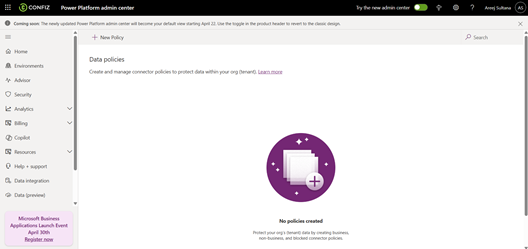
You can create DLP policies via the Power Platform Admin Center. The process involves:
Selecting an environment
Choosing which connectors go into each group
Publishing the policy
Policies can be scoped tightly. For example, different rules can be applied to other departments or use cases. Admins can also monitor flow creation to identify potential violations early.
What happens when a policy is violated?
Data Loss Prevention policy violations in Power Automate can also occur. However, if a user tries to create or run a flow that violates a DLP policy, they’ll receive a clear error message.
For instance, if a flow moves files from SharePoint (Business) to Twitter (Non-Business), Power Automate will block the flow at design time or during execution, depending on the policy enforcement.
This proactive blocking helps prevent risky automations before they go live.
Accelerate growth at an unprecedented pace
Discover how Confiz can help you take control of your daily operations, increasing growth and revenue.
Real-world case study: How a DLP policy prevented a data breach in a nonprofit organization?
Let’s consider an example where a DLP policy prevents a data breach to highlight its importance.
Background: A nonprofit organization in healthcare education enabled Power Automate across departments to speed up manual processes. A staff member created a flow that copied contact records from Dataverse to a personal Gmail account for “follow-up” purposes.
The risk: Although unintentional, this flow would have transferred sensitive contact data, potentially violating privacy agreements and compliance regulations like HIPAA.
The solution: Thanks to a predefined DLP policy, Gmail was categorized as a non-business connector, and the flow was blocked at creation. The user received an error and contacted IT. The incident helped IT identify a training need around data sharing policies.
The outcome
No data was leaked.
The team revised their onboarding for Power Automate users.
DLP policy was refined further to block similar patterns in other environments.
Visual aid: Connector classification flow diagram
This diagram shows how DLP policies categorize connectors into Business, Non-Business, and Blocked, helping admins enforce safe data movement across environments.
How to implement DLP in Power Automate?
This section provides a series of visual steps showing how DLP policies are implemented in Power Automate.
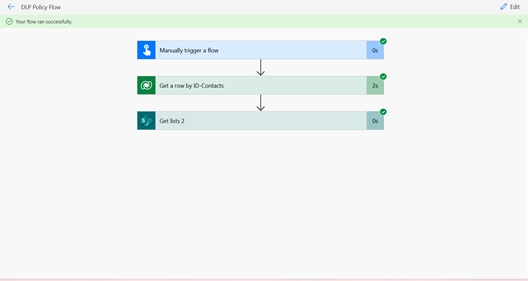
We have created a policy for SharePoint and DataVerse for implementation.
1: The first screenshot shows a flow built without any DLP restrictions.
2: The following image demonstrates the steps to create and configure a DLP policy in the Power Platform Admin Center.
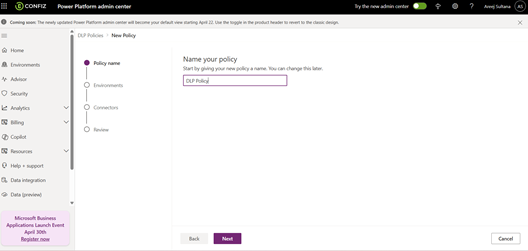
3: While creating the environment, you can give me any name. For implementation, we have given it the name “DLP Policy.”
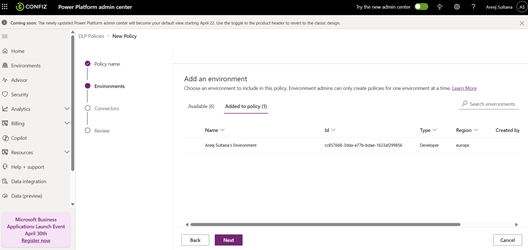
4: You can select the environment where you want to create a policy and add that to your respective environment.
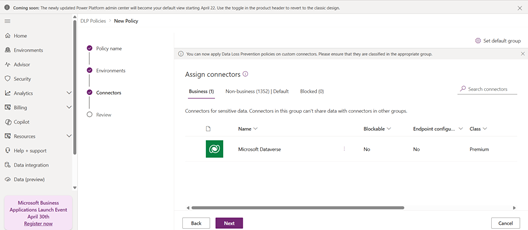
5: In the next step, you can identify business, non-business, and blocked connectors according to your requirements.
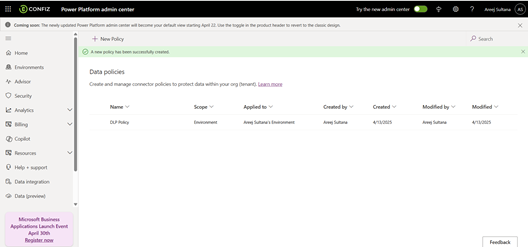
6: Data Policy has been added to the environment successfully.
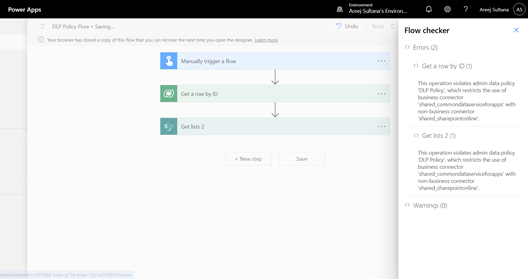
7: The final image highlights how Power Automate alerts users when a flow violates the applied DLP policy, effectively preventing risky configurations.
Conclusion
Data Loss Prevention policies are more than just technical controls – they’re a core part of your Power Platform governance strategy. As low-code tools democratize app development, it’s critical that organizations proactively manage data exposure risk. Strong DLP policies are a low-effort, high-impact way to ensure your flows are secure and compliant.
If you need guidance on setting up or optimizing DLP policies in Power Platform, contact our experts at marketing@confiz.com. We’re here to help.