Modern finance teams are under growing pressure to do more with their data. As transactions become complex, so does the need for better traceability, richer context, and smarter reporting. Traditional financial structures in Microsoft Dynamics 365 Finance offer tools like financial dimensions. Still, those tools alone aren’t always enough for users who need more flexibility, fewer constraints, and deeper insight at the transaction level.
That’s where the financial tags come in. Introduced as a new capability in Dynamics 365 Finance, financial tags allow users to assign up to 20 customizable values to transactional records, unlocking more granular visibility without the rigidity of predefined account structures. These tags aren’t just visible when posting and carrying through voucher transactions; they also enable more intuitive filtering and data exploration.
In this blog, we’ll explore how D365 financial tags work, how they differ from traditional financial dimensions, and how to configure them. We’ll also discuss automation through default rules that can save time and improve consistency across your financial operations.
What are financial tags in Dynamics 365 Finance?
Financial tags in Dynamics 365 Finance are a powerful feature that lets you add up to 20 user-defined fields to transactions for enhanced tracking and reporting, without modifying your chart of accounts or financial dimensions.
Financial tags are lightweight, flexible labels you can attach to transactions (like journal entries, invoices, or payments) to capture extra context, such as:
- Sales order numbers
- Vendor or customer names
- Campaign codes
- Internal project references
They’re especially useful for internal analysis, audit trails, and ad hoc reporting.
Financial tags vs financial dimensions: What’s the difference?
A common misconception among Dynamics 365 users is that financial tags D365 function similarly to financial dimensions. While both tools help categorize and track financial data, they serve different purposes and behave differently in the system. Understanding the distinction between financial tags vs financial dimensions is key to using each effectively and avoiding misconfigurations, and some of these are listed below:
| Financial Dimensions | Financial Tags |
| Must be included in account structures or advanced rules to be functional. | Not tied to account structures, offering more flexibility and fewer validation constraints. |
| Undergo validation during accounting entry based on active status and structure rules. | Not subject to structural validations during entry, making them easier to apply. |
| It is not supported in dimension sets or trial balances but is visible in separate voucher columns, which is ideal for filtering transactions. | Values of financial tags in D365 can be edited or removed even after posting. |
| Useful in financial dimension sets and compatible with Management Reporter for detailed financial reporting. | It cannot be associated with master data; it is applied at the journal header level and can default to lines. |
| Requires maintenance mode to activate new dimensions. | Values of financial tags in D365 can be edited or removed even after posting. |
| Once a transaction is posted, dimension values cannot be changed. | Values of financial tags in D365 can be edited or removed even after posting. |
Configuring financial tags in D365 Finance: Step-by-step guide
Setting up financial tags in D365 Finance is a straightforward process, but it requires a few key steps to ensure proper functionality. Follow this guide to enable the feature, define tag behavior, and make them available across your journals.
Step 1:
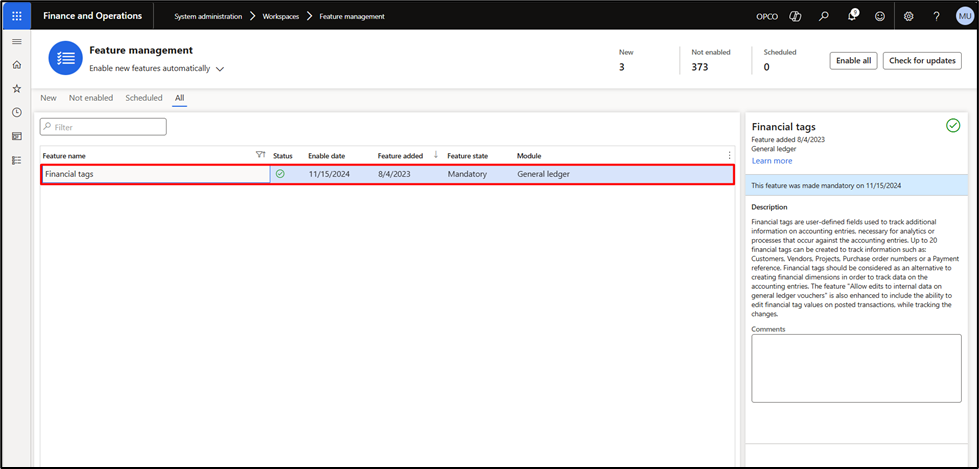
First, navigate to the feature management and enable the “Financial Tags” feature.
Step 2:
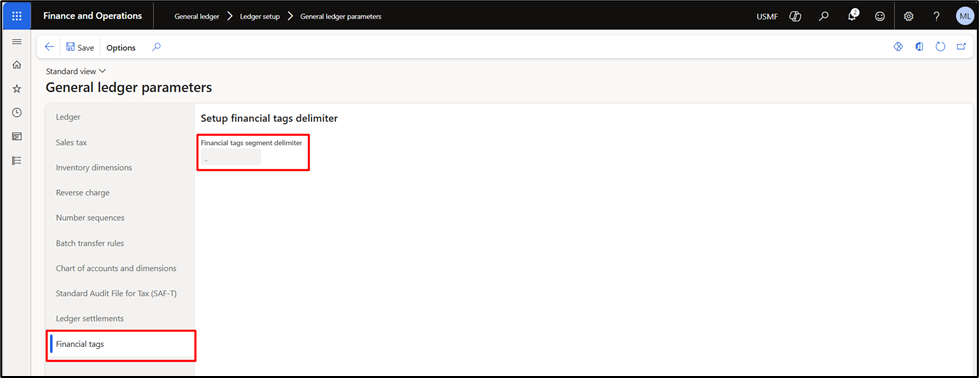
We need to add a delimiter that separates each financial tag from the others. This will be defined in the General Ledger parameters > Financial Tags Tab.
Note: Choose this delimiter wisely because it can’t be used in the Financial Tag values, which we will explore further in later parts of this blog.
Step 3:
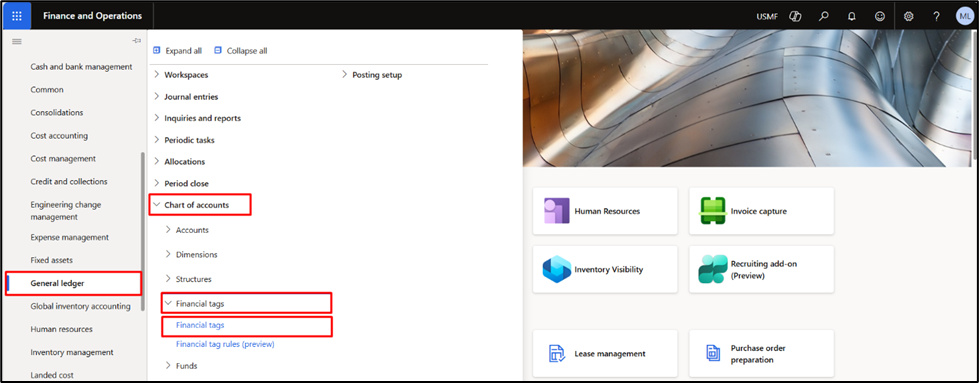
We are all set to create the D365 F&O financial tags.
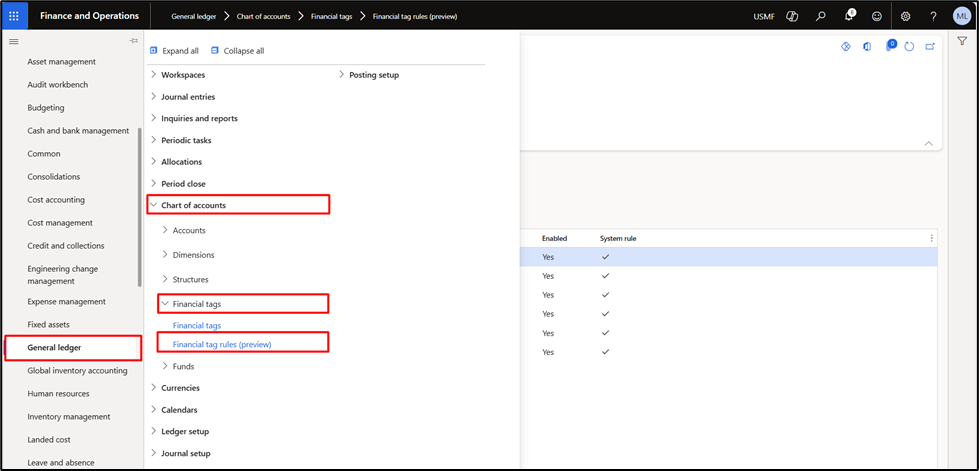
Navigate to General Ledger > Chart of Accounts > Financial Tags > Financial Tags.
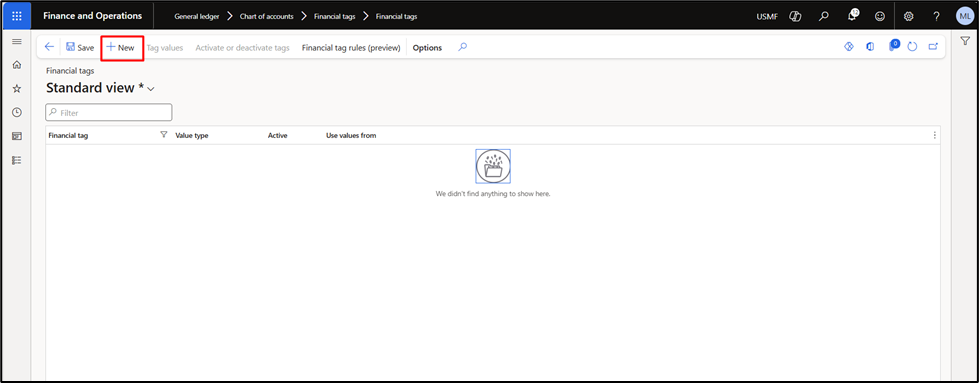
Step 4:
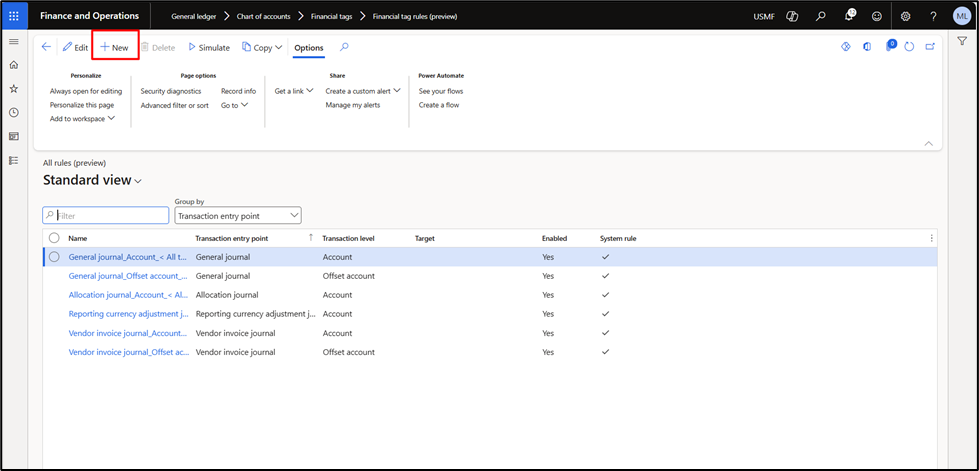
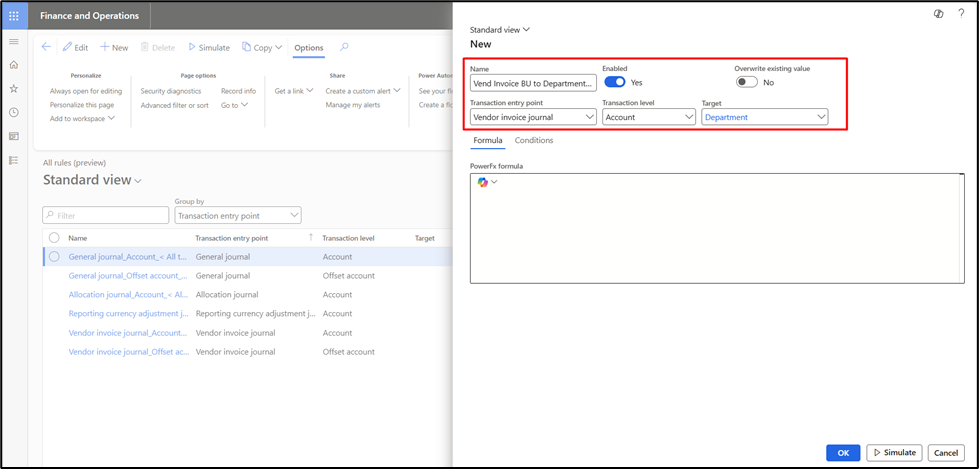
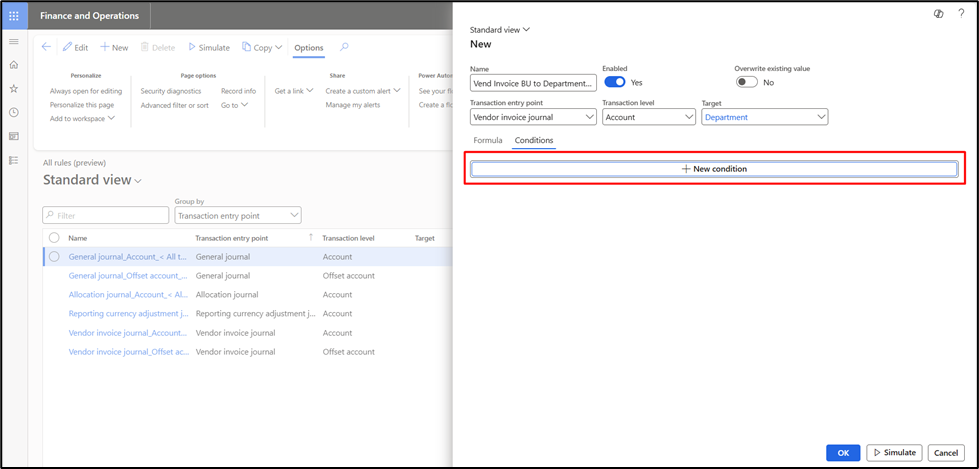
Click on the New button to create a new financial tag in Dynamics 365 Finance and Operations.
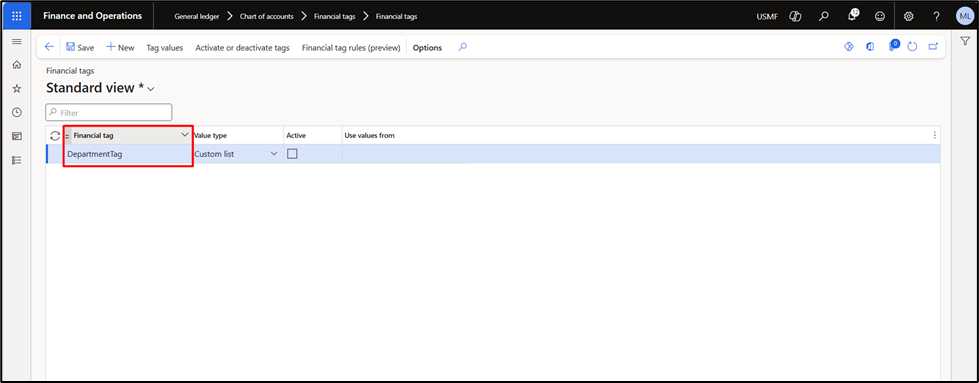
Step 5:
Fill in the Name of the financial tag in the field “Financial tag”.
Step 6:
Select the correct Value Type. This defines the type of values for the financial tags that will be available for the user’s selection.
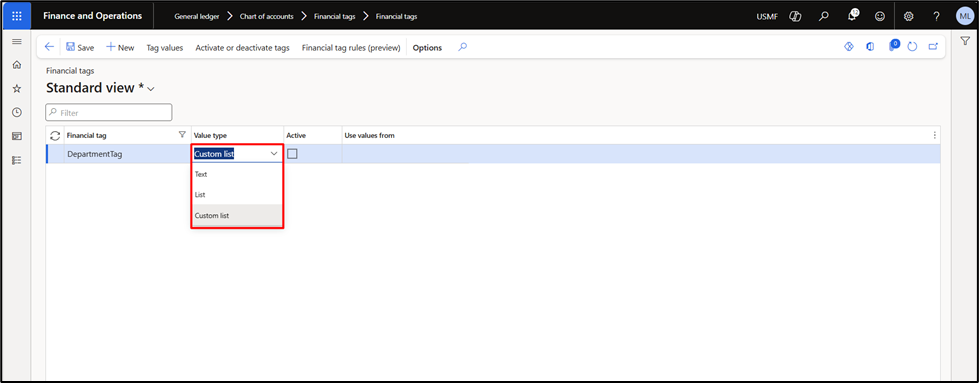
We have the following options available:
- Text: The user can type any desired value in the field without restrictions.
- List: If this option has been selected, we need to define the entity in the Use Values from field so that relevant options, such as Bank Account Names, Business Units, Customer accounts, customer groups, fixed asset numbers, item groups, etc., are only available for selection.
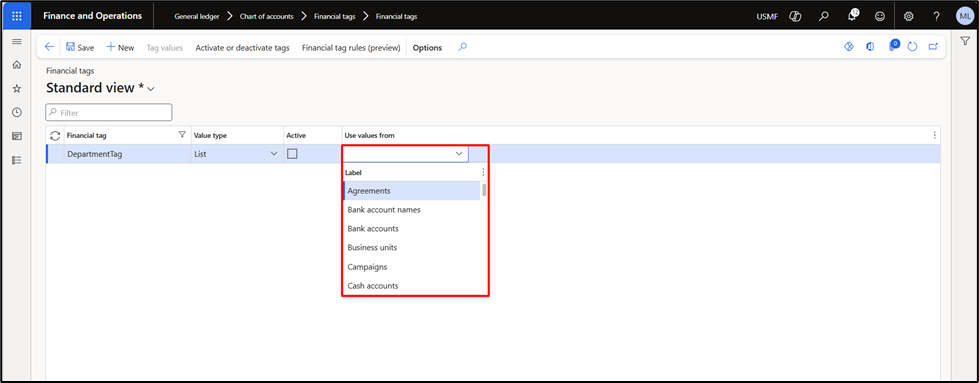
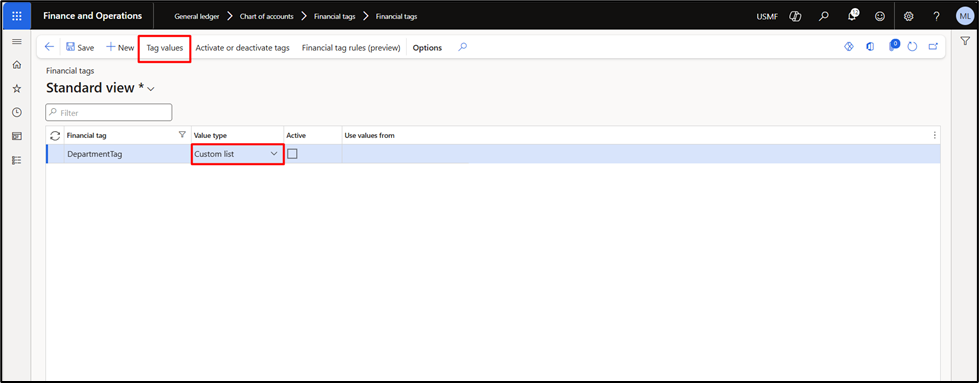
- Custom List: Under this option, we can define a custom list as tag values so that users can specifically choose from the custom list only.
To define the custom list for selection, click the Tag Values button.
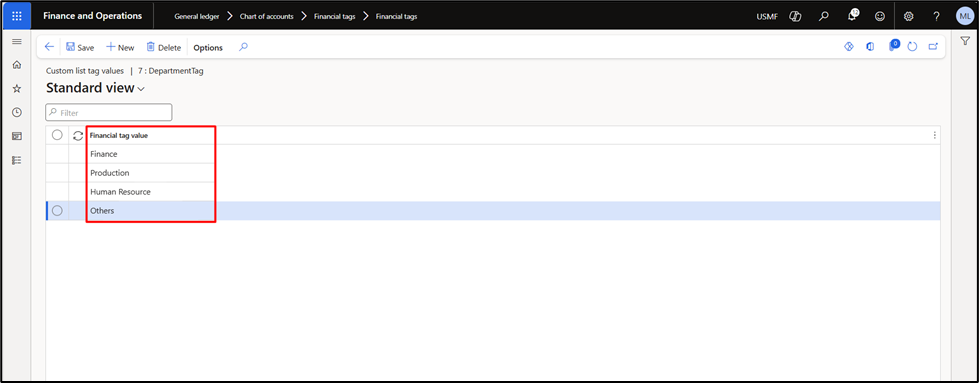
Step 7:
Define the values that you require for your custom list.
Step 8:
To make the financial tags visible or available, click the Activate or Deactivate tags, move the required dimensions to the Active financial tags section, and click OK.
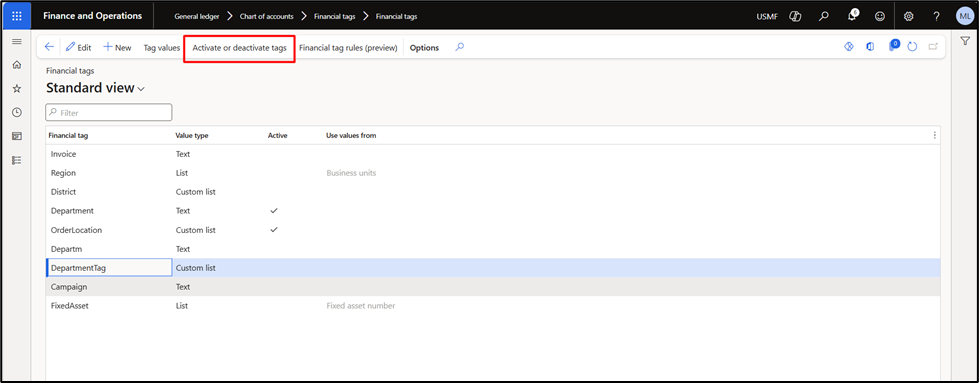
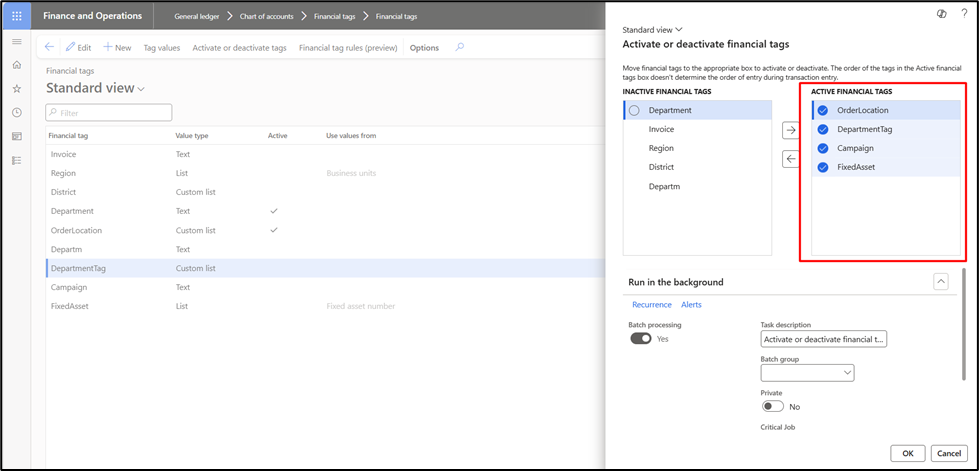
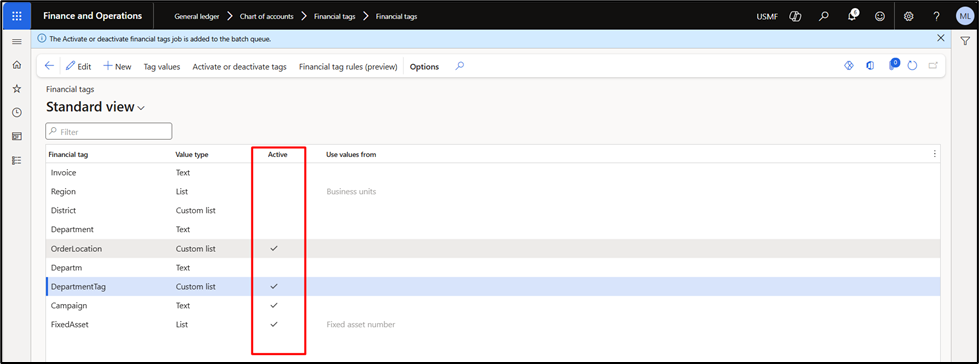
Once the batch job is ended, you will see the previously selected financial tags as Active.
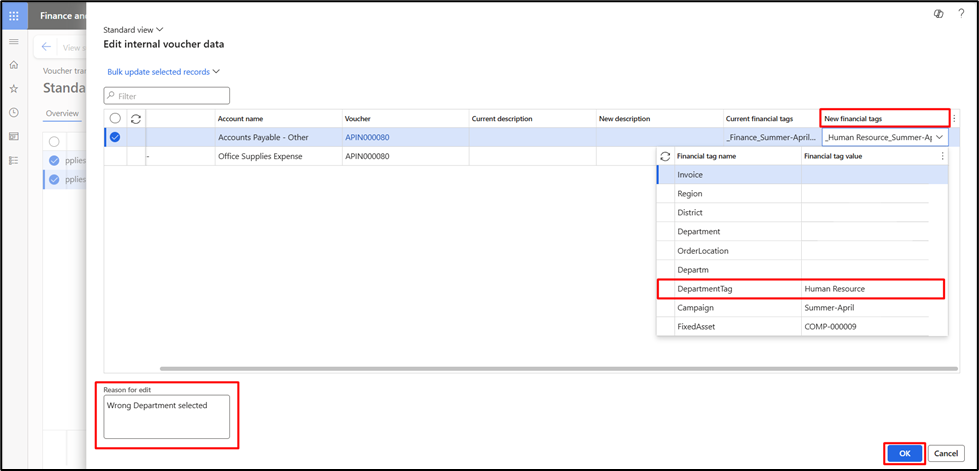
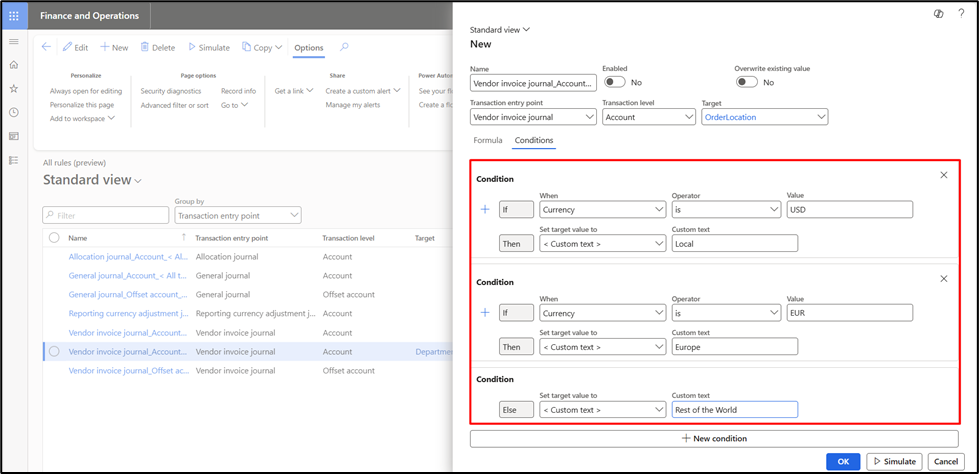
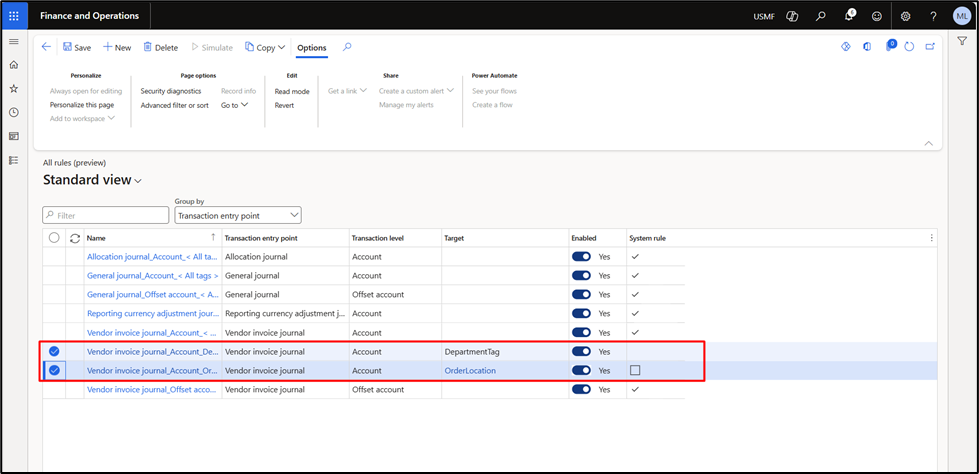
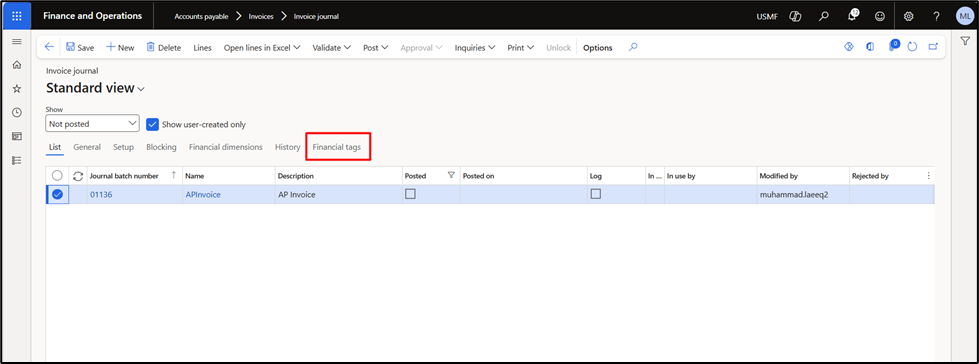
Walkthrough: Using financial tags in a vendor invoice journal
Once your financial tags are configured and activated, you can apply them during transaction entry. Here’s how to test them using a vendor invoice journal:
Step 1:
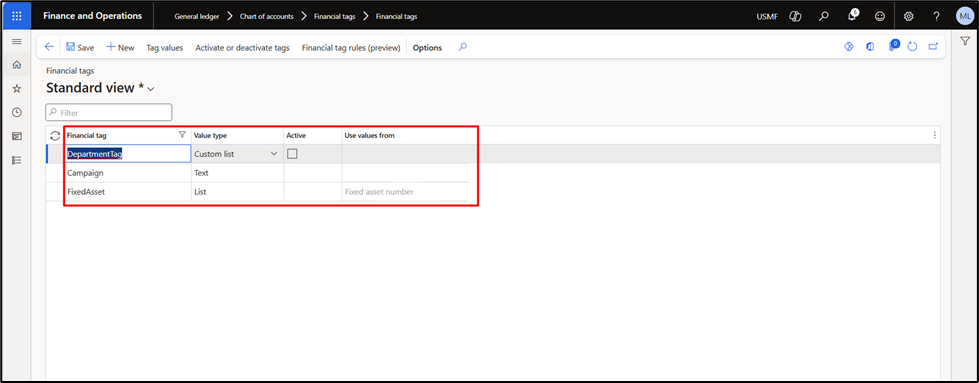
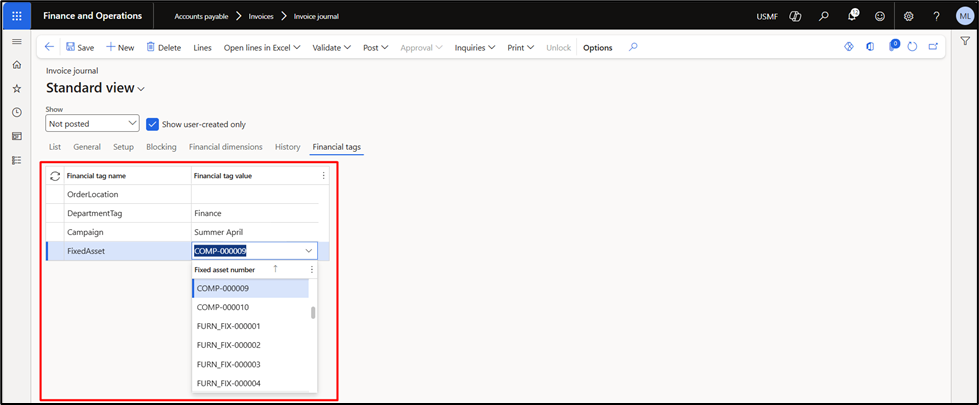
For demonstration purposes, create the following three financial tags:
| Financial Tag | Value Type | Use Values from |
| DepartmentTag | Custom List | |
| Campaign | Text | |
| FixedAsset | List | Fixed Asset Number |
Step 2:
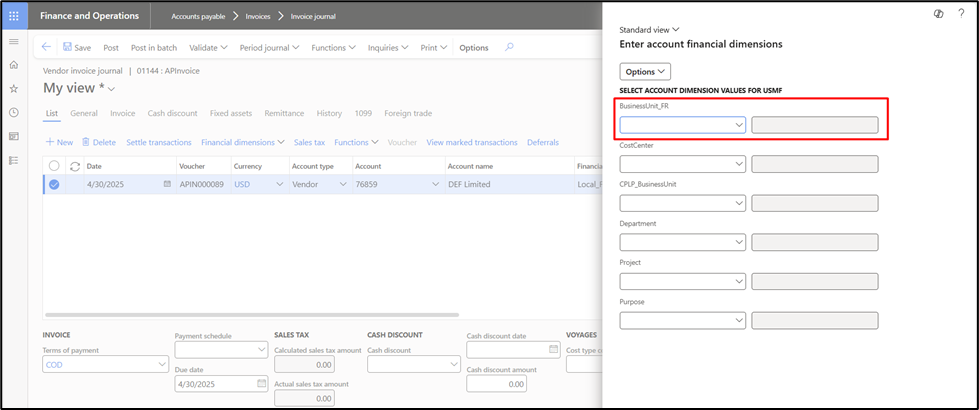
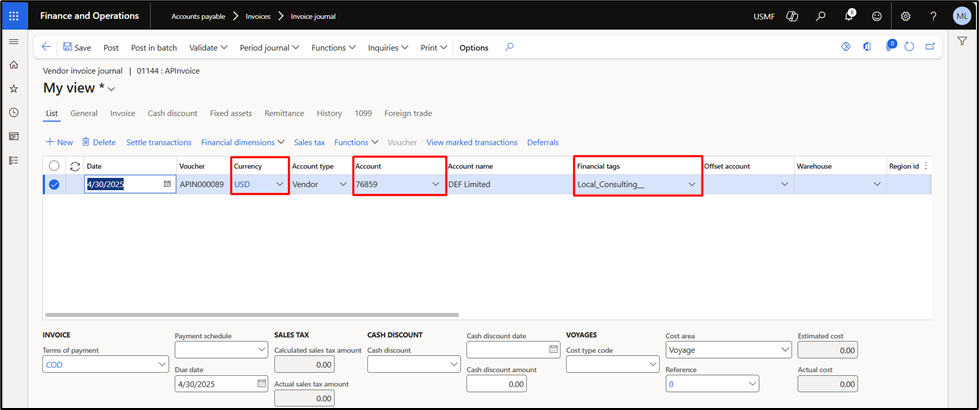
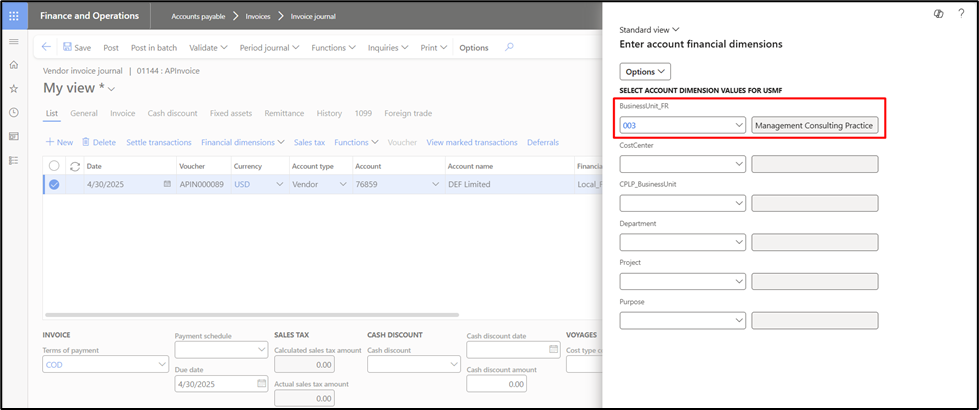
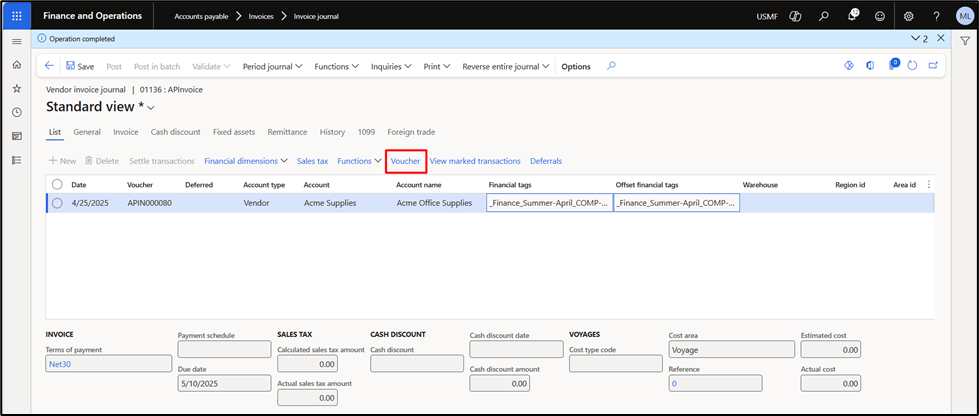
When posting the Vendor Invoice journal, you would see the financial tags and the offset financial tags fields for the information to be filled in.
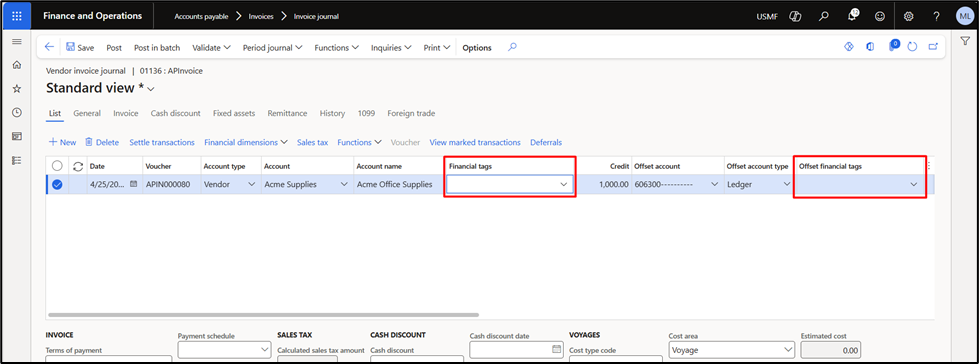
Step 3:
Once click on the drop-down, you will see the active financial tags and the allowed tag values for each financial tag. The user can select the required financial tag values that need to be tagged with the Invoice journal
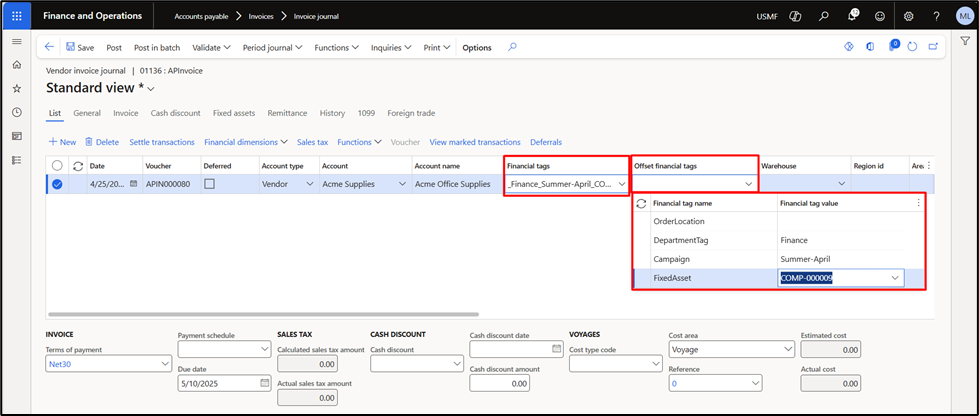
Step 4:
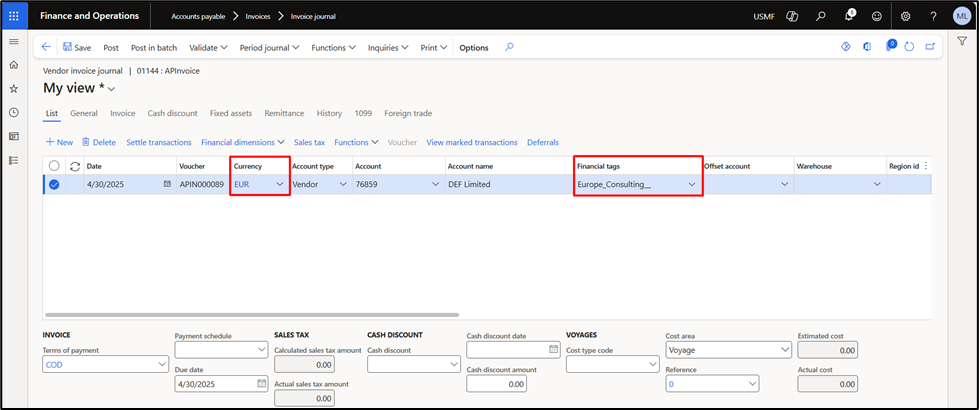
Alternatively, you can define the financial tag values on the header level and populate them on all the subsequent lines.
Step 5:
Post the vendor invoice journal.
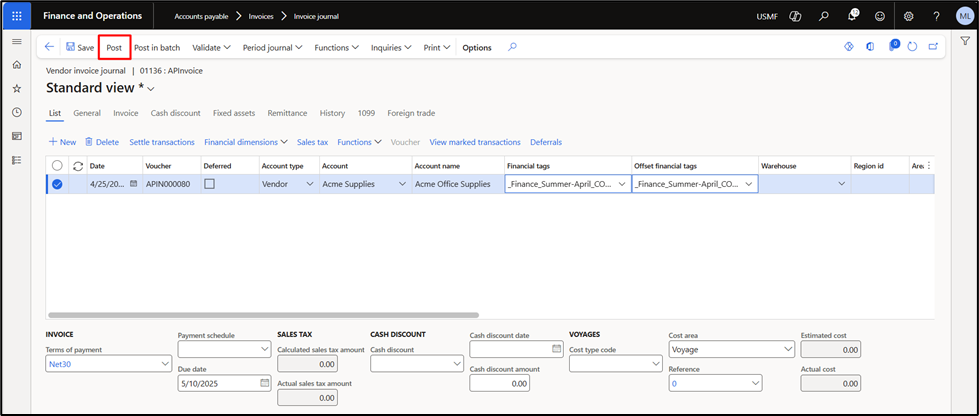
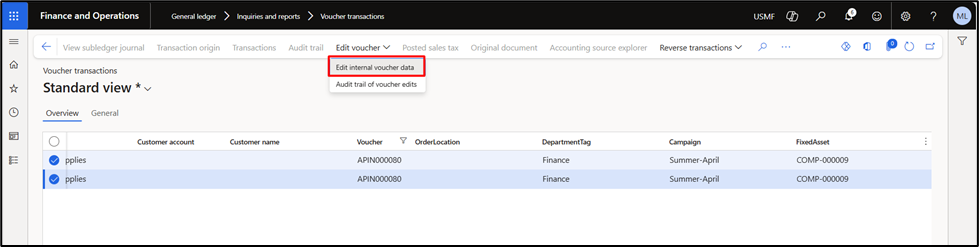
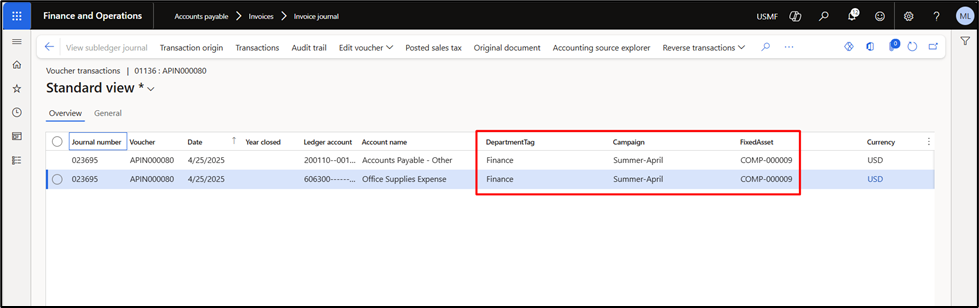
Step 6:
Let’s check the voucher together.
Here, you will observe that financial tags have also been tagged with the posted financial voucher.
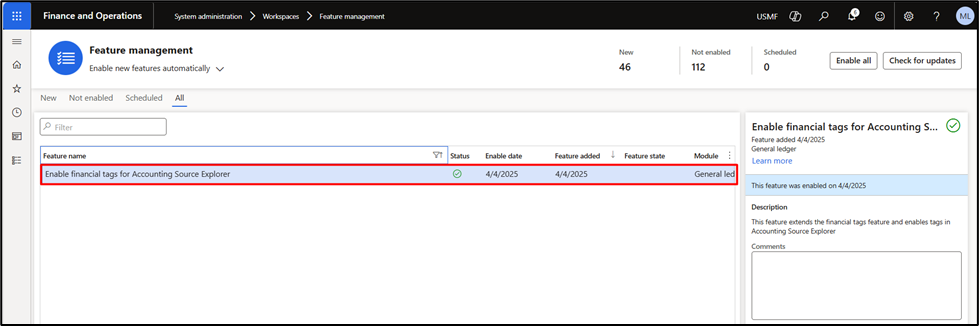
Step 7:
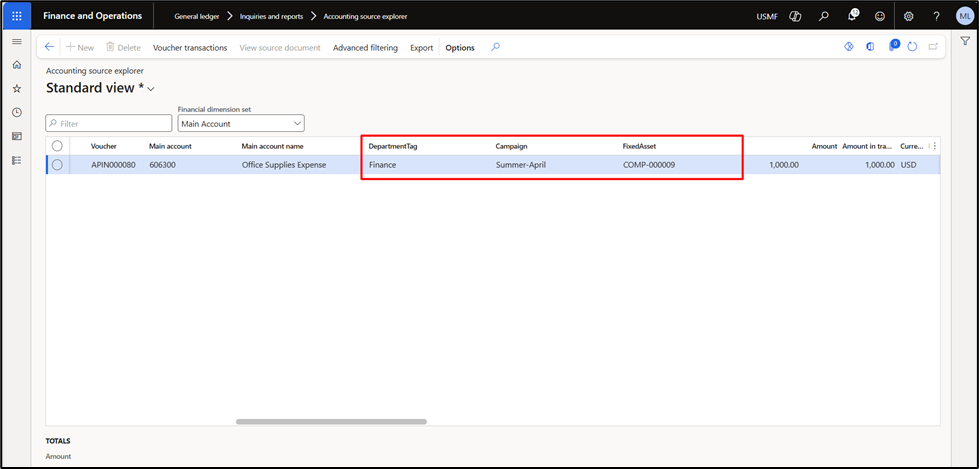
Next, once the “Enable financial tags for Accounting Source Explorer” feature is enabled, you can find these financial tags in the Accounting Source Explorer.
Step 8:
You can explore the accounting source explorer for the earlier posted expense account and check whether these financial tags are available there.
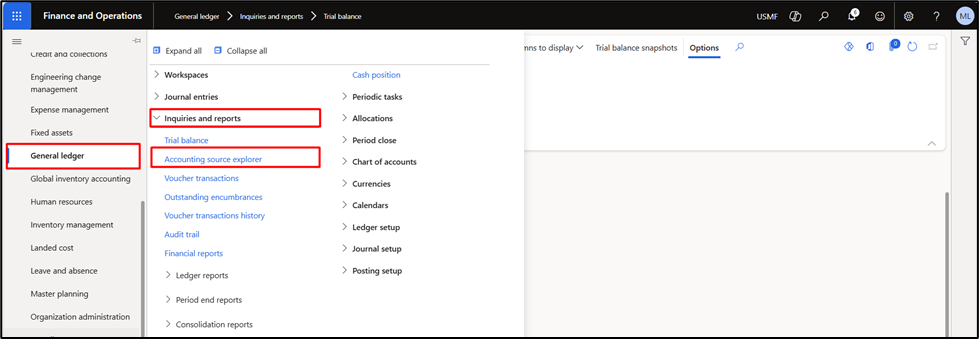
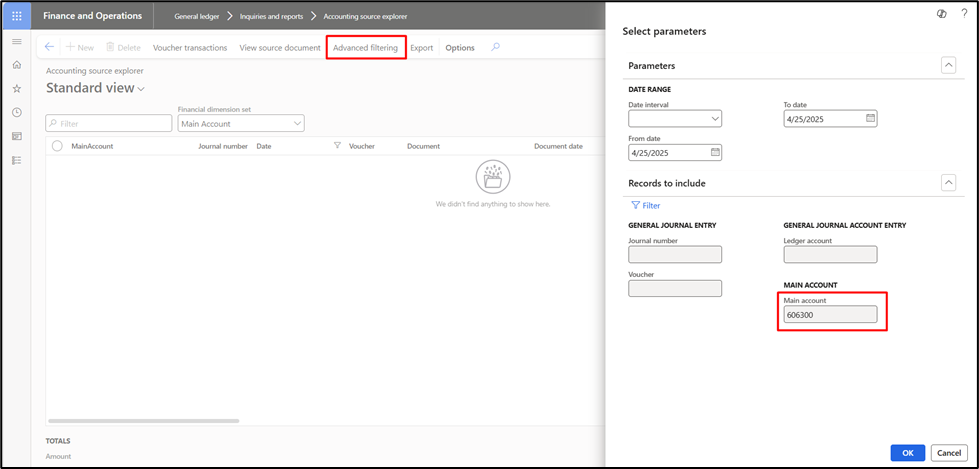
Step 9:
We have confirmed that financial tags and their relevant values are also available in the accounting source explorer.