As organizations modernize their DevOps practices, shifting from centralized version control systems like TFVC to distributed systems like Git has become a strategic priority, especially for teams working on Microsoft Dynamics 365 Finance & Operations (F&O). Git not only enables better collaboration and faster delivery cycles but also integrates seamlessly with Azure DevOps Git, making it the preferred choice for development teams.
In this blog, we’ll walk you through everything you need to know to start with Git for Dynamics 365 F&O projects. You’ll learn how to configure Git, use key commands in Visual Studio, adopt best practices for commits and pull requests, and execute a smooth migration from TFVC to Git. Whether optimizing your version control practices or planning a full migration, this guide offers actionable steps to help you modernize your DevOps approach confidently.
Why do we use Repos in DevOps for D365 F&O development?
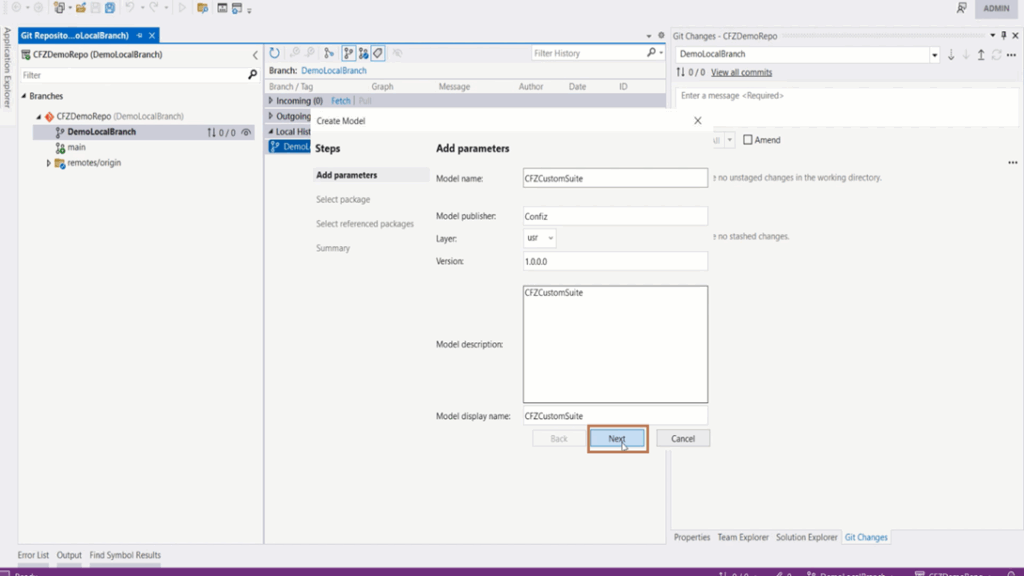
In DevOps for Dynamics 365 Finance and Operations (F&O) development, repos (repositories) are used primarily for version control. This allows developers to track changes to their code over time, collaborate effectively with other team members, and manage different codebase versions. It also ensures smooth development and deployment processes by facilitating branching, merging, and code reviews, all within a centralized system like Git Azure DevOps.
Key benefits of using Repos in D365 F&O development
- Collaboration
Multiple developers can work on the same codebase simultaneously, each making changes on their own branch and merging them into the main codebase to avoid conflicts.
- Version control
Track every change made to the code, allowing you to revert to previous versions if needed easily.
- Code review process
Enable team members to review each other’s code changes before merging them into the main branch, improving code quality.
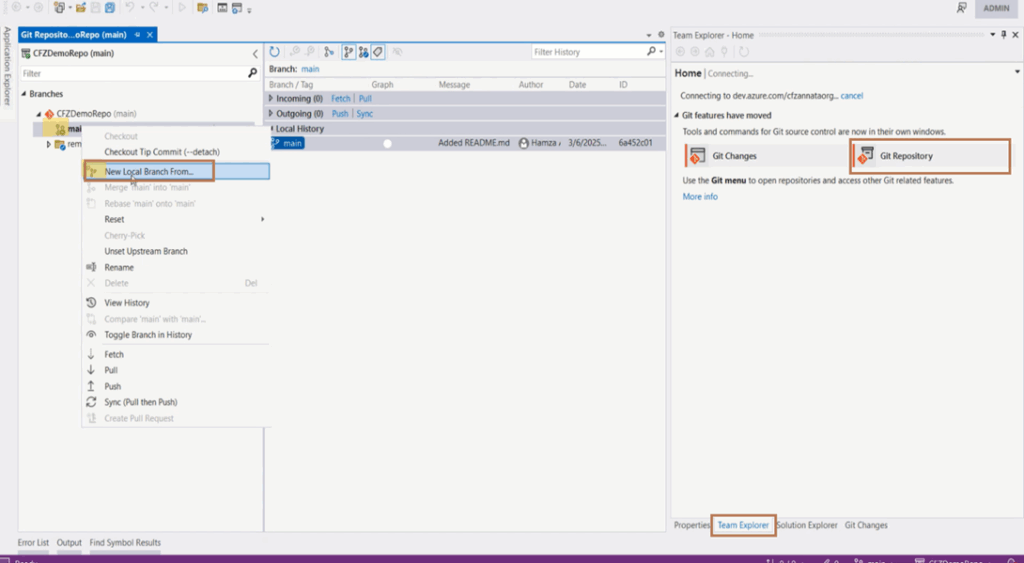
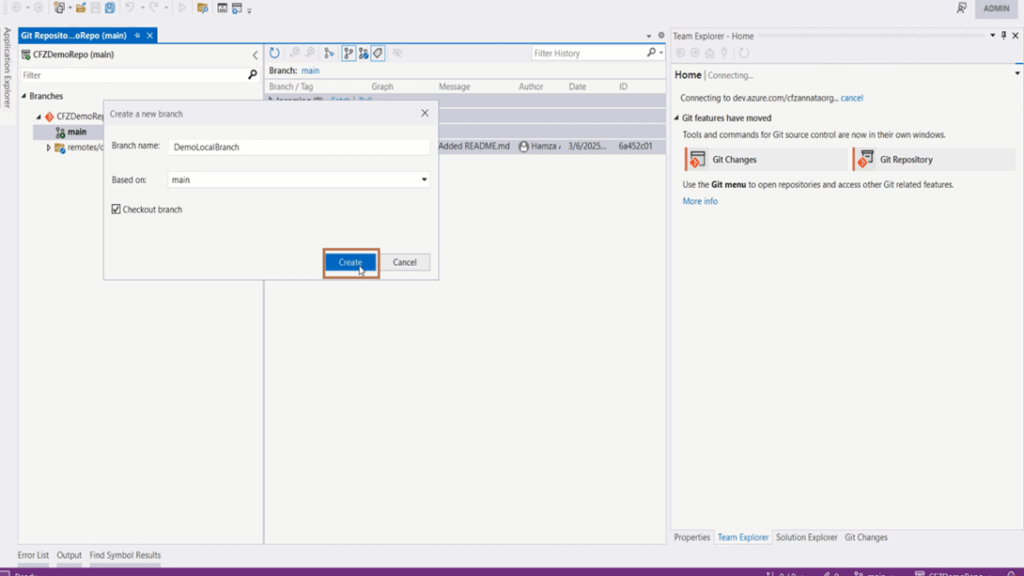
- Branching strategies
Create different branches for development, testing, and production environments. This allows for isolated testing and deployment of new features without affecting the live system.
- Automated build and deployment
Integrate with CI/CD pipelines in Azure DevOps to automatically build, test, and deploy code changes to different environments based on commits to the repo.
- Git as the preferred version control system
Most modern D365 F&O development teams use Git as the underlying version control system within their repos, due to its flexibility and popularity.
- Branching strategy
Choosing a suitable branching strategy (like feature branching, trunk-based development) is crucial for efficient collaboration and managing different code versions.
Importance of Git
Git is a modern, distributed version control system that is critical in today’s software development practices. It allows developers to work independently with a complete copy of the codebase, enabling faster performance and offline access. Git simplifies collaboration by supporting efficient branching and merging, which helps teams develop features, fix bugs, and experiment safely without affecting the main codebase.
It also provides detailed history tracking, making it easy to audit changes and roll back if necessary. Widely integrated with DevOps tools and CI/CD pipelines, Git ensures smooth automation of build, test, and deployment processes. Its open-source nature and strong community support have made Git the industry standard for version control.
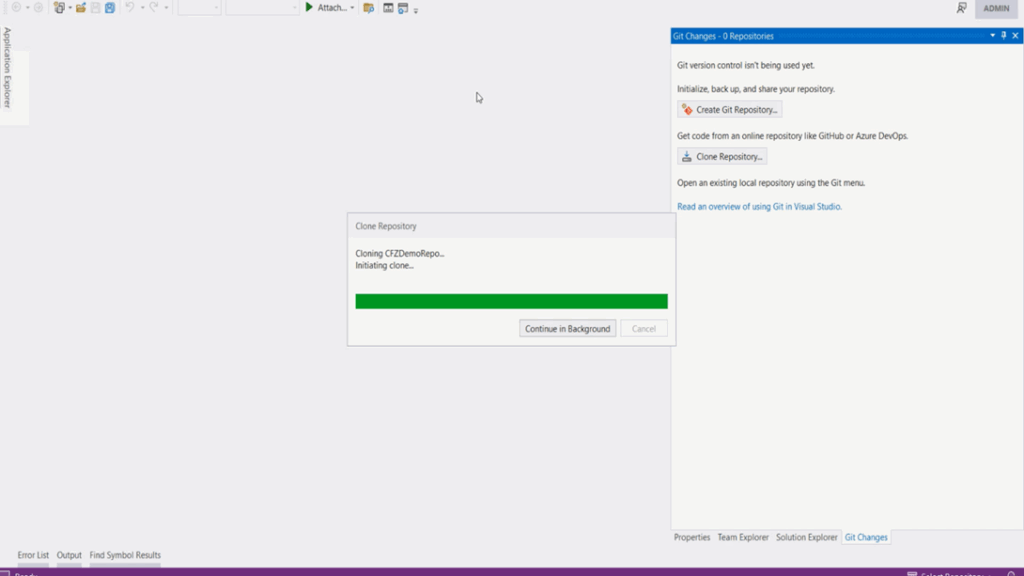
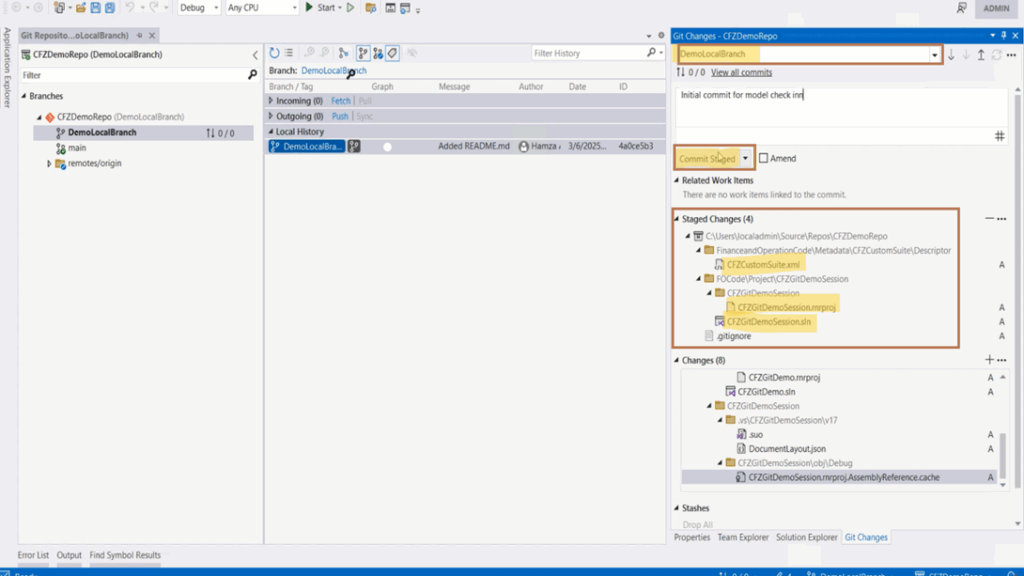
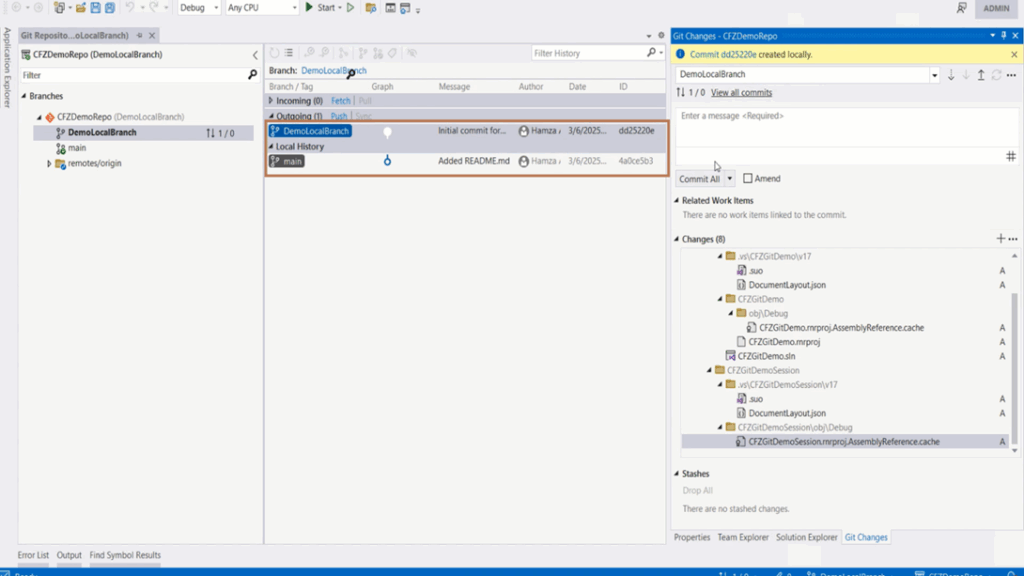
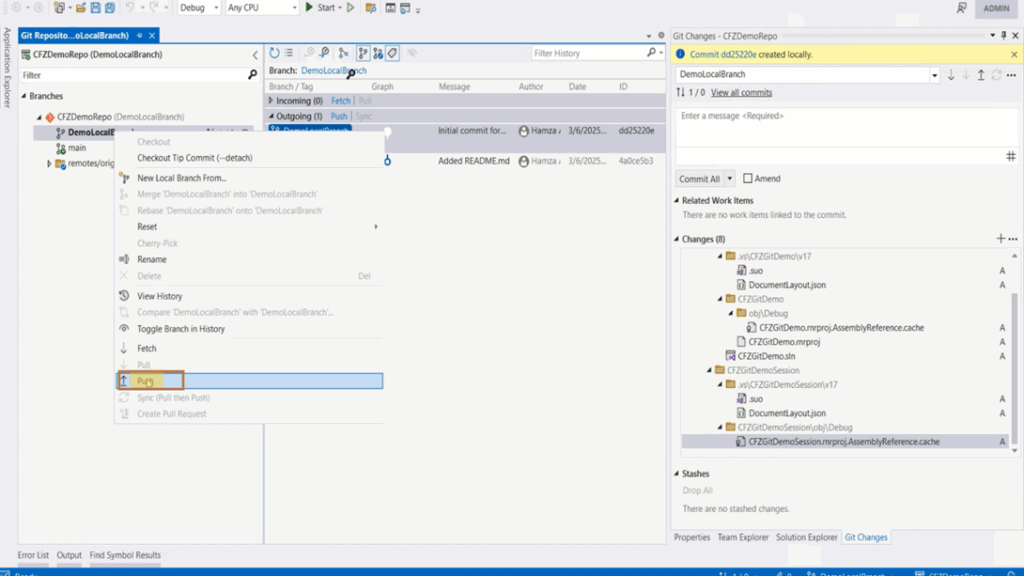
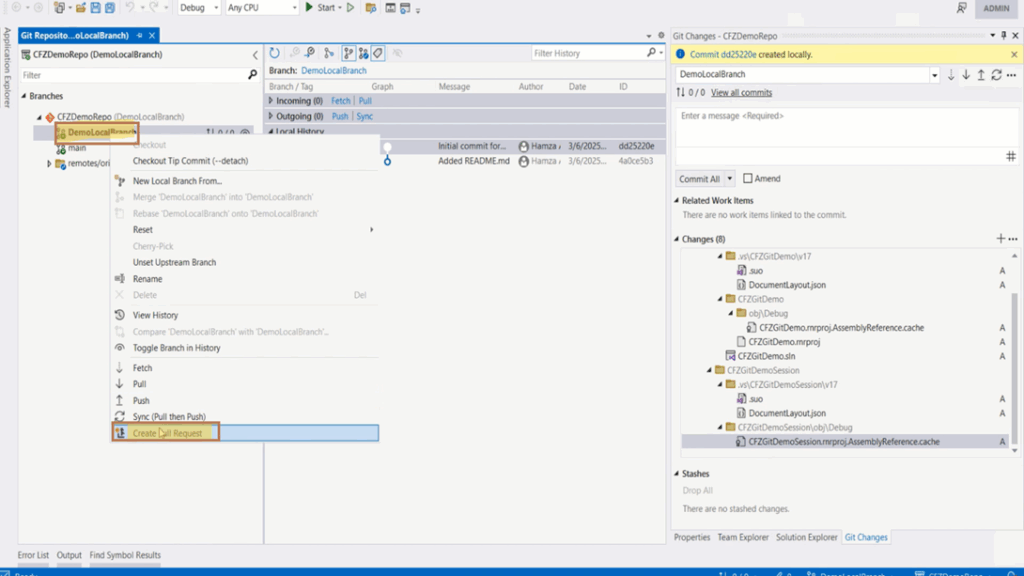
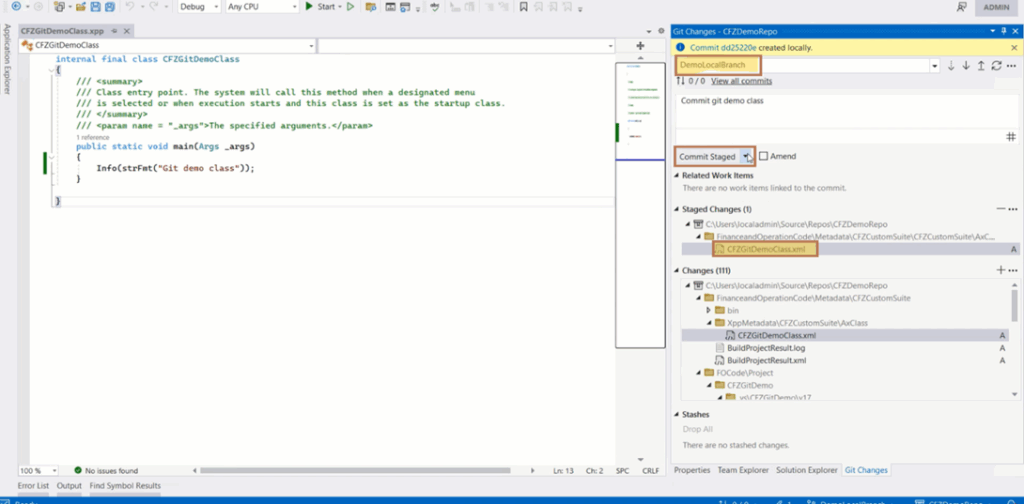
Use of Git fetch, pull, push, and sync for version control in Visual Studio
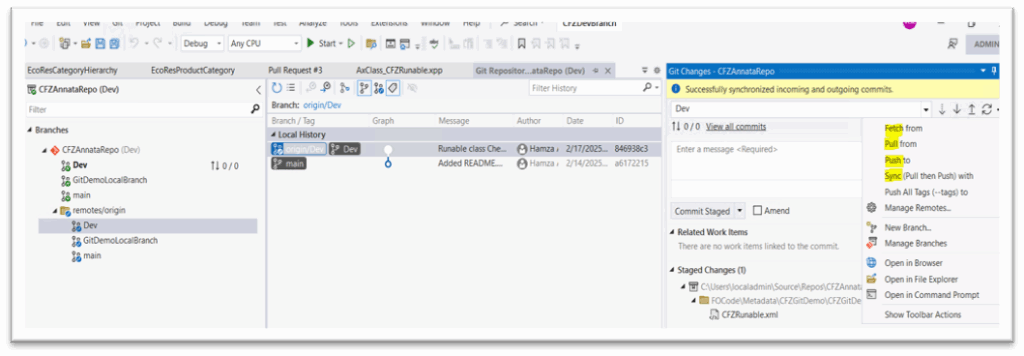
- Fetch
It is important to fetch and pull before you push. Fetching checks for any remote commits you should incorporate into your local changes. If you see any, pull first to prevent any upstream merge conflicts. When you fetch a branch, the Git Changes window has an indicator under the branch drop-down, which displays the number of unpulled commits from the remote branch. This indicator also shows you the number of unpushed local commits.
- Pull
Always pull before you push. When you pull first, you can prevent upstream merge conflicts.
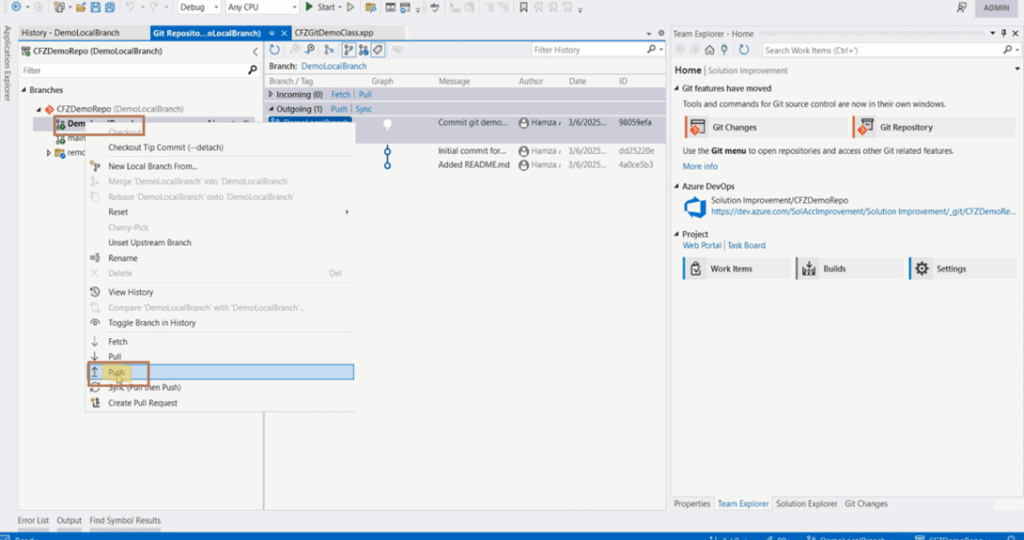
- Push
When you create commits, you have inherently saved local code snapshots. Use Push to push the commits to GitHub, where you can store them as backups or share your code with others.
- Sync
You push commits if your local branch is behind the remote branch. If you try to push, a dialog prompts you to pull before pushing.
Use this operation to both pull and then push, sequentially.
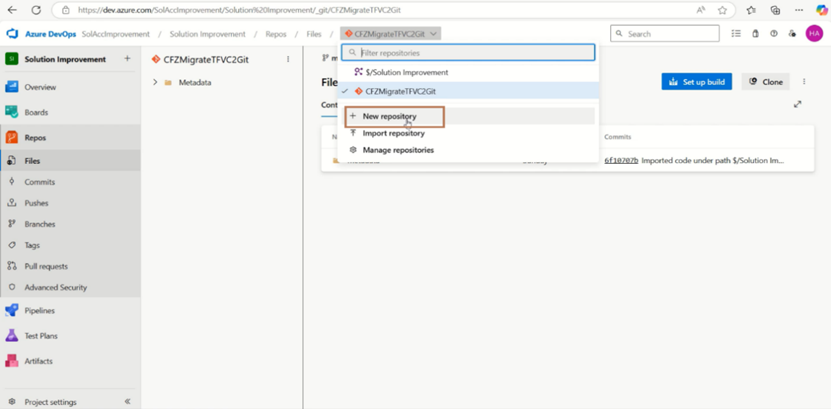
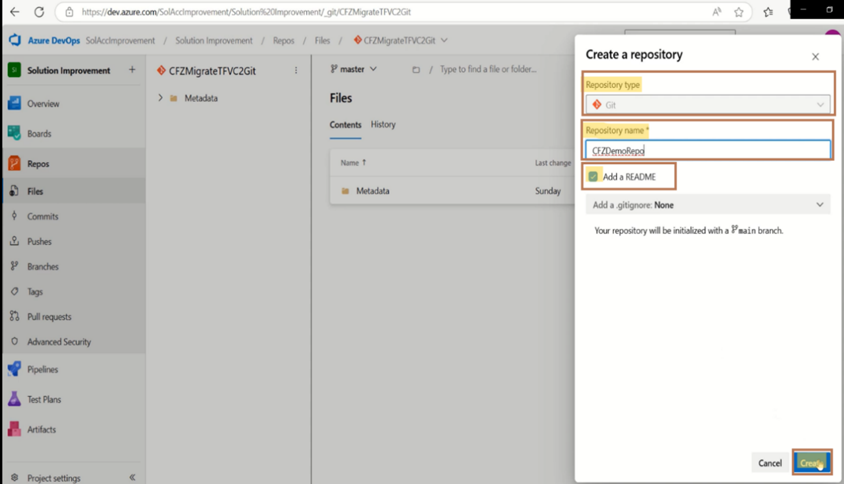
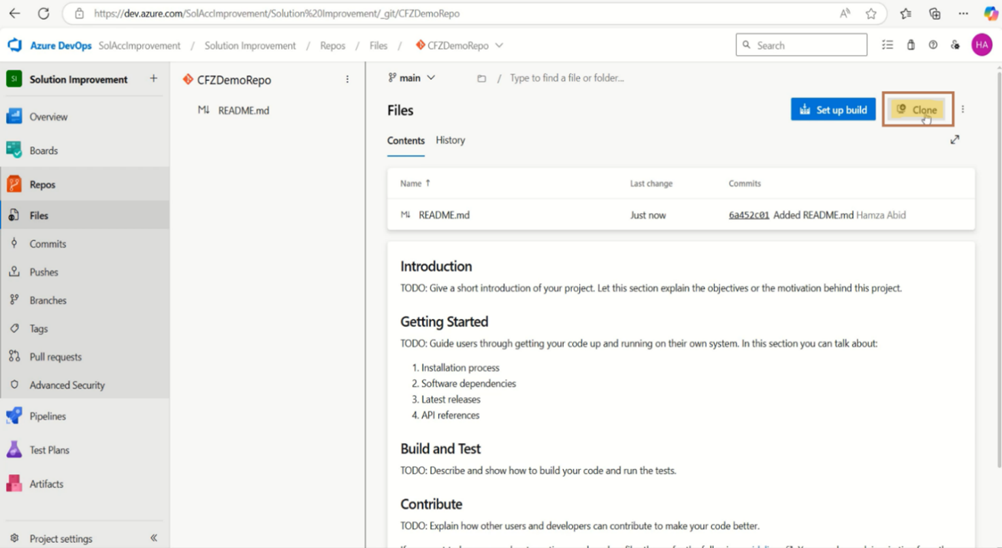
Azure DevOps Git vs TFVC
| Key Points | TFVC | Git |
| Architecture | Centralized Version Control System (CVCS) | Distributed Version Control System (DVCS) |
| Repository Structure | A single centralized repository | Each developer has a full copy of the repository |
| Branching Model | Heavyweight, branching is less frequent | Lightweight, branching is fast and encouraged |
| Offline Work | Limited offline capabilities | Full offline capabilities |
| Performance | Slower due to network dependency | Faster due to local operations |
| Merging | More complex merging process | More flexible and efficient merging |
| Storage Model | Tracks changes per file | Tracks changes per commit (snapshot-based) |
| Collaboration | Developers check in changes to a central server | Developers commit locally and push to a shared repository |
| Learning Curve | Easier for beginners | Fine-grained permission control at the file and folder level |
| Security & Access Control | Fine-grained permission control at file and folder level | Permissions are typically repository-wide |
| Use Case | Best for large enterprises with strict control | Ideal for open-source and distributed teams |
Comparable actions in TFVC and Git
| TFVC | Git | |
| Map Code | ⟷ | Clone |
| Check In | ⟷ | Commit, Push |
| Code Review | ⟷ | Pull Request |
| New Branch | ⟷ | Fork |
| Get Latest | ⟷ | Pull |
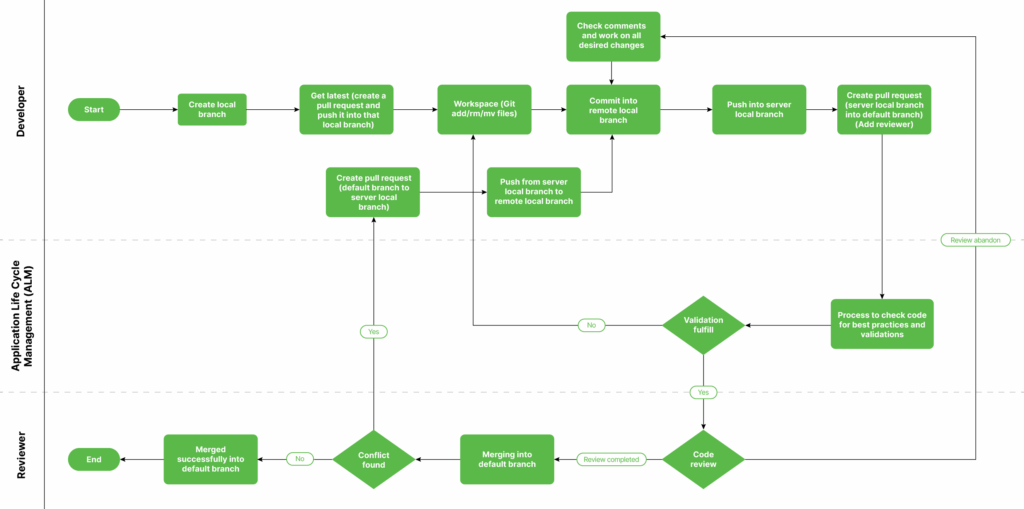
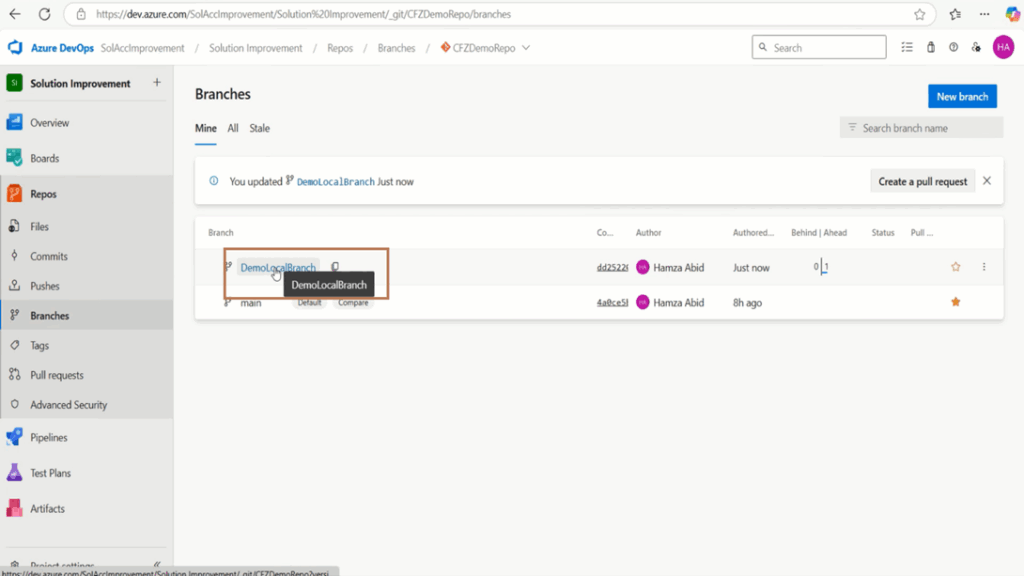
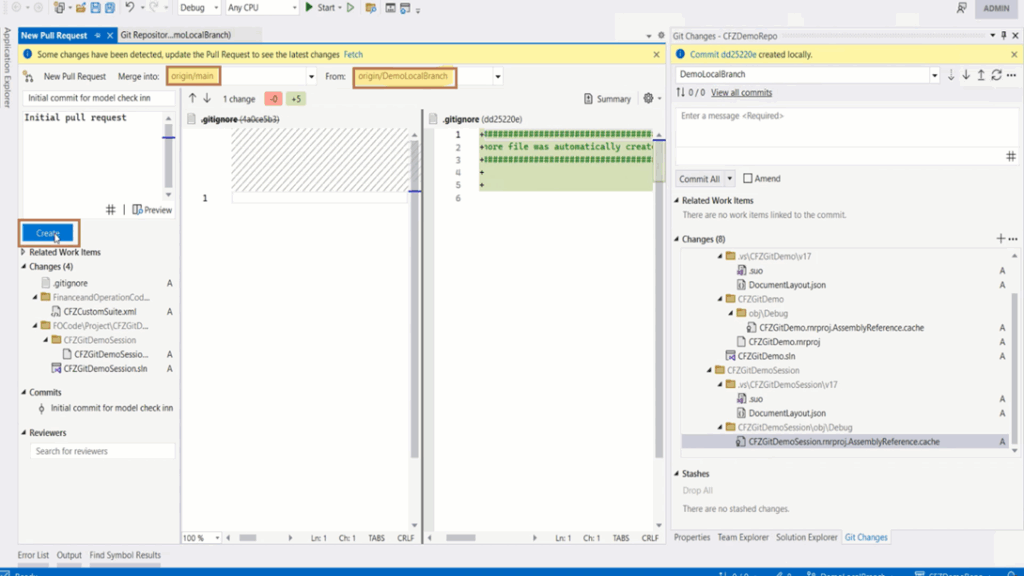
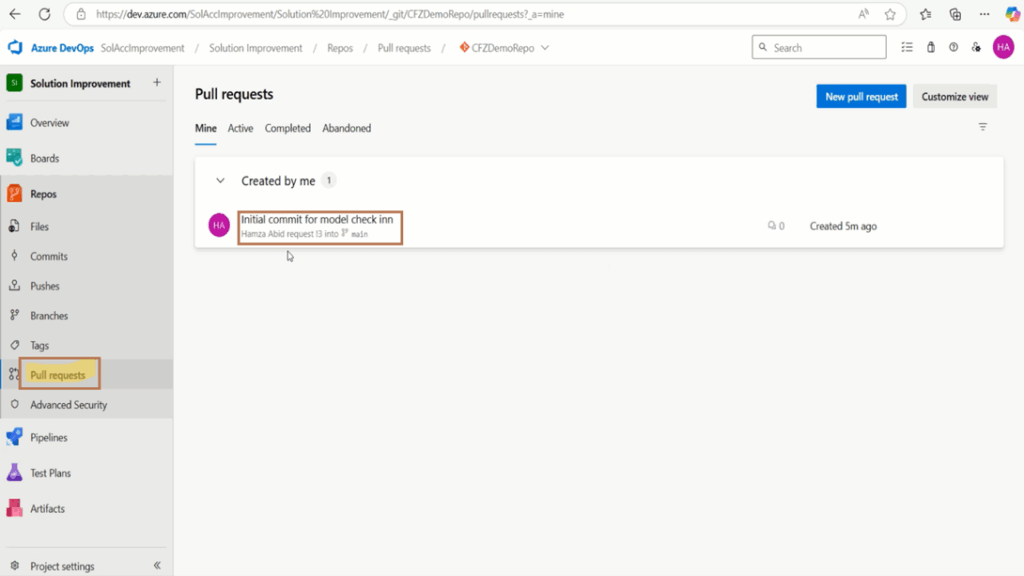
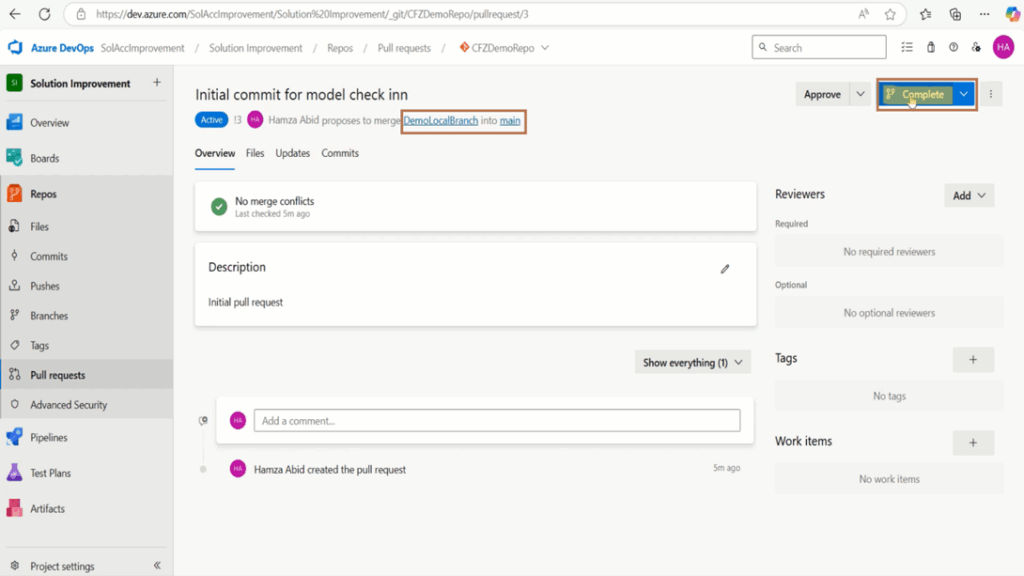
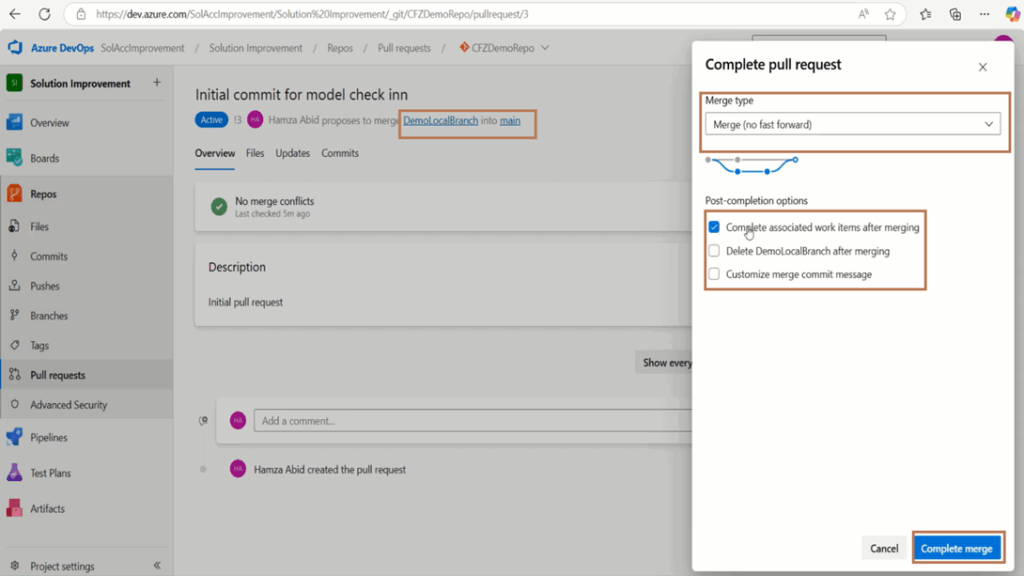
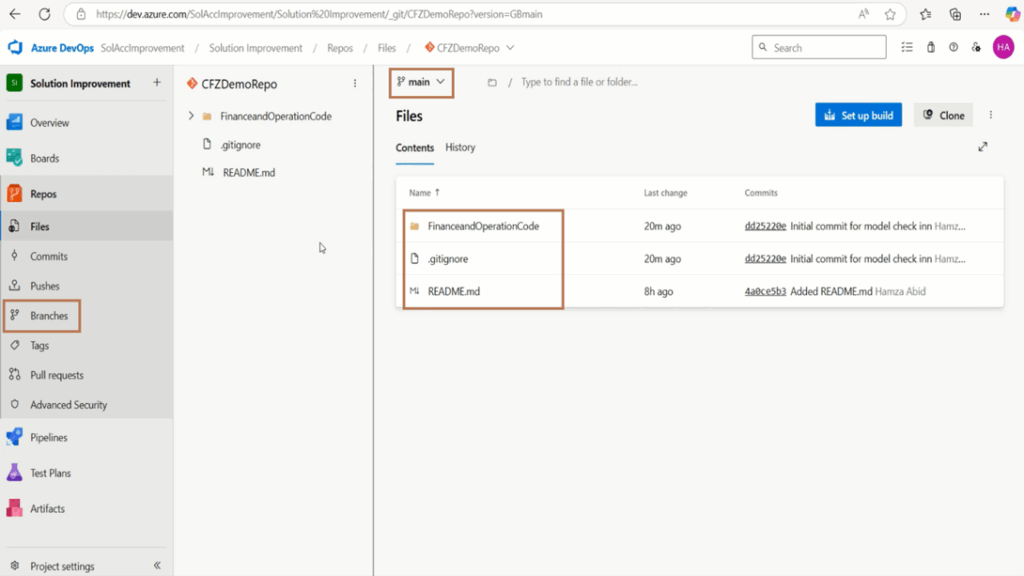
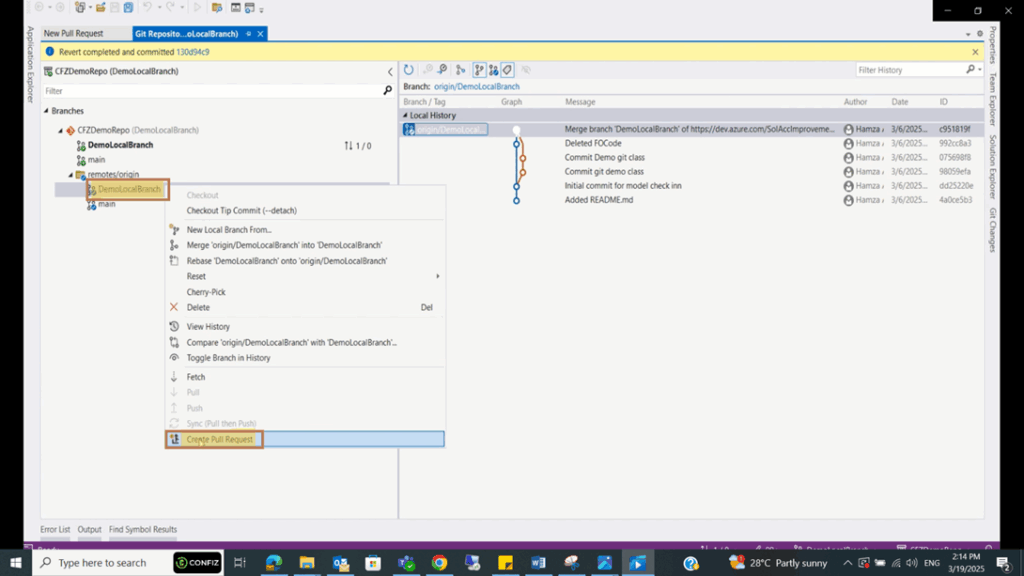
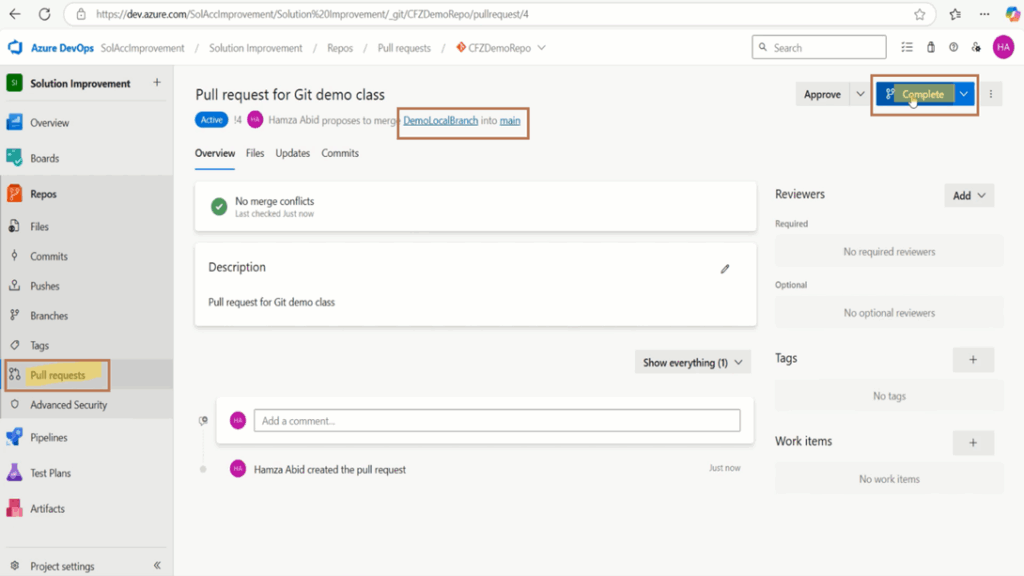
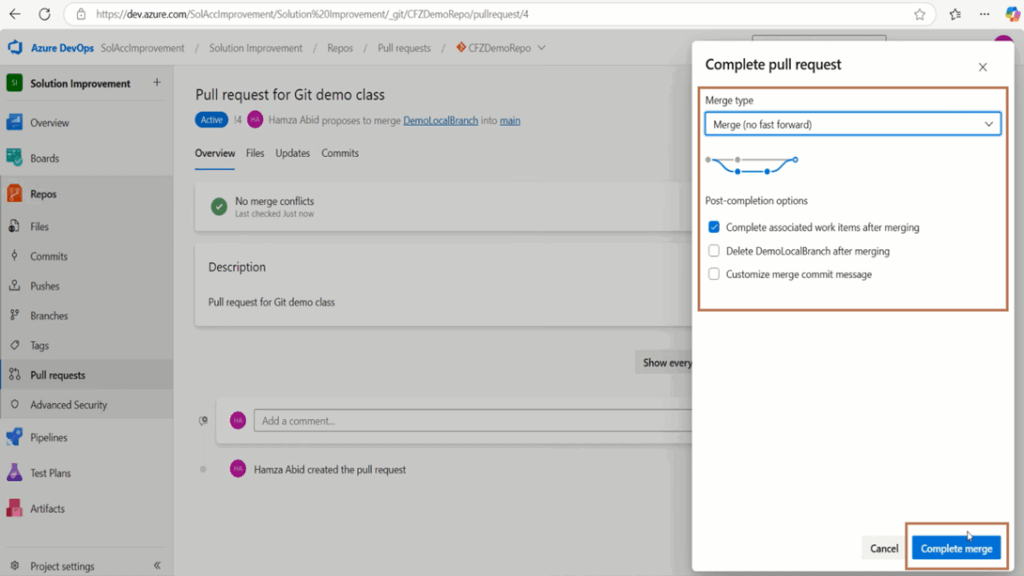
Git review process