Microsoft Dynamics 365 Finance and Operations offers various data integration methods, and recurring integration is one of the most effective ways to automate data imports and exports. This method is particularly useful for businesses dealing with large-scale data transfers that need to be processed on a scheduled basis without manual intervention.
This blog will explore the concept of recurring integration in D365FO, its key components, setup process, endpoints, and best practices to ensure smooth data automation.
What is recurring integration in Dynamics 365 Finance and Operations?
D365 F&O recurring integration enables businesses to schedule and automate data imports and exports using the Data Management Framework (DMF). This integration method efficiently handles bulk data, reducing manual efforts and enhancing data accuracy.
How can recurring integration help?
- Asynchronous data transfer: Processes data without impacting system performance.
- Uses data entities: Ensures structured data import/export.
- Seamless Azure integration: Communicates with external systems via Azure Blob Storage.
- Error handling and logging: Tracks failures and generates logs for debugging.
- Data integrity and consistency: Ensures accurate data transfer.
Components of recurring integration
To understand how Recurring Integration works, let’s break down its main components:
- Data Management Framework (DMF): This core component handles data imports and exports.
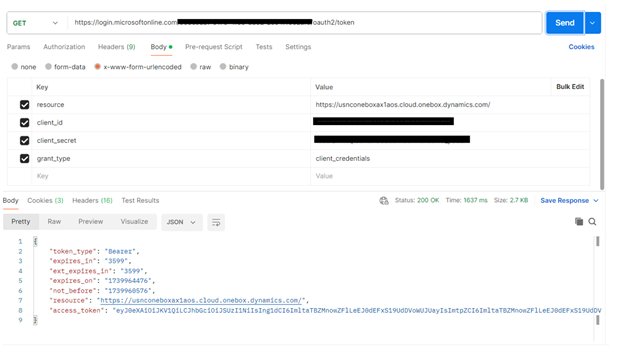
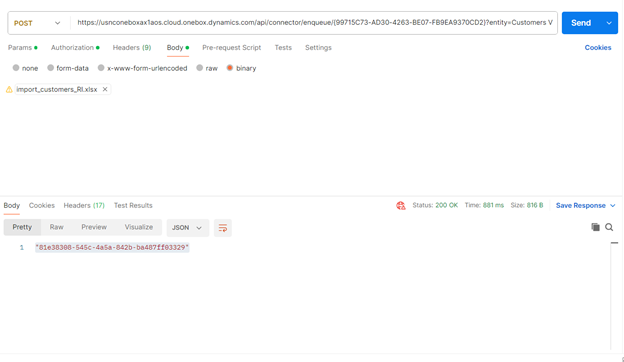
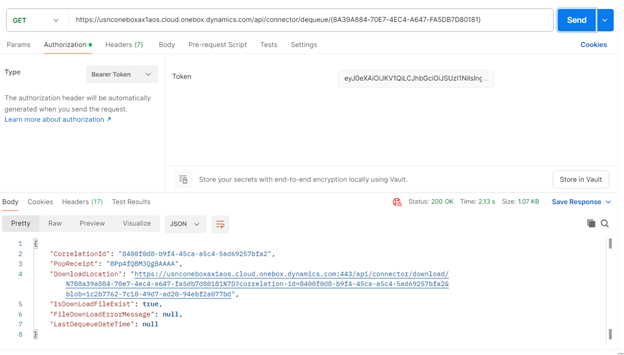
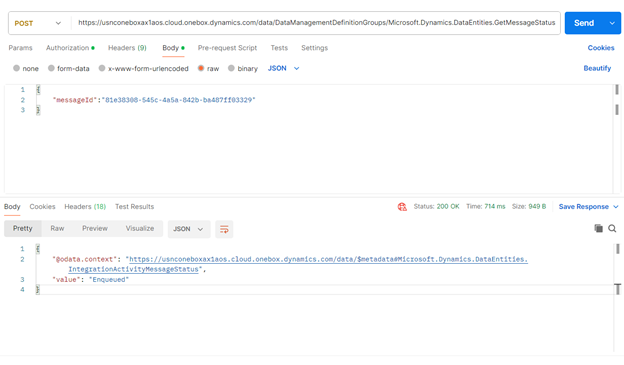
- Recurring integration API: Facilitates communication between external applications and D365 F&O for scheduled data transfers.
- Execution pipeline: Processes data transformations and validations before final import/export.
- Batch processing: Automates execution through batch jobs to ensure timely data processing.
Setting up recurring integration in D365 F&O
Setting up Recurring Integration in Dynamics 365 Finance and Operations (D365 F&O) allows you to schedule and automate data imports/exports between D365 and external systems using the Data Management framework and Azure services.
Here’s a step-by-step guide:
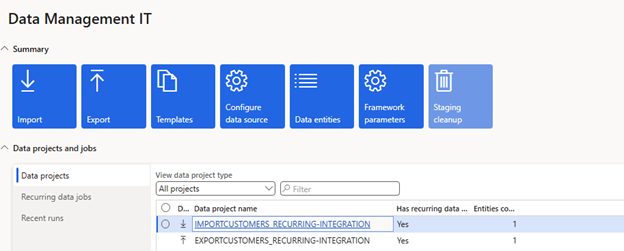
Step 1: Create a data project
- Open Data Management Workspace
- On the main dashboard, click on the Data Management tile.
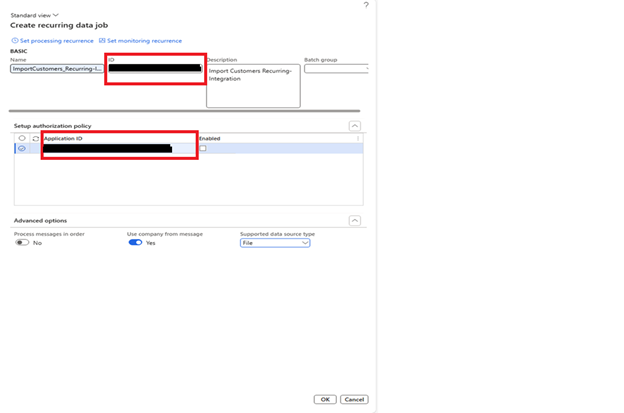
Step 2: Create a new data project
Click on Import or Export to start a new data project.
Step 3: Enter project details
- Provide a valid job name.
- Select the data source and entity name.
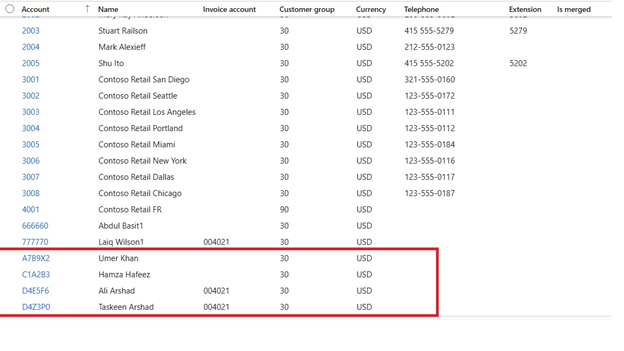
Step 4: Upload data file
- Upload a file for one or more entities.
- Ensure all entities are added without errors.
Step 5: Save the data project
Click Save to finalize the setup.