
D365 Solution Architect
Subscribe to the newsletter
In today’s dynamic business landscape, it’s common for companies to interact with the same entity as both a customer and a vendor. Managing separate payables and receivables in such cases can add to administrative burden and complicate financial processes.
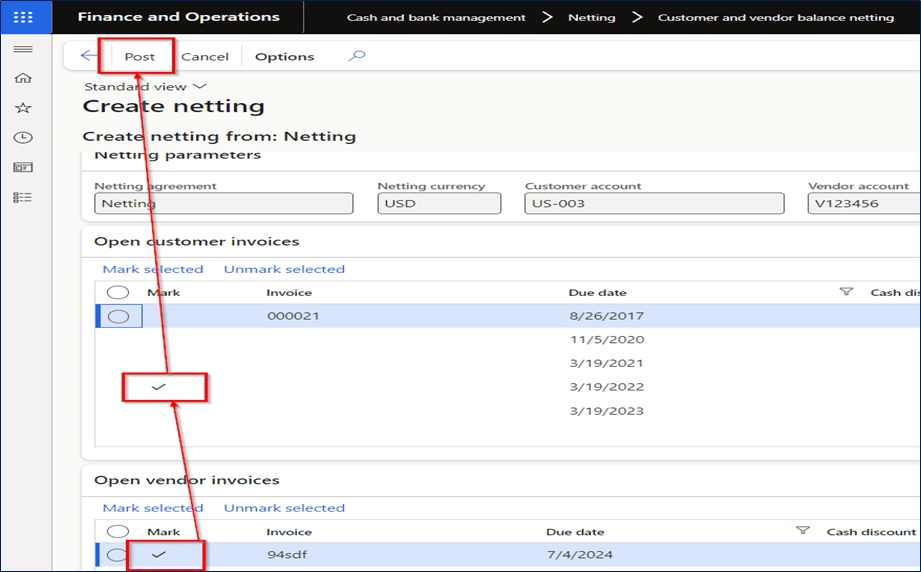
Netting reduces the need for separate payments and receipts between a company and its customer or vendor by consolidating their balances. This approach helps avoid redundant transactions and can lower associated costs such as bank or processing fees.
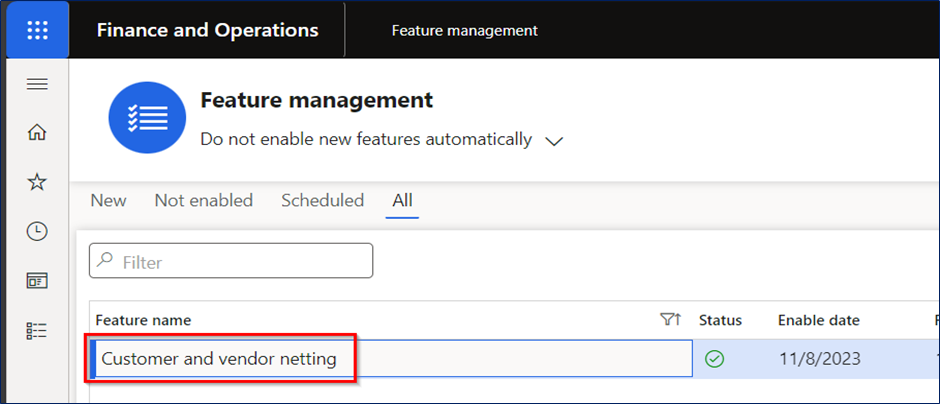
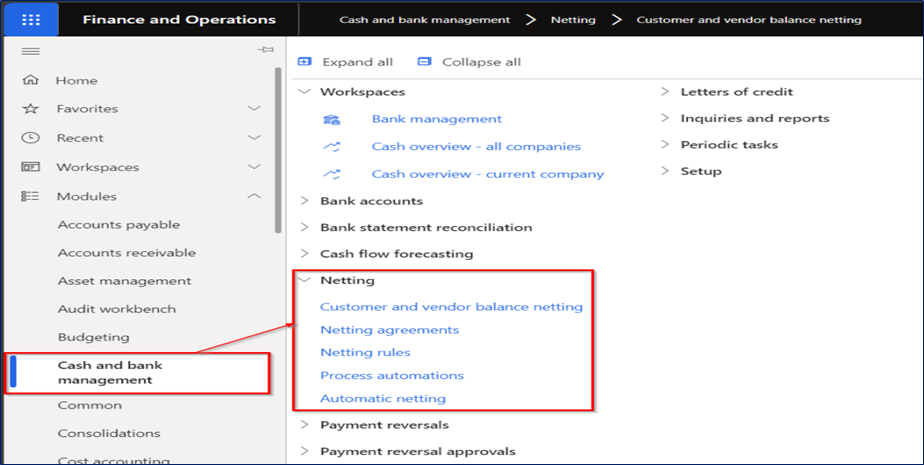
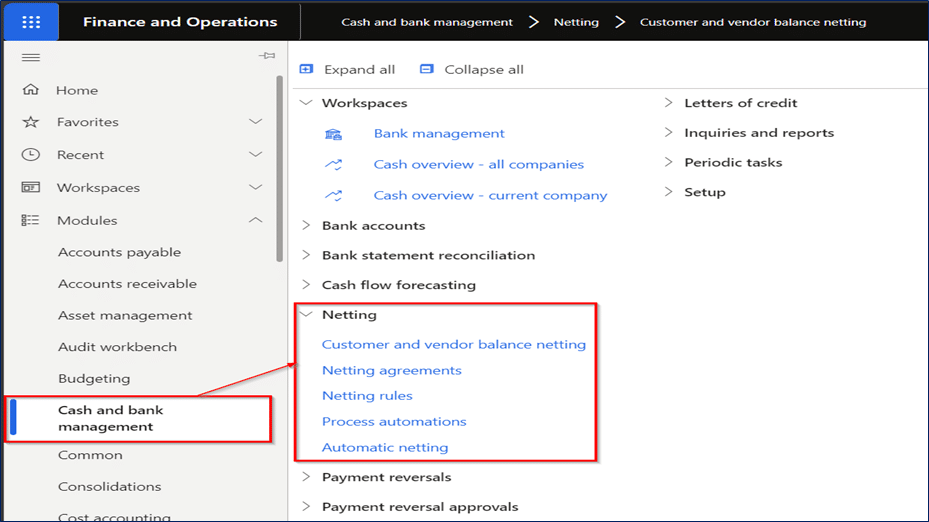
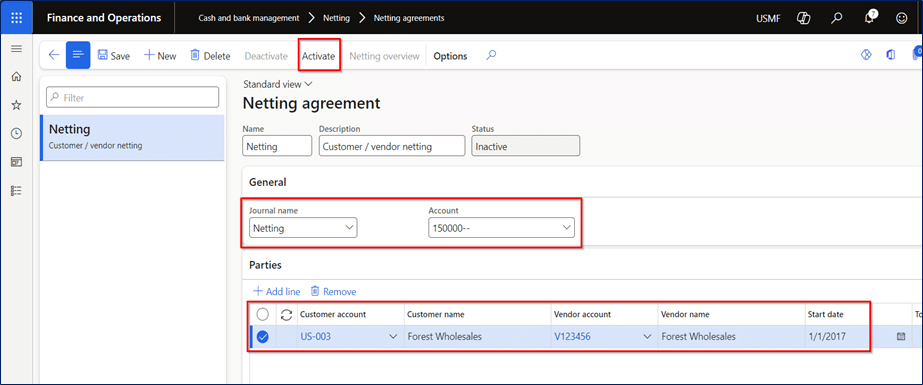
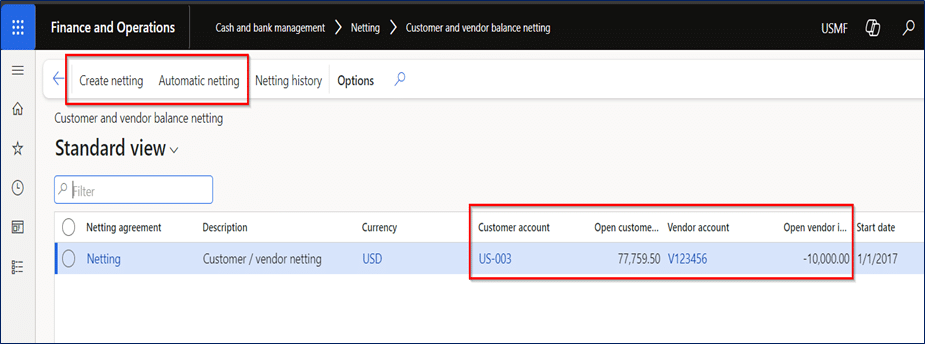
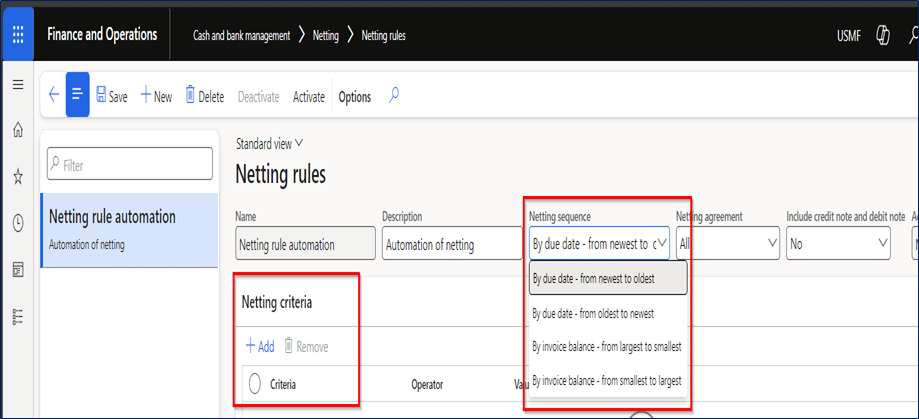
If you’re using Microsoft Dynamics 365 Finance, you’ll appreciate its built-in support for customer and vendor balance netting. This feature allows you to offset payables and receivables when the same entity acts as both a customer and a vendor, simplifying financial reconciliation and reducing unnecessary transactions.
This blog delves into the end-to-end process of implementing and utilizing Customer-Vendor Netting in D365 Finance, covering step-by-step configurations, automation options.
What is customer/vendor netting?
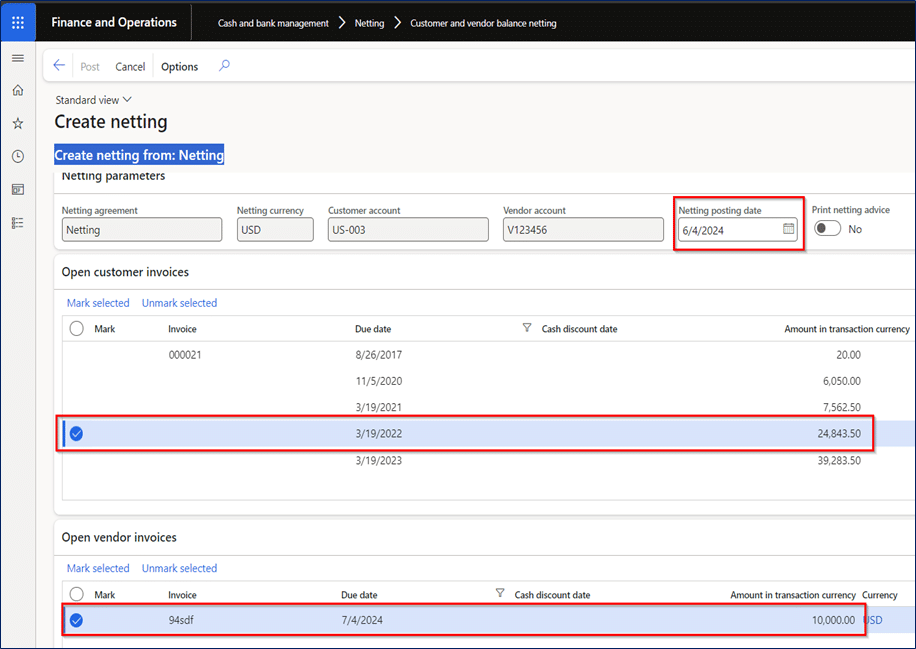
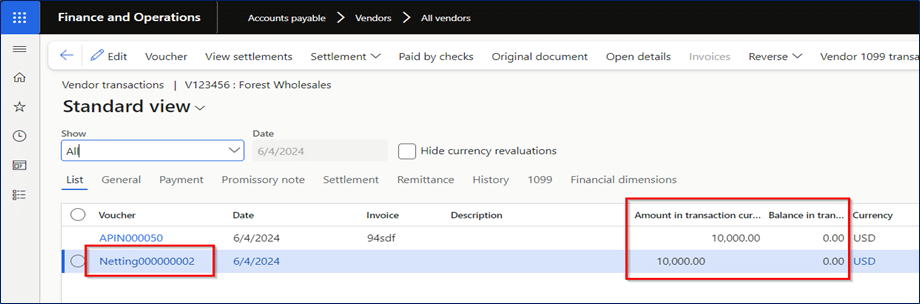
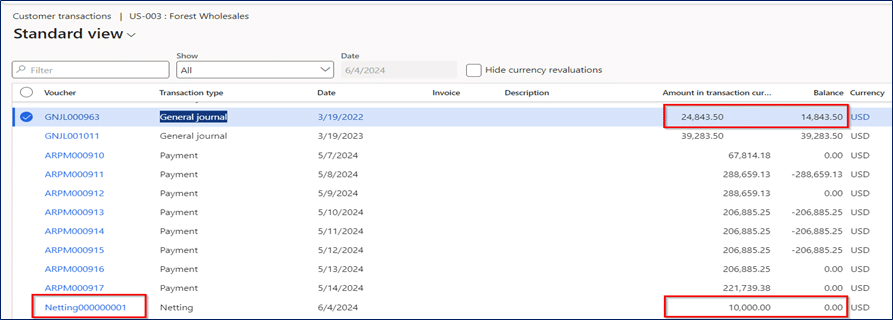
Customer-vendor Netting is a financial process used to offset payables and receivables between the same business entities. If a company is both a customer and a vendor to another organization, netting allows them to settle mutual debts rather than making separate payments and receipts.
Here’s a simple example:
- Company A sells goods worth $5,000 to Company B (A is the vendor).
- Company A also purchases raw materials worth $3,000 from Company B (A is the customer).
Instead of A paying $3,000 and B paying $5,000 separately, netting allows them to just settle the difference – in this case, B would pay A $2,000.
Benefits
- Reduces the number of transactions and bank fees
- Simplifies reconciliation and improves cash flow visibility
- Lowers administrative workload for both parties
It offsets mutual balances, reducing redundant transactions, improving cash flow management, and optimizing financial efficiency.
Step-by-Step process to enable and use customer/vendor netting in Dynamics 365 Finance
To work with this option, first enable the feature ‘Customer and vendor netting.’
Step 1: Enable customer-vendor netting in feature management
- Navigate to Workspaces > Feature Management.
- Search for Customer and Vendor Netting and enable the feature.
Step 2: Set up a netting journal
To be able to use the netting option, you need to create a new journal name. A new journal name type ‘Customer and vendor netting’ is available and needs to be chosen for this journal:
- Go to General Ledger > Journal Setup > Journal Names.
- Click New, enter a name, and set the Journal Type to ‘Customer and Vendor Netting.’
Step 3: Configure netting accounts
- Navigate to General Ledger > Chart of Accounts > Accounts > Main Accounts.
- Create a netting account to handle netted amounts.
In our demo environment, within the USMF company, customer US-003 (Forest Wholesales) has open invoices. Therefore, we assign the same party ID to a vendor role in the USMF legal entity and post a vendor invoice to create an open amount for settlement.
With all these preparations made, we can have a look at the netting options. This is part of the Cash and bank management module.
Step 4: Define netting agreements
First, we need to set up a netting agreement to allow these customer/vendor combinations to net the open amounts between them. This is also where we link the previously created journal name and bridge account. Don’t forget to activate the netting agreement once you’re done, so it can be used!
- Go to Cash and Bank Management > Netting > Netting Agreements.
- Click New, enter details, and select the journal name created earlier.
- Add the customer and vendor accounts that will participate in netting.
Step 5: Perform manual netting
- Navigate to Cash and Bank Management > Netting > Customer and Vendor Netting.
- Click New, select the relevant netting agreement.
- Select the customer invoices and vendor invoices to be netted.
- Click Process Netting to offset balances and generate a settlement journal.
When the netting agreement is activated, you can start using the netting between this customer / vendor combination (and other customer / vendor combination if you have added multiple lines in the netting agreement).
For netting, go to the ‘Customer and vendor netting balance’ option in the Cash and bank management module. Here you can see the open amounts of the customer and vendor behind the netting agreement. Also, you can start netting manually (Create netting) or automatically (Automatic netting via Process Automation) via the two netting options in the top of the form.
In this example, we are using ‘Create netting’ option to start the process manually. In the form that opens, we have selected the posting date and also marked the invoices of the customer / vendor combination that we would to settle with each other:
When marked, click ‘Post’ at the top of the form:
While the posting process is in progress you get an info message about this.
When finished on both the vendor and customer new transactions are added based on the netting, which also results in settlement of the earlier marked invoices:
Vendor transactions:
Customer transactions:
In this manual netting, we selected the invoices that needed to be netted for both the customer or vendor. If you use the ‘Automatic netting’ options, you can use the ‘Netting rules’ to tell D365FO how to settle the invoices.
Step 6: Set up automatic netting (Optional)
You can automatically net customer and vendor balances by defining a netting rule and then running it through a batch job or the process automation framework.
- Navigate to Cash and Bank Management > Netting > Netting Rules.
- Define rules and criteria for auto-netting based on amount, date, or entity
- Select a netting sequence. Four options are available:
• By due date – From oldest to newest
• By due date – From newest to oldest
• By invoice balance – From largest to smallest
• By invoice balance – From smallest to largest
Select the netting agreement scope. If you select All, all the active netting agreements are included in this rule. If you select Selected, define a netting agreement list.
In the automatic netting, in the Include credit note and debit note field, select Yes or No.
On the Netting criteria Fast-tab, define the criteria if users want to automatically net only specific vendor accounts, customer accounts, or invoice currency.
Activate the netting rule.
Step 7: Review and audit netting transactions
- Navigate to Cash and Bank Management > Netting > Netting History.
- View details of past netting transactions, including settled amounts and journal entries.
Conclusion
Customer-vendor netting in Microsoft Dynamics 365 Finance helps simplify financial operations by offsetting mutual payables and receivables. It reduces unnecessary payments, lowers transaction costs, and improves cash flow visibility. To learn how Confiz can support your netting setup, contact us at marketing@confiz.com.