In Dynamics 365 Finance, a Bill of Exchange (BoE) is a financial document used to manage and settle accounts receivable and payable through formal, negotiable instruments. It’s commonly used in countries where BoEs are part of standard business practices (especially in parts of Europe, Asia, and the Middle East).
Setting up and managing Bills of Exchange in Dynamics 365 Finance plays a key role in optimizing collections and streamlining customer payments. With the right configurations, this feature can support more structured financial operations and improve overall control across accounts receivable.
In this blog, we’ll walk through the essential setup steps for customer Bills of Exchange in Dynamics 365 Finance, helping you lay the foundation for a smoother, more automated process.
What is a Bill of Exchange?
A Bill of Exchange (BoE) in Microsoft Dynamics 365 Finance is a negotiable financial instrument that facilitates business payment transactions. Recording, accepting, and settling BoEs within the system enables organizations to manage trade credit, automate collections, and streamline payment processing. The bill of exchange process in Dynamics 365 includes issuance, acceptance, remittance, settlement, and protest handling, ensuring efficient cash flow management and financial control.
Bills of exchange can be processed through the bank in two ways:
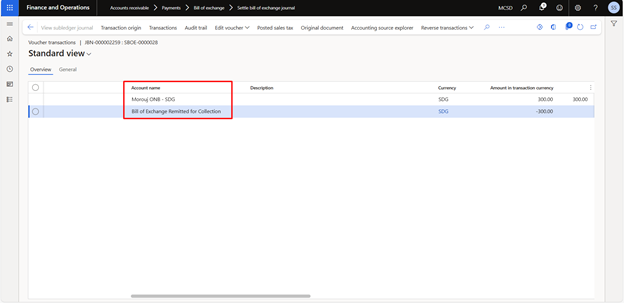
- On the due date: This method, known as “remit for collection,” involves presenting the bill to the bank on the agreed-upon payment date.
- Before the due date: Known as “remit for discount,” this method allows the bill to be drawn on the discount date outlined in the customer’s payment terms. In this case, the discount amount is recorded as an expense, while the remaining amount is treated as a liability until the bank receives the customer’s payment.
How do you set up a bill of exchange?
Setting up Bills of Exchange allows organizations to handle customer and vendor settlements efficiently, especially in regions where BoEs are a common practice. Below is a step-by-step guide to configuring Bills of Exchange in Dynamics 365 Finance.
Step 1: Set up posting profiles of the Bill of Exchange.
First, we will set up the Bill of Exchange posting profiles. For this, use the customer posting profiles page to set up the posting profiles that can be used with Draw, Remit, Protest, Redraw, and Settle the Bill of Exchange.
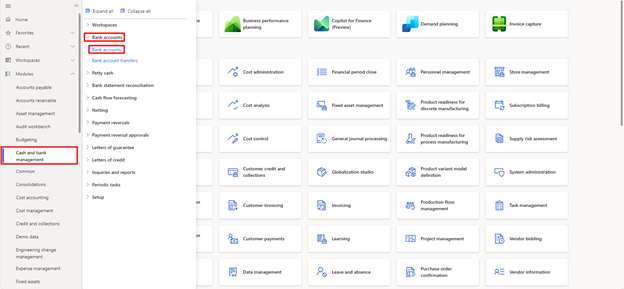
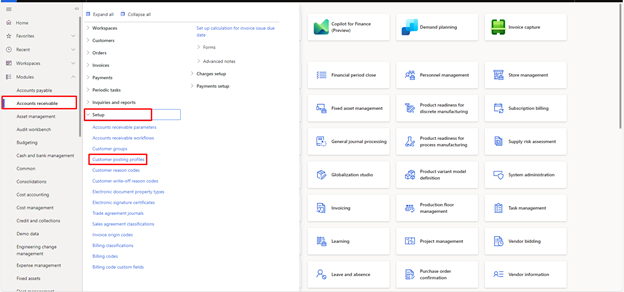
Navigate to Accounts Receivables >> Setup >> Customer Posting Profiles.
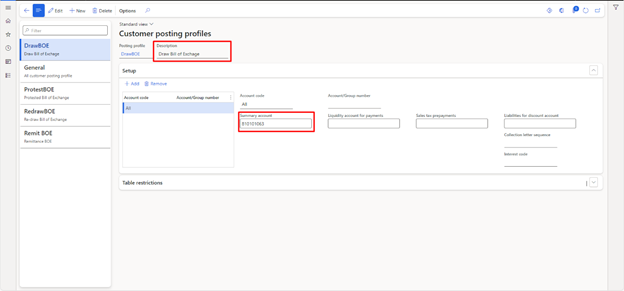
- Summary account field: Select the account where the Bill of Exchange process amounts will be posted. This account is either debited or credited based on the type of bill of exchange transaction.
- Drawing bills of exchange: For drawing bills of exchange, the account is debited when a bill is posted and credited during a remittance for discount or collection.
- Protest bills of exchange: For protest bills of exchange, the account is debited when a protest bill is posted.
- Remittance for collection: For remittances for collection, the account is debited when the remittance is posted. For remittances for discount, the account is debited when the remittance is posted.
- Settle account field: Specify the cash account where the process of bill of exchange amounts is posted upon settlement. This account is debited when a bill of exchange is settled.
- Sales tax prepayments field: Select the summary account to post sales tax amounts related to prepayments made via bills of exchange.
- Liabilities for discount account field: Define the account to post discount amounts for remittances. This account is credited when a discount remittance is posted.
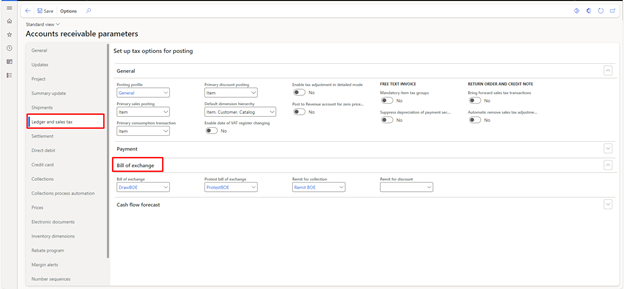
Step 2: Set up accounts receivable parameters for the Bill of Exchange
In the Accounts receivable parameters page, default posting profiles for bills of exchange are specified under the Ledger and sales tax tab. At the same time, number sequences are configured on the Number Sequences tab.
Navigate to Modules >> Accounts Receivable >> Setup >>Accounts Receivable Parameters.
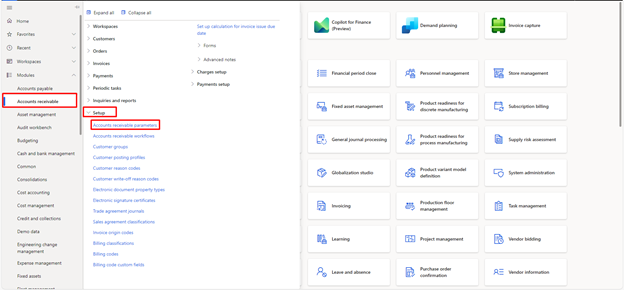
In the Ledger and Sales Tax, go to >> Bill of Exchange >> Define the default posting profiles.
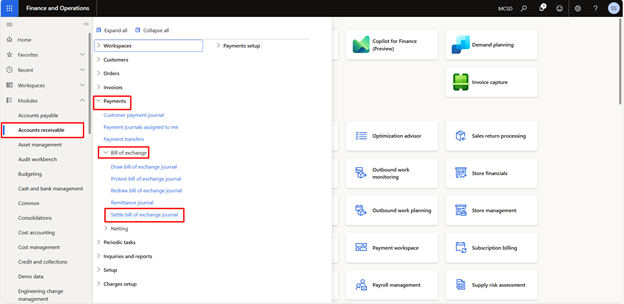
Step 3: Set up journal names for the Bill of Exchange
After the Posting Profiles are set up, we will set up the journal names for the bills of exchange.
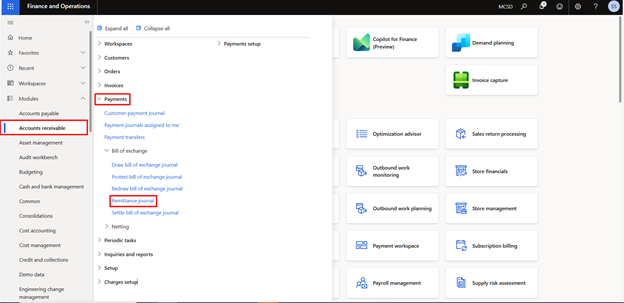
To set up the journal names for the bills of exchange, navigate to Modules >> General Ledger >> Journal Setup >> Journal Names.

Create at least five journal names on the Journal Names page specifically for bills of exchange. Assign the following journal types:
- Customer draws a bill of exchange: Define a journal name for the Draw bill of exchange journal.
- Customer protest bill of exchange: Define a journal name for the Protest bill of exchange journal.
- Customers redraw bill of exchange: Define a journal name for the Redraw bill of exchange journal.
- Customer bank remittance: Define the journal’s name for the remittance journal.
- Customer settles bill of exchange: Define a journal name for the bill of exchange process journal.
Provide the necessary details under each exchange journal’s Bill of Exchange tab on the Journal voucher page.
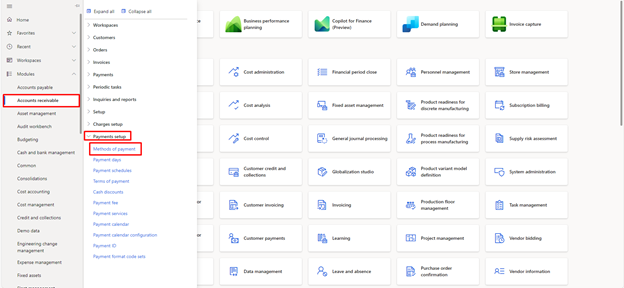
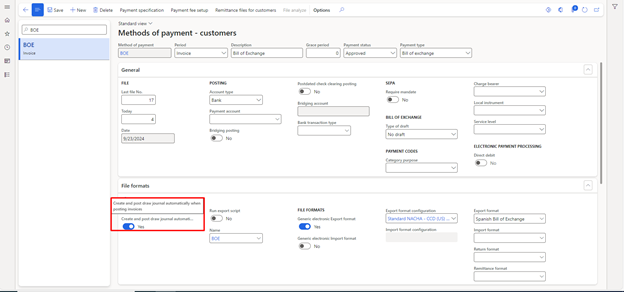
Step 4: Set up the method of payment for the Bill of Exchange
After the journal names are set up, we will also define at least one payment method for bills of exchange. To set up the payment method, navigate to Modules >> Accounts Receivable >> Payment Setup >> Method of Payment.
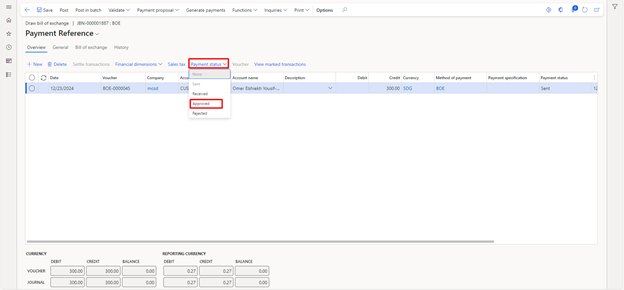
Select the payment status. If it is approved, it must be approved in the journal; otherwise, the system will not allow it to be posted. Similarly, in the payment type, select the bill of exchange.
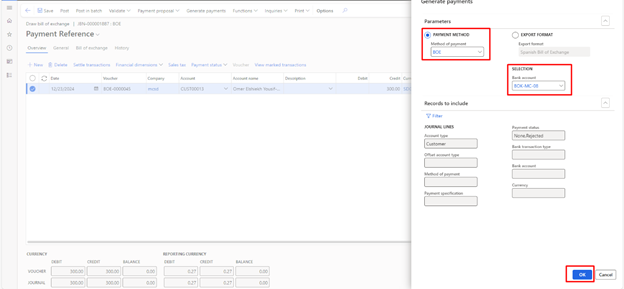
In the file format, we need to select the export format configuration that will be used to generate the remittance file when the bill of exchange is remitted.
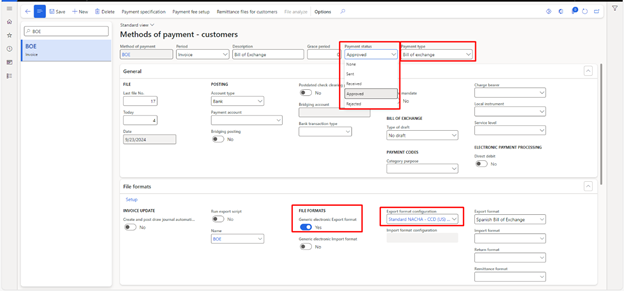
In the invoice update, creating and posting the journal automatically if marked as “YES” will automatically generate and post the bill of exchange journal when the invoice against the customer is posted, given that the customer’s payment method is Bill of Exchange.
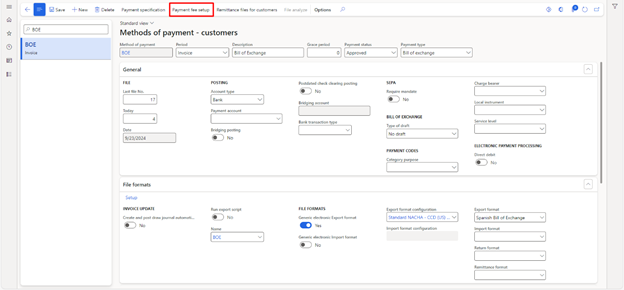
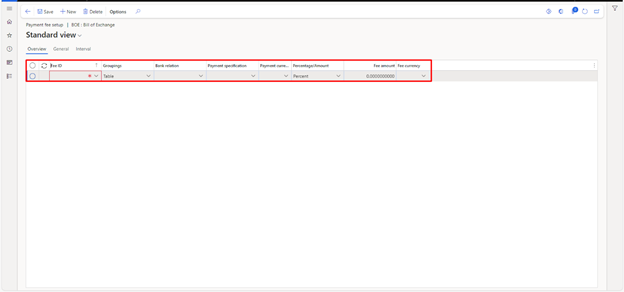
We can also specify the payment fee for the exchange bills. A payment fee is a charge incurred when collecting payments from customers. Each payment fee can have multiple setup lines, which help define how the default amounts are calculated. For example, setup lines can be configured for specific payment methods, specifications, currencies, or periods.
Additionally, setup lines can be based on percentages or fixed amounts determined by day intervals. For instance, an interest percentage can be applied depending on the duration a payment is overdue.
Suppose a bank applies varying fees for different remittance types, such as Collection or Discount. You can create a separate payment fee line for each remittance type to ensure accurate fee allocation.
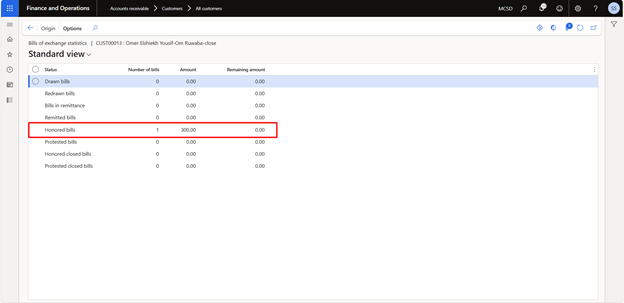
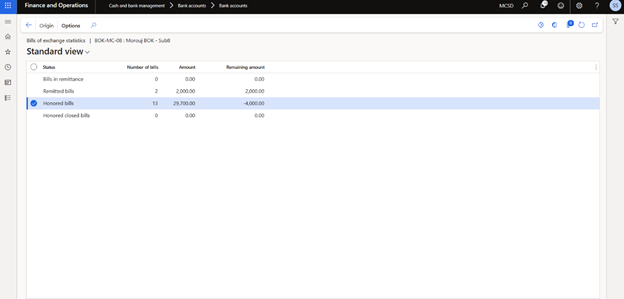
What is the logical process flow of a Bill of Exchange?
The process of a Bill of Exchange is as follows:
- Draw the Bill of Exchange: The initial step involves the vendor drafting and obtaining the customer’s approval.
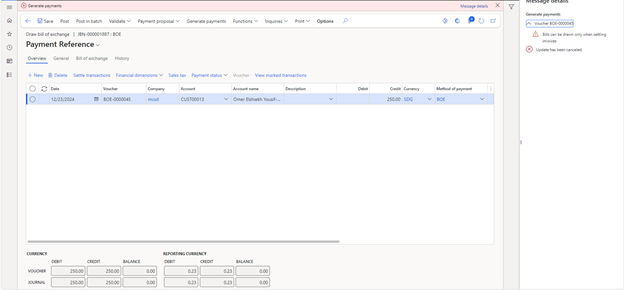
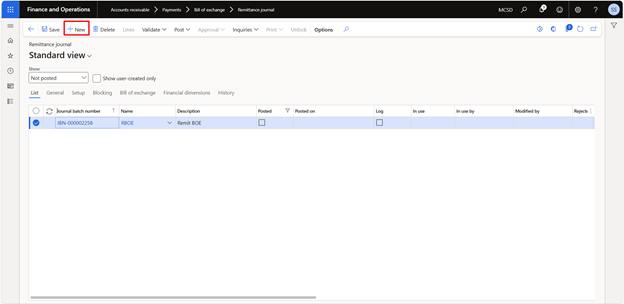
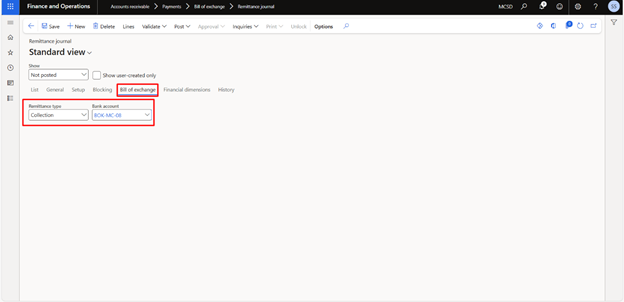
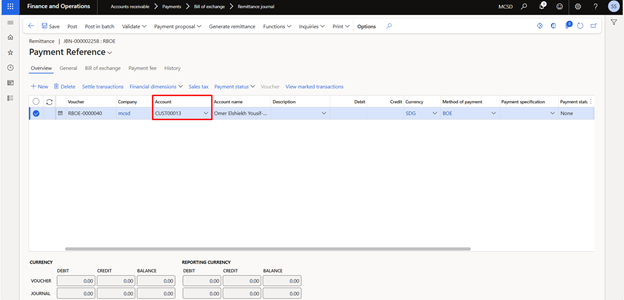
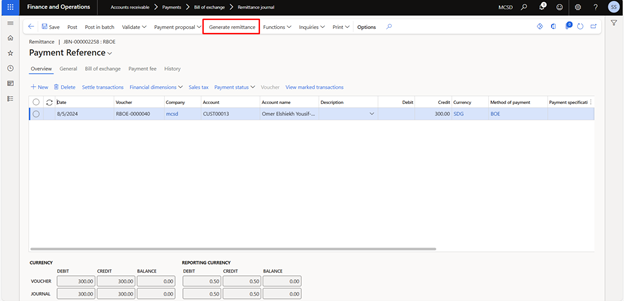
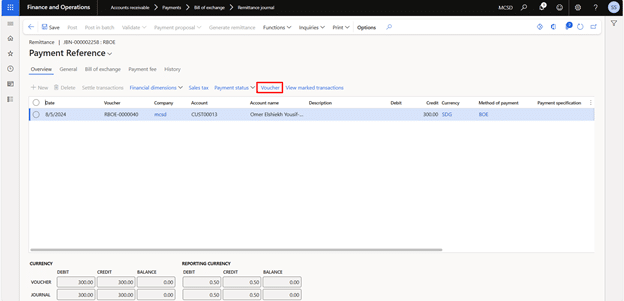
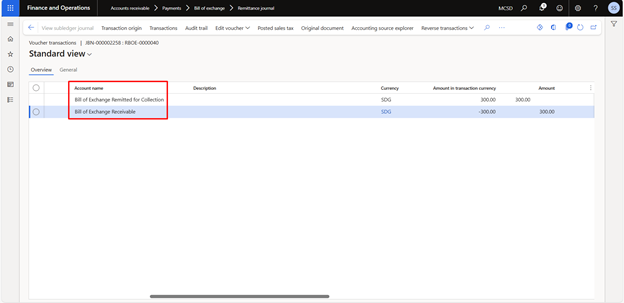
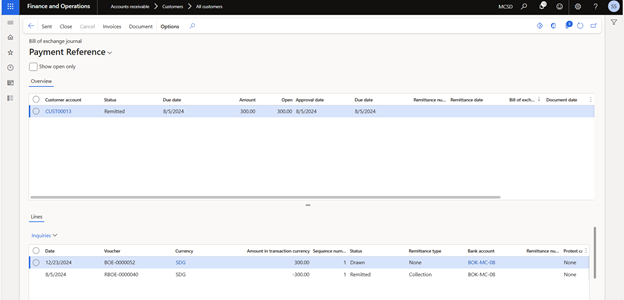
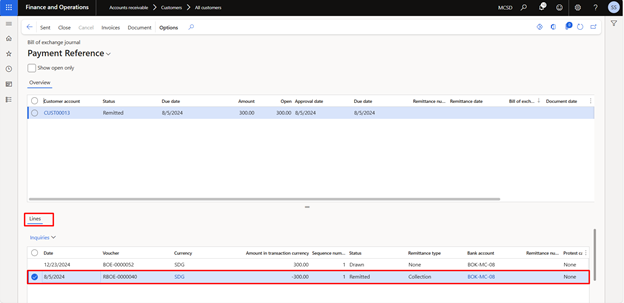
- Remit the Bill of Exchange: Once the customer approves the bill of exchange, the vendor forwards it to the bank, either for collection on the due date or to obtain the funds before the due date as part of the discount process.
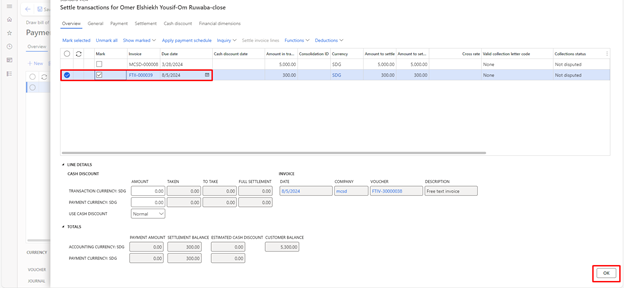
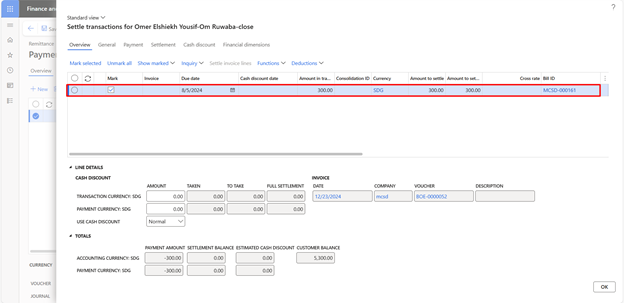
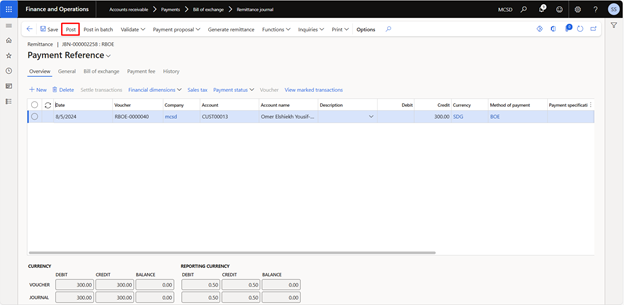
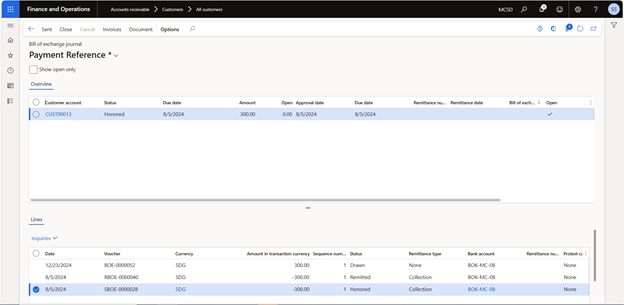
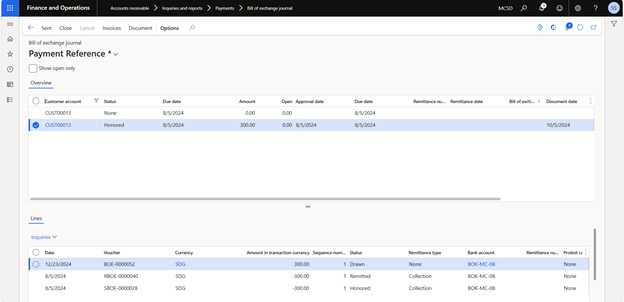
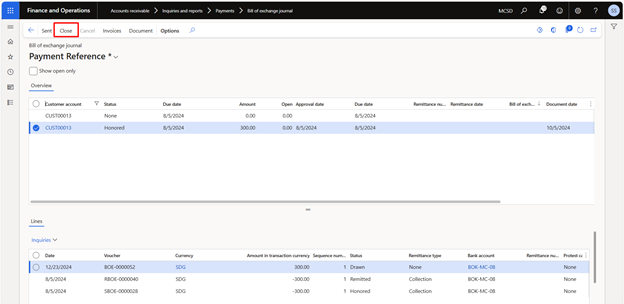
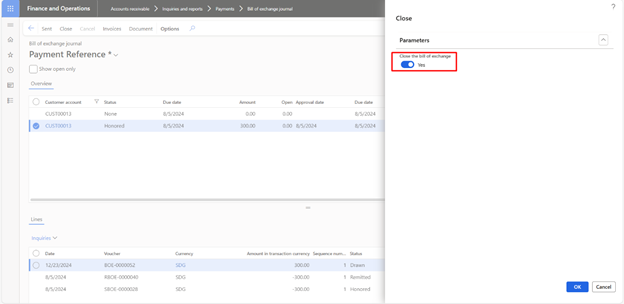
- Settle the Bill of Exchange: This is the third step, where the bill of exchange is settled with the bank to receive funds.
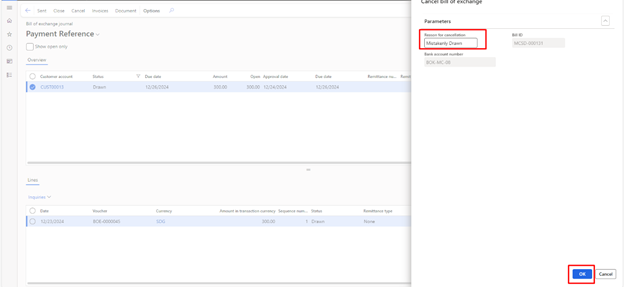
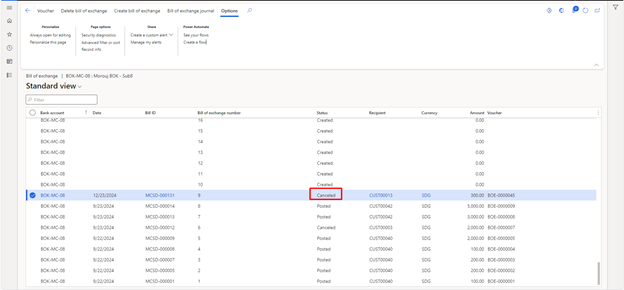
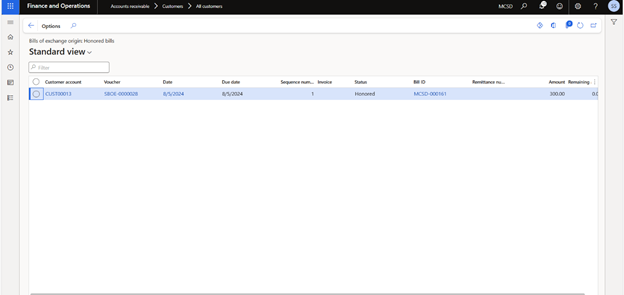
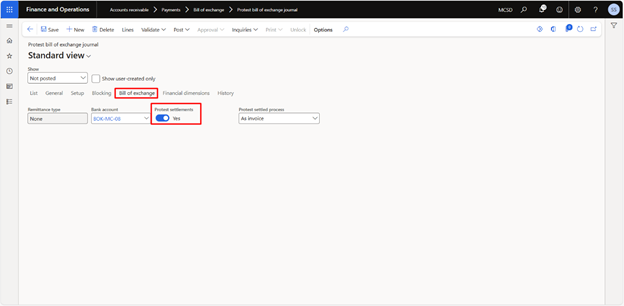
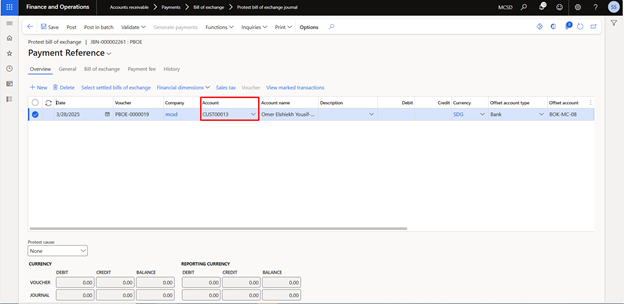
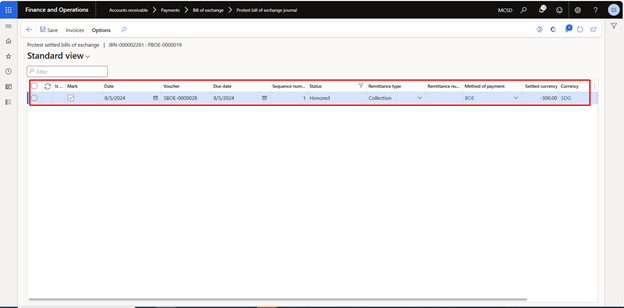
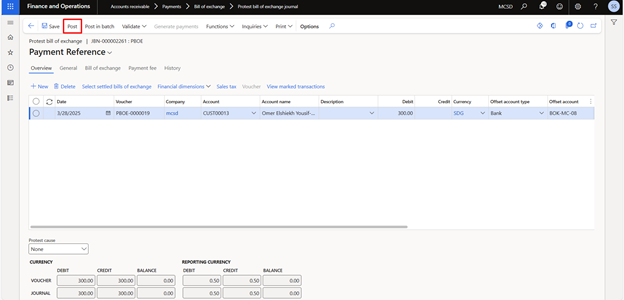
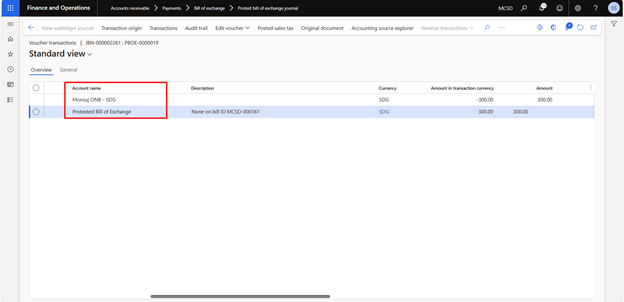
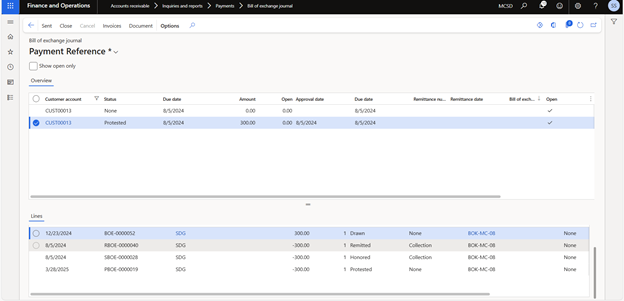
- Protest the Bill of Exchange: This step entails a formal declaration confirming that the bill of exchange has been dishonored, serving as documented evidence of nonpayment. Understanding the Draw Bill of Exchange feature in Dynamics 365.
Understanding the draw Bill of Exchange feature in Dynamics 365
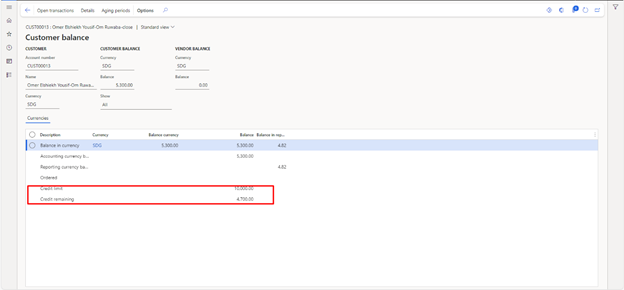
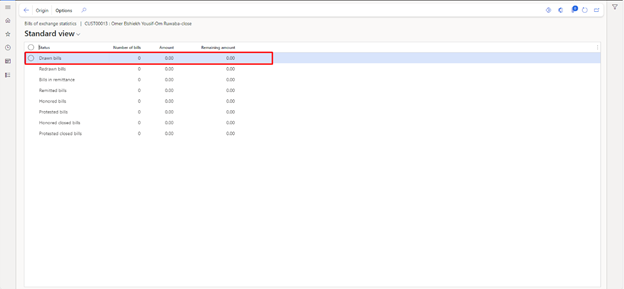
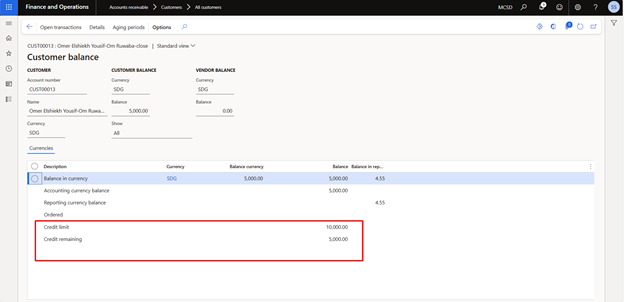
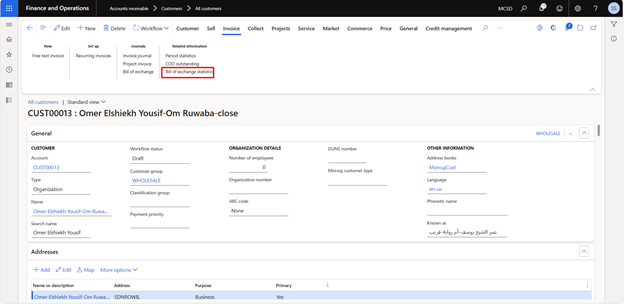
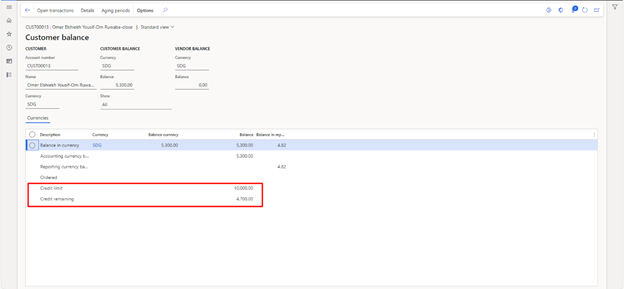
Before drawing the bill of exchange, we will navigate to the customer’s balance to see the credit limit and the credit remaining for the customer.
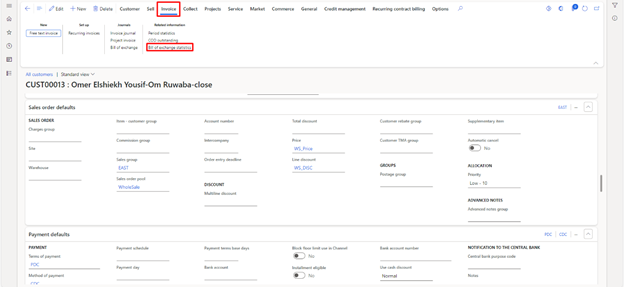
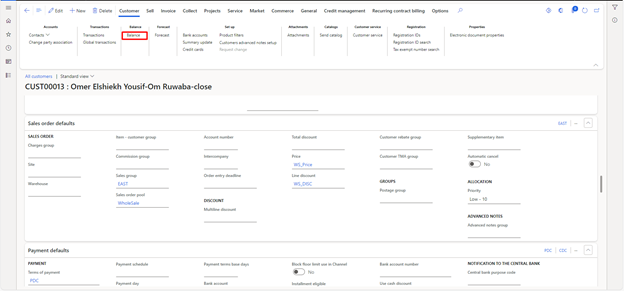
Navigate to Modules > Accounts Receivable > Customers > All Customers.
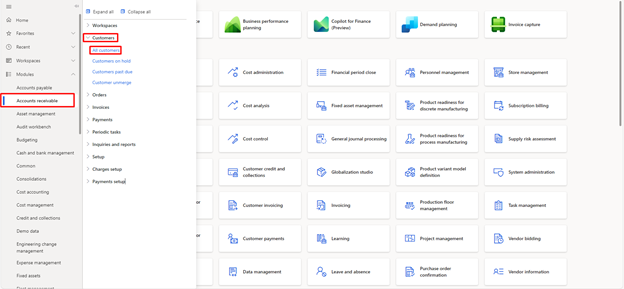
Select the relevant customer and click on Balance.
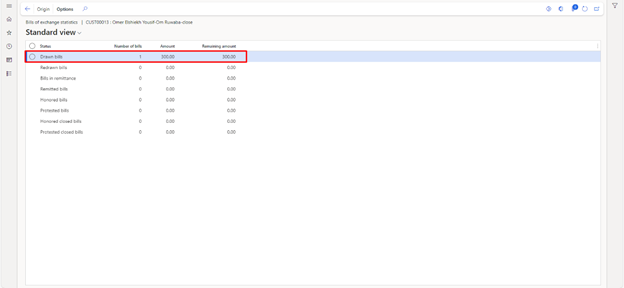
There, the credit limit and credit remaining will be shown.
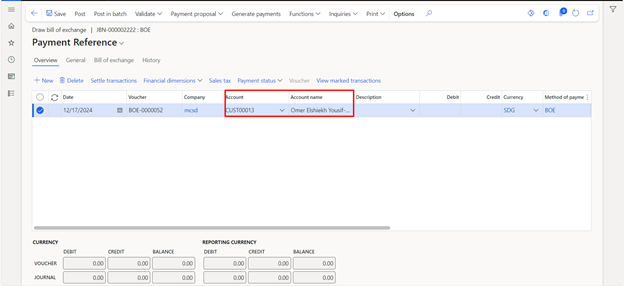
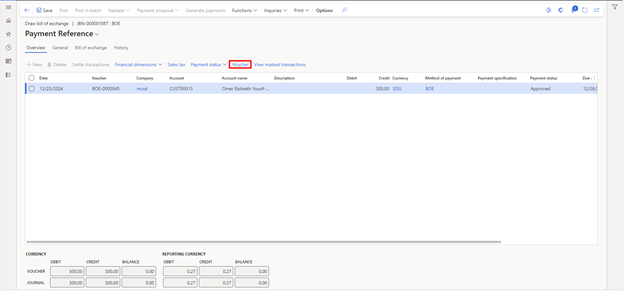
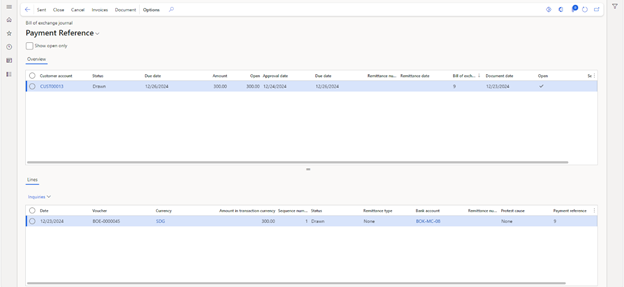
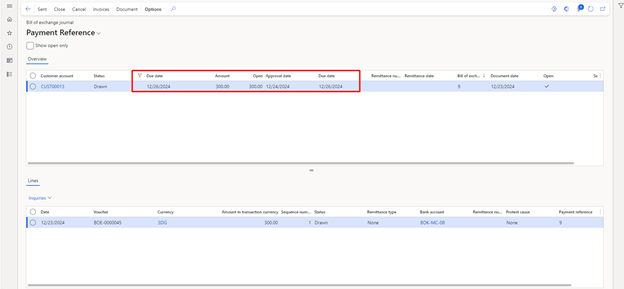
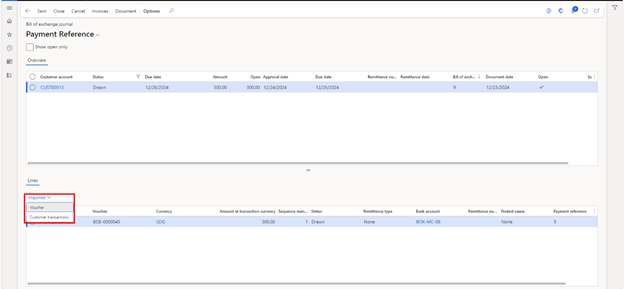
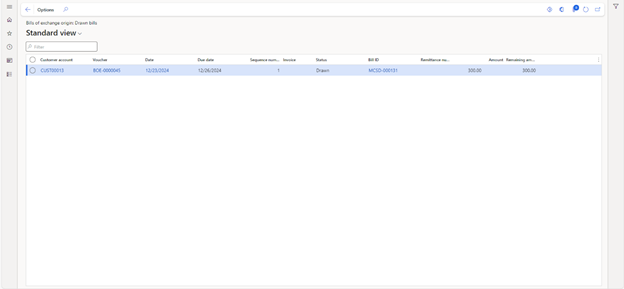
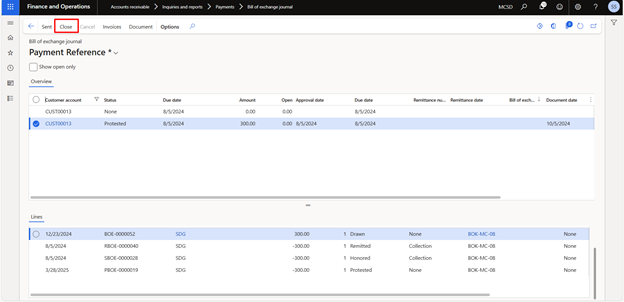
Draw the Bill of Exchange
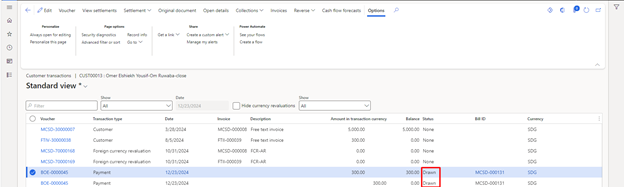
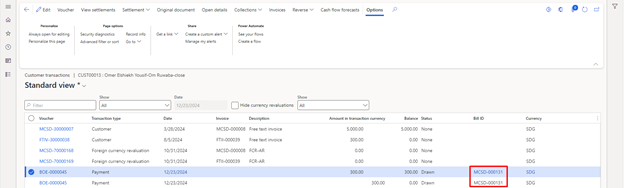
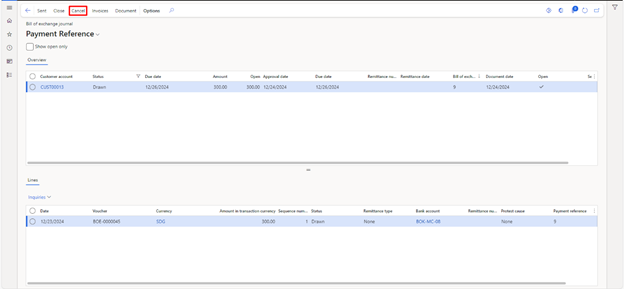
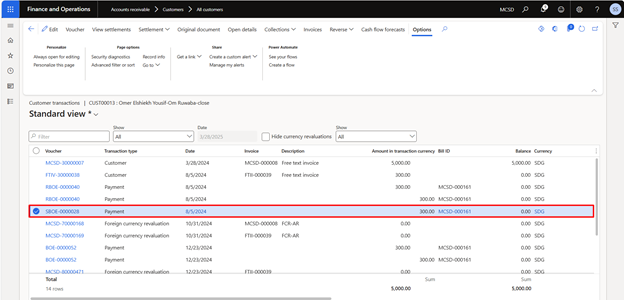
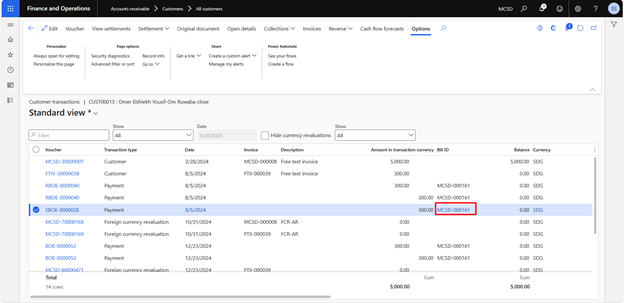
The bill of exchange can only be drawn against the invoices in Dynamics 365 Finance and Operations. If the invoice is not selected, the system will not allow the bill of exchange and throw an error.
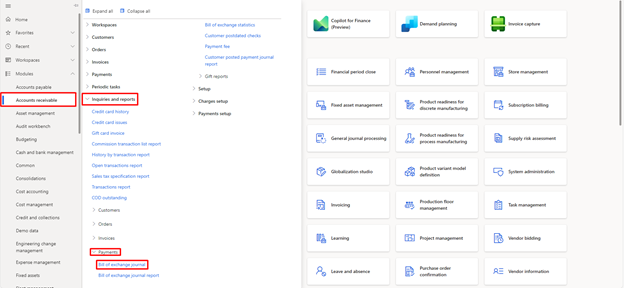
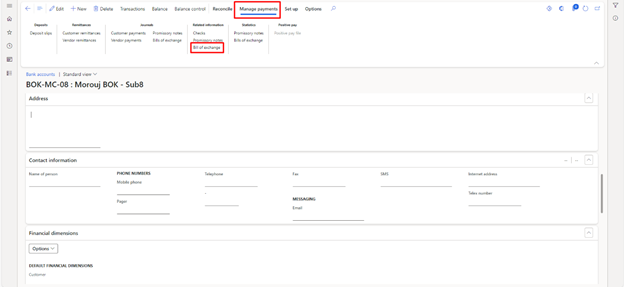
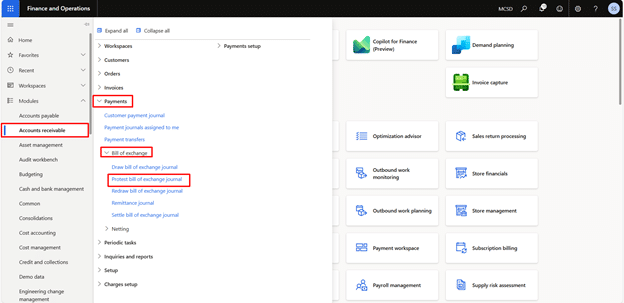
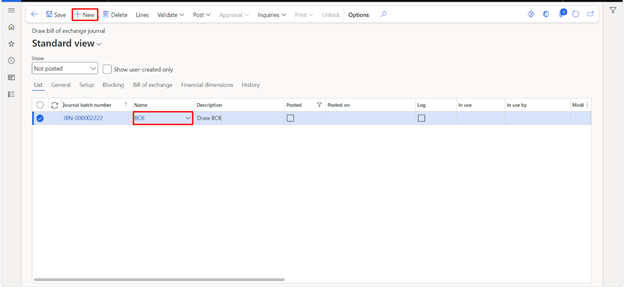
To draw the bill of exchange, navigate to Module > Accounts Receivable > Payments > Bill of Exchange > Draw Bill of Exchange.

Click on New to create a new journal.
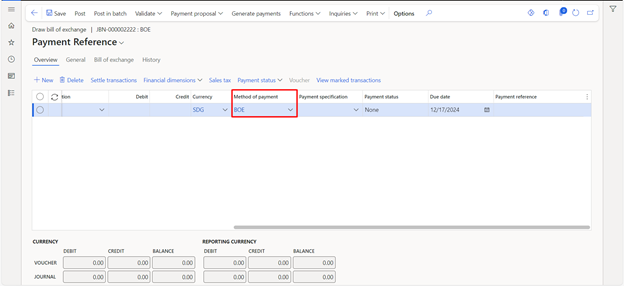
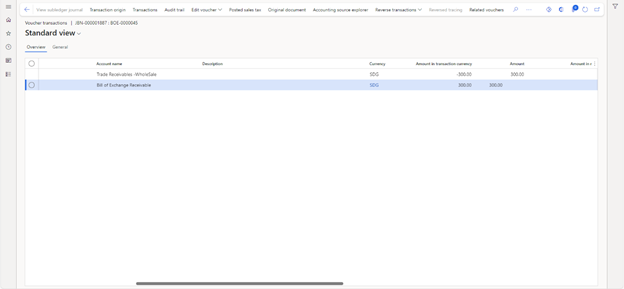
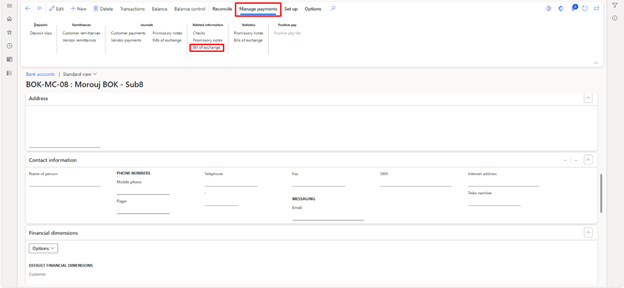
Go to the Bill of Exchange tab and enter the bank account from which the bill of exchange will be drawn.
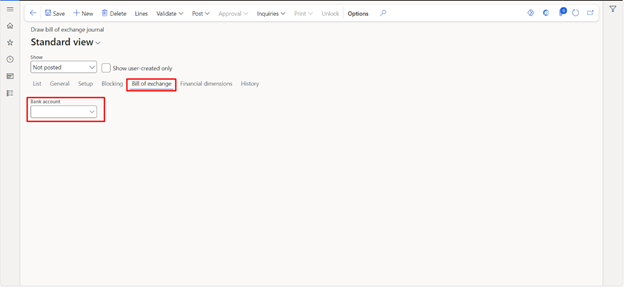
After selecting the bank account, click on the lines to enter the details of the bill of exchange.